
A driveway slope calculator helps you turn a measured height change and distance into a grade you can use for early planning. Before choosing gravel, planning drainage, or deciding whether grading work may help, calculate each part of the driveway separately. The result is an estimate—not a design approval or a substitute for checking site conditions.
Ask about materials or site preparation
What does driveway slope mean?
Driveway slope describes how much the surface rises or falls over a horizontal distance. It is commonly expressed as a percentage. A 5% grade means the driveway changes height by 5 units for every 100 horizontal units. The units can be feet, inches, or meters, as long as the rise and run use the same unit.
For example, a driveway that rises 2 feet over 40 feet has a 5% average grade: 2 ÷ 40 × 100 = 5. The same result comes from a rise of 24 inches over a horizontal run of 480 inches. Grade tells you the average incline for the measured section. It does not describe every dip, hump, or transition along the way.
Percent grade is not the same as degrees. A percent describes vertical change compared with horizontal distance. Degrees describe the angle of the surface. If a project plan or tool asks for one, do not enter the other without converting it. For instance, a 5% grade is a relatively small angle, not a 5-degree angle. Check what the calculator labels each input and output before using the result in a plan.
How do you use a driveway slope calculator?
Use this formula whether you calculate by hand or enter values into a calculator:
Grade (%) = (rise ÷ horizontal run) × 100
- Choose the section. Measure one stretch with a reasonably consistent incline. If the driveway changes direction or steepness, split it into sections.
- Measure the horizontal run. This is the level distance along the ground between the two measurement points, not the longer distance along the sloped surface.
- Measure the vertical rise or fall. Record the height difference between the ends. For a downhill section, use the size of the drop and note its direction separately.
- Use matching units. Convert measurements before dividing. For instance, change inches to feet or feet to inches so both figures use the same unit.
- Divide, then multiply by 100. The result is the average percent grade for that section.
Suppose a 30-foot horizontal stretch drops 18 inches. First convert 18 inches to 1.5 feet. Then calculate 1.5 ÷ 30 × 100. The grade is 5% downhill. If you accidentally divide 18 inches by 30 feet without converting units, the answer is wrong by a factor of 12.
For a quick manual estimate, a line level can help compare the height difference at the endpoints. Make sure the measuring tape is pulled along a horizontal line, not laid on the driveway. For longer sections or uneven ground, take multiple readings rather than assuming one measurement represents the whole surface.
Before entering measurements, write down the units beside each number. A note such as “rise: 14 inches; run: 28 feet” makes the mismatch obvious and prompts you to convert. Check the arithmetic once by estimating whether the answer is plausible: 1 foot over 50 feet is about 2%, while 5 feet over the same run is about 10%. If your calculator result is far outside that rough comparison, recheck the units and decimal placement.
How can you measure the driveway accurately?
A useful calculation depends on the measurements. Start by identifying the part of the driveway you want to evaluate: the entrance, the main drive, the apron near the garage, or a short transition. Mark both endpoints. Keep the distance and height measurements tied to those same points.
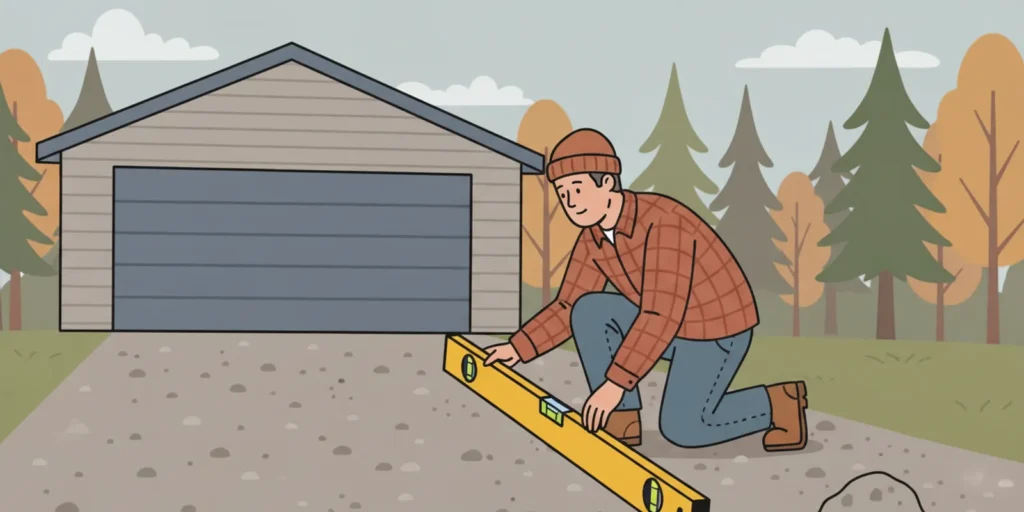
For a relatively short section, you can place a long level on the surface and measure the vertical gap at one end while the level is horizontal. Repeat the setup as needed, keeping the level stable. For a longer distance, use a line level and taut string between measured points. Another option is a laser level, if you have one and know how to use it safely. Take care around vehicles, traffic, and equipment.
Do not measure the sloping surface distance and treat it as horizontal run. The difference may be small on a shallow incline, but it can matter as the slope gets steeper or the section gets longer. If you cannot measure horizontally, use a suitable level or surveying method to establish the horizontal distance.
Reduce avoidable measurement error by keeping the measuring setup consistent. Set endpoints where the surface actually changes, not at arbitrary landmarks several feet away. If using string, keep it taut and check that the line level is centered before reading it. Repeat the height reading; if the two readings differ, check whether the string moved, the level shifted, or the surface has a bump that calls for a shorter section. Avoid measuring from a loose pile of gravel, a rut, or a soft shoulder if those are not the surface elevations you intend to compare.
Record more than just the final percentage. Note where each section begins and ends, whether it rises or falls, and any visible low spots or abrupt transitions. A simple sketch with dimensions makes it easier to explain the site to a contractor or material supplier. For help checking how much aggregate a project may use, see the cubic yardage calculator and the guide to estimating how much gravel you need.
A useful field note can be simple: label the street end and house end, draw arrows for uphill or downhill direction, and mark the width where it changes. Include separate readings for the apron, main run, and garage approach. If the driveway is curved, identify the path or lane you measured instead of assuming the inside and outside edges have identical grades. Photos taken from the same marked points can help explain the sketch, but do not replace measurements.
What does the calculated grade tell you?
The calculator gives you an average geometric grade for the section you measured. It can help compare two areas, describe a driveway to a grading professional, and flag places that deserve a closer look. It cannot decide whether a driveway is safe, comfortable, compliant with local requirements, or capable of carrying a particular vehicle.
| Example rise and horizontal run | Calculated average grade | What the calculation tells you |
|---|---|---|
| 1 ft over 50 ft | 2% | The measured section changes 1 foot in height across 50 horizontal feet. |
| 2 ft over 40 ft | 5% | The measured section changes 2 feet in height across 40 horizontal feet. |
| 3 ft over 30 ft | 10% | The measured section changes 3 feet in height across 30 horizontal feet. |
These are math examples, not recommended driveway grades or pass/fail thresholds. Actual performance depends on the full layout, surface material, drainage, climate, transitions, vehicle use, and applicable requirements. A single average also can hide a short steep segment. If the entrance is fairly flat but the middle rises sharply, measuring both together can make the overall grade seem less severe than the portion that matters most.
Use a steep driveway planning guide for broader ideas about evaluating a challenging driveway. For material characteristics, compare the options in the driveway gravel guide and learn about Class 5 gravel for driveways. A grade calculation alone does not establish which surface will work for a particular property.
Think of the result as a description of measured geometry, rather than a recommendation. Two drives with the same average grade can behave differently if one is a smooth, straight slope and the other has a sharp break near the garage. When comparing areas, keep the method and endpoints consistent. A difference between sections is more useful when you know it is not caused by measuring one run horizontally and another along the surface.
Why should you measure changing grades in sections?
Many driveways are not one continuous ramp. They can include a level apron, a rising or falling middle, and a transition near a garage or road. Measure each part separately when the slope visibly changes. This makes the numbers more useful than one driveway-wide average.
For example, imagine a 60-foot driveway with a nearly level 10-foot entrance, a 35-foot uphill stretch, and a 15-foot section that levels out near the house. Measuring only from the street to the garage tells you the net change over 60 feet. It does not reveal the grade of the 35-foot stretch or the shape of the transitions. Record the individual sections, then calculate each one using its own rise and run.
Also distinguish the driveway’s lengthwise slope from its cross slope. Lengthwise slope runs from one end of the drive to the other. Cross slope runs from one side to the other. Both may matter to how water moves, but they answer different questions and need separate measurements. A lengthwise result cannot tell you whether the driveway sheds water to one side or holds it in a low area.
For a practical section-by-section check, mark a point at each visible break in slope, then measure between neighboring marks. Add intermediate points where the surface changes gradually but noticeably. Calculate the average for every segment and list them in order from road to garage. This sequence makes it easier to see whether a steep portion is concentrated at the entrance, in the middle, or near a building. Do not combine sections just to produce one tidy number; preserve the measurements that represent the actual shape.
How does slope relate to driveway drainage?
Grade is one part of drainage planning. Water movement also depends on where the driveway sits relative to the house, garage, street, and surrounding ground, as well as the surface shape and soil conditions. A calculator cannot show where water will collect or whether it will reach a suitable outlet.
After measuring, look for clues such as standing water, washouts, ruts, sediment at the driveway edge, or water flowing toward a building. Note where runoff enters and leaves the driveway during rain or snowmelt. Do not assume that changing the surface grade alone will solve the problem; adjusting one area may redirect water somewhere else.
Make drainage observations alongside the measurements. After a rain, note whether water crosses the drive, follows a tire track, collects at a transition, or flows toward the garage. Look for recurring patterns rather than drawing conclusions from one small puddle. Mark the low points on your sketch and indicate where water appears to leave the surface. This information helps identify the question to investigate, but designing a drainage route may require a site-specific review.
For gravel surfaces, drainage and the underlying base deserve attention alongside the surface material. See the guide to gravel driveway drainage and this overview of Class 2 versus Class 5 gravel when considering a base. Where the driveway meets a public road, or work may affect a state highway, contact the responsible road authority before changing the connection. The Minnesota Department of Transportation is a starting point for state transportation information; local road authorities may have their own requirements.
Can the result help you plan gravel or grading?
Yes, as one piece of planning information. Measurements can help you describe the site, estimate the areas that need attention, and ask better questions about material delivery. They do not by themselves calculate the amount of gravel required. Material quantity depends on the area to cover and planned depth, while a driveway with uneven sections may need additional site-specific assessment.
Before requesting a delivery estimate, gather the driveway’s approximate length and width, the sections where material is needed, intended depth if known, access details, and whether material needs to be spread. Minnesota Aggregates supplies materials including Class 5 gravel and offers skid steer services; what is suitable depends on the project and site. Review the Class 5 gravel delivery information and skid steer services to consider the relevant options. You can also use the road base versus driveway gravel comparison as part of material research.
It can help to separate the request into zones rather than reporting one total driveway area. For example, note whether you are refreshing the full drive, adding material to a low section, or preparing a widened parking area. Provide each zone’s approximate length, width, and intended depth if known. A slope percentage does not multiply directly into a gravel volume; volume is based on coverage area and depth. The grade notes still matter because they explain site shape, runoff concerns, and where material or equipment may need attention.
For a driveway with sharp transitions, substantial erosion, water near a foundation, or uncertainty about vehicle access, seek an on-site assessment from an appropriately qualified professional. The geometry alone cannot account for soil strength, buried utilities, retaining needs, local rules, or construction methods. The Minnesota Department of Transportation homepage is not a substitute for project-specific guidance; ask the authority with jurisdiction when public access or right-of-way may be involved.
What should you confirm before ordering?
- Which exact sections need material or grading, and what are their dimensions?
- Are measurements in consistent units, and is the run horizontal rather than along the sloped surface?
- Is the calculated percentage an average that could conceal a steeper short section?
- Where does water currently flow, and where should it be directed?
- What material and depth are appropriate for the intended use and existing base?
- Can the delivery vehicle reach and safely access the drop location?
- Does the work involve a road connection, utility, or local permit requirement that should be checked first?
Clear measurements and a few site photos can make a conversation more productive, but a photo does not replace an in-person assessment where the site presents a technical or safety concern. If the scope changes after measuring, update the dimensions before estimating material so the order reflects the area that will actually be covered.
Before finalizing the plan, check access and staging as carefully as the quantity. Identify gates, overhead obstructions, soft shoulders, narrow turns, and places where a truck cannot safely maneuver. Explain whether material should be placed in one pile or several locations, if known. Confirm who will prepare and spread it, and whether the existing surface needs separate attention. These details do not change the slope formula, but they can affect how practical the delivery and site work will be.
Discuss your driveway material and delivery needs
Frequently asked questions
What is the formula for driveway slope?
Divide the vertical rise or fall by the horizontal run, then multiply by 100. For example, a 2-foot rise over a 40-foot horizontal distance equals 5% grade.
Should I measure along the driveway surface?
No. The formula uses horizontal run, not the longer distance measured along the sloping surface. Use a level, line, or suitable measuring method to establish horizontal distance.
Can one measurement describe the whole driveway?
Only as an average between the two endpoints. If the driveway has noticeably different slopes, transitions, or low spots, measure those sections separately so the average does not hide local conditions.
Does a driveway slope calculator tell me if my driveway is safe?
No. It calculates a grade from the numbers you enter. It does not evaluate traction, drainage, vehicle clearance, structural conditions, or local requirements. Ask a qualified professional or the responsible authority when those questions affect the project.
Can the grade tell me how much gravel to order?
No. Grade is not material volume. To estimate volume, you also need the coverage area and planned depth, and you may need to account for existing conditions and project-specific adjustments.
Sources and planning references
For state transportation information and direction to relevant resources, start with the Minnesota Department of Transportation. Check with the authority responsible for the road or property before work that could affect public access or right-of-way.
Use the calculator as an initial planning tool, then confirm the site, drainage, material, and access details before work begins.