
A beautiful outdoor patio begins with a rock-solid foundation that keeps your pavers flat. If you build your stone project on weak ground, Minnesota winter frosts will quickly warp the entire surface. Getting the base right prevents shifting and ensures your investment lasts for years.
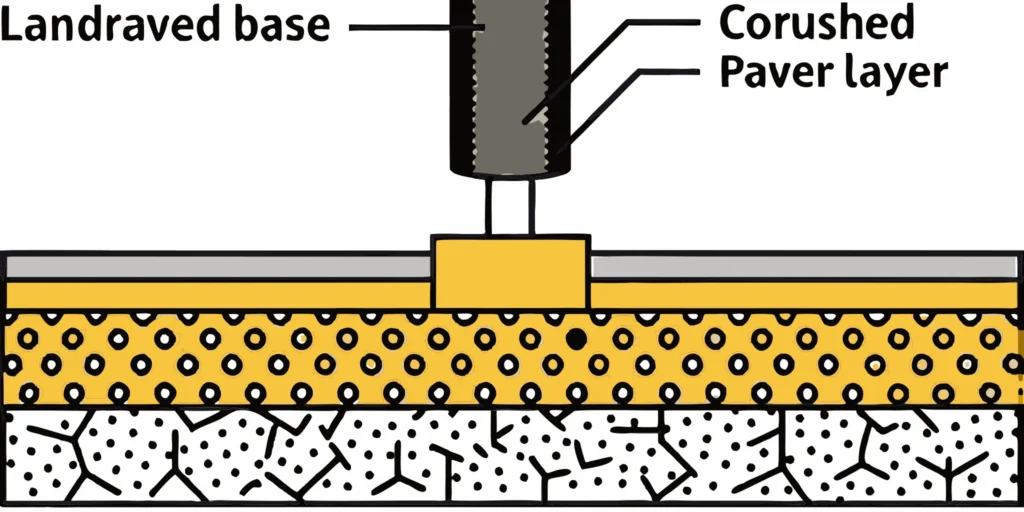
To build a gravel patio base properly, you must excavate the area, lay down geotextile fabric, and compact a structural aggregate layer in stages. According to the Environmental Protection Agency, outdoor stone and paver systems require a crushed stone aggregate bedding layer and base to provide stable structural support and temporary stormwater detention. For most Minnesota homes, a base of four inches of compacted Class 5 gravel topped with one inch of clean leveling sand is the local industry standard. This design provides a self-binding foundation that resists shifting and allows heavy rainwater to drain away safely, which protects your stone patio from sagging or moving over time.
A durable, level patio depends entirely on how deep you dig your foundation. The next phase of your project is to Excavate to the Right Depth for Minnesota Clay Soils. The path begins with clear ground and precise measurements.
Excavate to the Right Depth for Minnesota Clay Soils
You must dig to the correct depth to build a gravel patio base that lasts. In our state, heavy clay soils present a major challenge for outdoor projects. According to the Minnesota Department of Transportation, clay soils require a deeper aggregate base to provide enough structural strength and prevent shifting. If you skip this step, water trapped in the clay will freeze and push your pavers out of place. This freeze-thaw damage is known as frost heave, and it can ruin a flat patio in just one winter.
Check for Underground Utilities and Obstacles
Before you touch a shovel, you must call Gopher State One Call to mark buried utility lines. This is a free service in Minnesota that protects your safety and prevents costly damage. Once the lines are marked, you can plan your layout. If you find thick tree roots in your patio area. You should cut them back carefully so they do not grow under your base and lift the stones later.
Measure Your Dig Depth for the Base Layers
To proper gravel base preparation, you need to dig down at least seven to eight inches. This deep cut makes room for three distinct layers. First, you will lay a solid four-inch to five-inch base of crushed limestone. Next, you will add a one-inch layer of clean leveling sand. Finally, you must account for the height of your pavers, which are usually two to three inches thick. Measuring these layers carefully ensures your finished patio sits flush with your lawn.
Test Your Soil and Set a Drainage Slope
You can test your soil by squeezing a damp handful of dirt. If it forms a tight, sticky ball that does not crumble, you have heavy clay. To handle clay runoff, you must slope the bottom of your excavation. Tilt the dirt bed by one-quarter of an inch per foot away from your house foundation. This gentle slope guides rain and snowmelt away from your home so water does not pool under the stones. You can use stakes and a line level to verify this slope before you start backfilling.
Lay Landscape Fabric and a Geotextile Barrier
When you proper gravel base preparation is your goal, what lies beneath the stone is just as vital as the aggregate itself. Minnesota clay soils present unique challenges for outdoor projects. Heavy clay holds water and expands during freezing weather, which causes soil movement. Placing a high quality weed barrier fabric directly over the excavated dirt creates a protective layer. This step is essential when you build a gravel patio base that must withstand local freeze-thaw cycles.
Woven vs. Non-Woven Geotextile Fabrics
You must choose the right type of fabric for your patio base. Standard thin weed barrier from a local garden center is not strong enough for a paver project. Instead, you need a heavy-duty geotextile fabric. Woven geotextile fabrics are made by weaving plastic strips together, which gives them high tensile strength. This makes them ideal for soil separation and load distribution. Non-woven fabrics are made by bonding fibers together, which allows water to pass through easily. For a patio base on clay soil, a heavy non-woven fabric is often best because it keeps aggregate from sinking while letting water drain away to prevent pooling.
Prevent Aggregate Sinking in Minnesota Clay
Without a geotextile barrier, gravel and clay will mix over time. When heavy rain or winter frost softens the clay soil, the heavy gravel base will slowly sink into the mud below. This process ruins your leveling work and causes dips in your finished stone or paver patio. According to construction guidelines from the Minnesota Department of Transportation, a stable base is critical to prevent soil shifting under outdoor surfaces. Using a tough geotextile fabric keeps your stone base separate from the soft clay subgrade, which ensures the base maintains its full depth and strength.
Overlaps, Edges, and Pinning Tips
Proper installation of the fabric ensures it does its job. Lay the fabric flat across the entire excavated area. When you join two pieces of fabric, you must overlap the seams by at least 6 inches to keep dirt from squeezing through the gaps. Pull the fabric tight and extend it at least 2 to 3 inches up the side walls of your trench. This edge extension keeps dirt from sliding into the gravel base from the sides. Secure the fabric to the ground with metal landscape staples. Drive a staple every 3 feet along the seams and edges using a hammer. This pinning prevents the fabric from shifting or wrinkling when you begin spreading gravel properly over the area.
Build and Compact the Gravel Base Layer
A solid foundation is the most critical part when you proper gravel base preparation for a patio. To ensure your stones or pavers stay level over time, you must build the gravel layer step by step. This keeps the ground from shifting during freeze-thaw cycles and heavy rain.
Understand Your Base Materials
For a strong patio, you need the right type of stone. Professional builders in Minnesota use Class 5 gravel. This material is a specific blend of crushed limestone and fine particles that meets MnDOT Specification 3138. The mix has a maximum stone size of 3/4 inch, and the fine dust fills the gaps between the larger rocks. When compacted, this blend locks together to create a solid, self-binding base that resists water and heavy loads.
The Compaction Process
To prevent future dips in your patio, you must compact the aggregate in thin layers, which are also called lifts. Placing all the gravel at once makes it impossible to compact the bottom portion. According to guidelines from the Minnesota Department of Transportation, you must compact your aggregate base in 4-inch lifts to achieve uniform density and prevent settling. If you skip this step, the stones will shift, and your pavers will become uneven.
Before you begin placing your stone, you should plan your budget. You can calculate how much gravel you need by multiplying your patio area by the desired depth. For a standard paver patio, you should aim for a final base thickness of 4 to 6 inches after full compaction.
Steps to Install and Compact the Base
- Dump the first gravel layer. Pour your Class 5 gravel into the excavated patio area. Spread the material evenly using a sturdy rake until it reaches a depth of about 4 inches.
- Moisten the stone. Spray the gravel lightly with a garden hose. The aggregate should be damp but not muddy, as a small amount of moisture helps the fine dust bind the larger rocks together.
- Run the plate compactor. Use a gas-powered plate compactor or a heavy hand tamper to pack the first lift. Start at the outer edges of the patio and move inward, making at least three complete passes over the entire surface.
- Check the level and slope. Place a long 2×4 board and a bubble level across the compacted layer. Make sure the base maintains a slight slope of 1 inch for every 8 feet of length to direct water away from your home.
- Add the second lift. Dump and spread another 4-inch layer of Class 5 gravel over the first compacted layer. Repeat the dampening and compaction steps until the stones are packed tight.
- Verify final thickness. Measure the depth of the base layer at several spots. The final base must be between 4 and 6 inches thick after compaction to provide strong structural support.
- Inspect for flat areas. Look for any low spots or loose pockets of gravel. Add a small amount of stone to any dips, moisten the area, and run the plate compactor over them one last time.
Add the Sand Bedding Layer for Level Paving
Once you finish compacting your gravel base, you are ready to prepare the sand bedding layer. This layer acts as a smooth cushion that holds your pavers in place and helps you achieve a perfectly level surface. According to EPA stormwater guidelines, a clean aggregate bedding layer is vital for structural support and water drainage. To get the best results, you must use the correct type of sand and spread it to a precise thickness.
Choose Concrete Sand Over Other Types
Selecting the right material is the first step to a stable patio. You must use washed concrete sand rather than fine play sand or masonry sand. Concrete sand has coarse, jagged particles that lock together when pressed. This interlocking strength prevents the sand from shifting or washing away under heavy rain. It also provides the best sand for paver base applications because it allows water to drain quickly. Fine, rounded sands like play sand hold moisture and wash out easily, which leads to loose, uneven pavers over time.
Set the Screed Pipes and Depth
A level patio requires a uniform sand depth. To achieve this, use one-inch outer-diameter steel or PVC pipes as guide rails. Lay two pipes parallel to each other across your compacted gravel base. The pipes should sit about six to eight feet apart. Next, pour your washed concrete sand between the pipes. You want a final sand thickness of exactly one inch to one and a half inches. Keep the sand slightly damp to help it hold its shape, but do not let it get wet or muddy. If the sand is too dry, it will slide around as you work.
Screed the Sand Level
With your guide pipes in place, you can now screed the sand. Take a straight board, such as a clean two-by-four, and place it across the top of the two pipes. Pull the board toward you in a smooth, sawing motion. As you slide the board, it will push excess sand forward and leave behind a perfectly flat bed. If you notice any low spots or hollow dips behind the board, stop and toss a handful of sand into the low area. Run the board over that spot again to smooth it out. Once a section is flat, carefully lift the pipes and fill the remaining tracks with a small trowel of sand.
Keep the Sand Bed Loose
One common mistake is compacting the sand layer before laying your stone. Do not roll or tamp this sand. The sand bed must remain loose and uncompacted. You will place your pavers directly onto this smooth, soft bed. Once all your stones are set, you will run a plate compactor over the top of the pavers. This action vibrates the stones down into the loose sand. It also forces the sand up into the joints, locking the entire patio together into a single flat surface.
Install Edge Restraints and Plan for Drainage
You cannot build a gravel patio base without thinking about water and movement. In Minnesota, wet soils and cold winters can quickly ruin your hard work if you skip these steps. Setting up strong borders and managing water flow are key to making your new patio last.
Prevent Shifting with Solid Edge Restraints
If you do not lock your patio stones in place, they will spread outward over time. Heavy foot traffic and rain push the outer blocks into the soft lawn. Edge restraints form a strong barrier that holds both your sand bedding and your pavers together. You can choose heavy vinyl strips, spiked metal edgings, or a poured concrete border.
Make sure to secure your edge restraints directly into the gravel layer using long steel spikes. Pushing spikes into the gravel base makes the border much stronger than pinning it into loose dirt. The restraints must sit slightly below the top surface of the pavers so they stay hidden while keeping the stones tight.
Manage Water in Heavy Clay Soils
Many lawns in the Twin Cities area sit on dense clay soils that hold onto water. When water gets trapped under your patio, it can freeze and expand. This action causes frost heave, which creates uneven stones and dangerous trip spots. A clean gravel base helps by letting water pass through instead of pooling under the pavers. According to guidelines from the U.S. Environmental Protection Agency (EPA), a crushed stone base provides crucial structural support while acting as a temporary storage area for stormwater runoff.
To keep the base dry, you must slope the patio surface away from your house foundation. A safe slope is about one inch of drop for every eight feet of width. If your patio sits in a low spot where water naturally pools, you will need to add more drainage. You can run a perforated drain pipe along the low edge of the patio base or set up a small French drain to carry wet runoff to a safer area of your yard.
Keep the Base Dry to Stop Frost Heave
Keeping water away from the base is your best defense against the harsh freeze-thaw cycles of Minnesota. You must shape and compact the sub-base dirt so that water flows toward your drainage lines. When you lay a thick, well-drained aggregate base, you create a buffer that keeps soil moisture from rising into the stone bedding. To keep your project on schedule, make sure to read our guide on proper gravel base preparation before you begin your excavation.
Class 5 Gravel vs Other Base Materials: Which One Works Best
When you want to build a gravel patio base, selecting the right material is the first key step. The base layer must provide deep structural support while managing water runoff. In Minnesota, your choice of stone determines whether your outdoor space stays level or shifts during winter freezes.
The Performance of Class 5 Gravel
Class 5 gravel is the standard choice for paver patios and walkways. This material is a specific blend of crushed limestone and fine particles that meets strict MnDOT Specification 3138 standards. When compacted, the small limestone pieces lock together while the tiny particles fill the empty spaces. This self-binding action creates a dense, solid layer that resists shifting, making it an excellent choice when you choose the right gravel size for your project. A single cubic yard of Class 5 gravel weighs about 1.4 tons, proving its high density and strength.
How Other Base Materials Compare
Other materials are available but they have clear drawbacks. Clean crushed stone (three-quarter inch) allows excellent water drainage but it does not pack down tightly because it lacks fine particles. Pea gravel has round, smooth edges that roll under weight, which makes your pavers unstable. Limestone screenings pack down well, but they hold too much moisture and can crack when the ground freezes. Recycled concrete is cheap, but its quality varies and it may break down over time in wet soils.
| Base Material | Compaction Level | Water Drainage | Load Support | MN Climate Use |
|---|---|---|---|---|
| Class 5 Crushed Gravel | Excellent (self-binds) | Moderate | High (road spec) | Excellent (resists frost) |
| 3/4-Inch Clean Stone | Poor (loose stone) | Excellent | Moderate | Good |
| Pea Gravel | None (rolls) | Excellent | Low | Poor |
| Limestone Screenings | Good | Poor (holds water) | Moderate | Poor (heaves) |
| Recycled Concrete | Moderate | Moderate | Moderate | Moderate |
Why Class 5 Gravel Wins in Minnesota
Class 5 gravel is the best option for Minnesota soils. Local clay holds moisture, which causes the ground to rise and fall during winter. Because Class 5 gravel packs so tightly, it keeps water from pooling underneath your stones. This strong barrier resists frost heave and protects your patio from structural cracks. Choosing this road-base material ensures your patio remains stable and flat for years.
Frequently Asked Questions
How deep should a gravel base be for a patio?
In Minnesota, the gravel base depth depends on your soil type. For standard soils, a base of four inches is common. However, heavy clay soils require a deeper base of six inches to prevent frost heaving, according to guidelines from the Minnesota Department of Transportation. This extra depth provides structural support and helps manage water drainage under the patio.
What kind of gravel do you use for a patio base?
The best material to build a gravel patio base is Class 5 gravel. This is a crushed limestone aggregate that meets Minnesota Department of Transportation specifications. It contains stone sizes up to 3/4-inch mixed with fine particles. This blend allows the material to bind together tightly under compaction, creating a solid foundation that will not shift or settle over time.
How do you prepare the ground to build a gravel patio base?
To start, excavate the patio area to the required depth and slope the subgrade slightly away from your home. Run a plate compactor over the bare soil to make it firm. According to the EPA, permeable systems require this stable, clean subgrade layer to provide proper structural support and stormwater detention. Lay down a heavy-duty geotextile fabric before adding your aggregate.
Why must you compact the gravel base in layers?
You must compact your gravel base in thin layers, or lifts, that are no more than four inches thick. Attempting to compact six inches of gravel at once leaves the bottom layer loose. Compacting in smaller lifts is standard construction practice to achieve uniform density, as noted by the Minnesota Department of Transportation. This careful process prevents future settling, dips, and shifting pavers.
Ready to build a gravel patio base for your project?
Delaying your prep work can cause your excavated area to wash out in the next heavy rain. If you start building your foundation now, you can get the Class 5 limestone and sand compacted before wet weather ruins your hard work. Getting your patio base completed this week ensures your pavers stay stable and level through the cold Minnesota winter. We deliver exactly what you need directly to your home or construction site on time.
No project is too small, and we serve both residential DIY builders and commercial teams. Ready to take the next step? Call Minnesota Aggregates at 612-772-3677 to get a free quote on Class 5 gravel and sand delivery for your patio project today.