
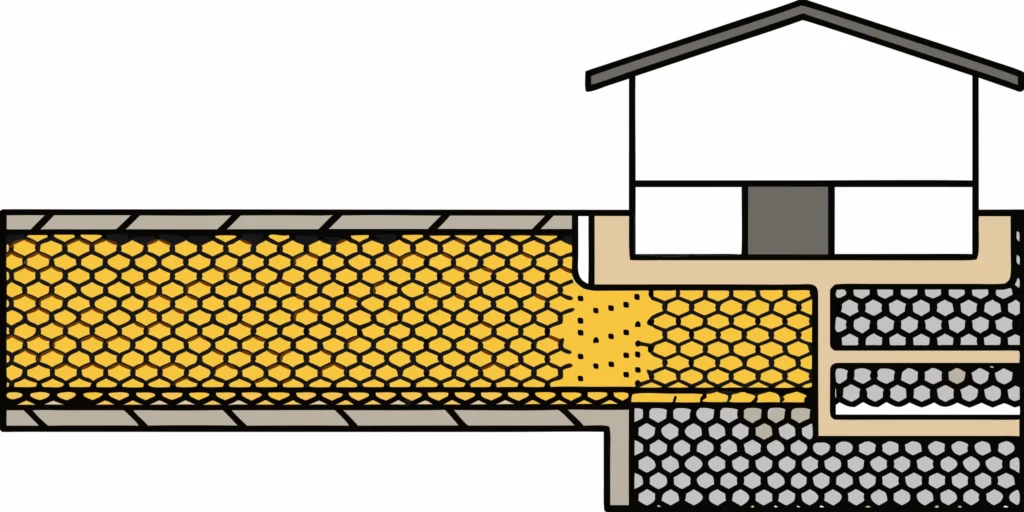
When heavy rain or snowmelt hits, traditional asphalt and concrete driveways send water rushing into storm drains, carrying pollutants with it. This runoff can contribute to local flooding and erosion. There is a more environmentally friendly way to manage water on your property. A rock and grass driveway is designed to be permeable, allowing rainwater to soak directly into the ground beneath it. This natural filtration process helps replenish groundwater and reduces the strain on public drainage systems. It’s a practical choice for Minnesota homeowners who want a beautiful driveway that works in harmony with the environment, not against it.
Key Takeaways
- Get the Best of Both Worlds: This driveway style uses a structural grid filled with gravel and soil, giving you a durable surface that can handle traffic while providing the natural look and excellent drainage of a permeable lawn.
- A Solid Foundation Is Everything: For a driveway that lasts, you must start with proper site preparation. This means fully excavating the area and building a compacted base with a material like Class 5 gravel to prevent future sinking, shifting, and frost heave.
- Keep It Looking Great with Easy Upkeep: Maintaining your driveway is straightforward and protects your investment. Regular lawn care, periodically raking the gravel to keep it level, and clearing away leaves or weeds will preserve its function and appearance for years.
What Is a Rock and Grass Driveway?
If you love the look of a lush, green lawn but need the function of a durable driveway, a rock and grass driveway might be the perfect solution. Instead of a solid slab of concrete or asphalt, this style combines the strength of stone with the natural beauty of grass. It’s a creative and practical way to handle vehicle traffic without sacrificing your home’s curb appeal. So, how does it work? The secret lies in a hidden support system.
These driveways use special plastic grids, often called grass pavers, that are laid down first. This grid creates a strong, stable structure that can handle the weight of a car. Once the grid is in place, it’s filled with soil and grass seed, or sometimes a combination of gravel and grass. The grid protects the soil and grass roots from being compacted, allowing you to drive on a green surface that stays healthy and intact. It’s a smart design that gives you the best of both worlds: a functional parking area that blends seamlessly into your landscape.
The Essential Materials
To build a rock and grass driveway that lasts, you need a few key components working together. The foundation of the entire system is a sturdy base layer, typically made from a compactable material like Class 5 gravel. This base provides stability and ensures proper drainage. On top of the base sits the grid system. These are strong, interlocking plastic pavers designed to distribute weight and prevent ruts. Some grid systems are specifically made to hold gravel in place while allowing water to pass through. Finally, you have the fill materials: a nutrient-rich black dirt or topsoil for planting grass, and your choice of decorative gravel or stone for the driving strips.
How It All Works Together
The magic of a rock and grass driveway is in its layered construction. The gravel base creates a solid, level foundation that prevents the ground from shifting. The plastic grid system locks into place on top of this base, forming a honeycomb-like structure that evenly distributes the weight of your vehicles. This prevents the tires from sinking into the soil and crushing the delicate grass roots. As a result, you can plant grass that will grow healthy and strong right in your driveway. This design also allows rainwater to soak directly into the ground, reducing runoff and preventing puddles from forming on the surface.
Popular Design Ideas
One of the best parts of a rock and grass driveway is the design flexibility. The most popular style is the “ribbon” driveway, which features two parallel strips of gravel for your car’s tires, with a wide ribbon of green grass running down the middle and along the sides. This creates a classic, natural look that complements almost any home. Another idea is a checkerboard pattern, where you alternate between squares filled with grass and squares filled with flat stones or gravel. For a more subtle approach, you can use a full grid system and plant grass across the entire driveway, creating a surface that looks almost like a normal lawn but is strong enough to park on.
The Benefits of a Rock and Grass Driveway
If you’re looking for a driveway that’s as beautiful as it is functional, a rock and grass combination might be the perfect fit. This style offers a unique blend of natural aesthetics and modern engineering, giving you a durable surface that works with the environment instead of against it. Beyond its good looks, this type of driveway comes with some impressive practical advantages, especially for Minnesota homeowners who deal with everything from heavy downpours to summer heat. It’s a smart solution that can add serious curb appeal to your property while being kind to your wallet and the planet.
Eco-Friendly and Great for Drainage
One of the biggest advantages of a rock and grass driveway is its permeability. Unlike solid asphalt or concrete, which creates runoff that can overwhelm storm drains, this system allows rainwater and snowmelt to soak directly into the ground. The grid structure provides support for vehicles while the open cells, filled with gravel or soil, let water pass through. This natural filtration process helps replenish groundwater, reduces the amount of pollutants entering our local waterways, and prevents soil erosion around your property. It’s an eco-conscious choice that effectively manages water right where it falls.
A Beautiful, Natural Look
A rock and grass driveway offers a softer, more organic look that blends seamlessly with your home’s landscaping. Instead of a harsh slab of pavement, you get a beautiful, green surface that enhances your property’s natural charm. The design is also incredibly versatile. You can create patterns with different types of stone or let the grass create a lush, green carpet that’s still strong enough to drive on. This approach allows you to integrate your driveway into your overall landscape design, making it a feature to be admired rather than just a functional necessity.
Durable and Budget-Friendly
Don’t let the grass fool you; these driveways are built to last. The underlying plastic or concrete grid system distributes the weight of vehicles, preventing the ruts and mud that can plague traditional gravel driveways. When installed correctly with a solid base of Class 5 gravel, a rock and grass driveway can easily handle daily traffic for decades. It’s also often a more affordable option compared to asphalt or concrete, both in terms of initial installation and long-term maintenance. You get a high-end look and impressive durability without the high-end price tag.
Cooler Surfaces and Less Erosion
On a hot summer day, asphalt can become incredibly hot, radiating heat and making the area around it uncomfortable. A rock and grass driveway stays much cooler, as the vegetation and porous surface don’t absorb and retain heat in the same way. This can help create a more pleasant microclimate around your home. The grid system also stabilizes the ground, preventing the soil erosion that can occur with heavy rain. By locking the soil and gravel in place, the structure ensures your driveway remains stable and your surrounding landscape stays put, even during Minnesota’s most intense storms.
How to Install Your Rock and Grass Driveway
Ready to get your hands dirty? Building a rock and grass driveway is a rewarding project that you can tackle over a weekend or two. The process involves creating a stable foundation, laying a grid system, and filling it with your chosen materials. Following these steps will help you create a beautiful, functional driveway that lasts for years. Let’s walk through the process together, one step at a time.
Step 1: Prepare and Excavate the Site
First things first, you need to prepare your canvas. Start by marking the exact dimensions of your new driveway with stakes and string. Before you dig, always call 811 to have underground utility lines located. Proper drainage is essential, so plan for a gentle 2% slope away from your home or other structures. Once your layout is set, it’s time to excavate. You’ll need to dig down about 4 to 8 inches. A shallower depth works for light passenger cars, while a deeper base is necessary for heavier vehicles or frequent traffic. If digging by hand sounds like too much work, our professional skid steer services can make quick and easy work of the excavation process.
Step 2: Build a Solid Stone Base
A strong driveway starts with a solid foundation. The key to a long-lasting base is using multiple layers of stone. After excavating, your first layer should be a larger, coarse aggregate that allows for excellent drainage. On top of that, add a layer of smaller aggregate, like a high-quality Class 5 gravel, which contains a mix of rock and sand that compacts tightly. For each layer you add, you must compact it thoroughly with a plate compactor. This step is critical for preventing sinking and shifting later on. Not sure how much material you’ll need? Our handy cubic yardage calculator can help you estimate the right amount for your project.
Step 3: Install the Grid System
With your compacted base ready, it’s time to install the plastic grid system. These grids are the secret to keeping your gravel and grass neatly in place, preventing ruts and erosion. Most permeable paver grids are made from recycled plastic and are designed to snap together easily, covering the entire surface of your driveway. Simply lay the panels directly on top of your prepared stone base and connect them according to the manufacturer’s instructions. The open-cell structure of the grids provides strength while allowing water to pass through freely into the ground below, which is great for managing stormwater runoff.
Step 4: Choose Your Gravel and Grass
Now for the fun part: choosing the materials that will give your driveway its signature look. You can fill the grids entirely with gravel, entirely with grass, or create a custom pattern with both. For the gravel portions, select a small, angular stone that will lock securely into the grid cells. For the grass sections, you’ll need a nutrient-rich soil mixture. We recommend using a high-quality topsoil or a garden mix. Our screened black dirt delivery provides an excellent, fertile base for growing healthy grass. When selecting grass seed, choose a hardy, drought-tolerant variety that can withstand traffic and thrive in Minnesota’s climate.
Step 5: Fill the Grids and Plant the Grass
The final step is to fill the grid cells and bring your design to life. Carefully fill the designated cells with your chosen gravel, making sure it’s level with the top of the grid. For the grass cells, fill them with a quality soil mix, like our screened black dirt, leaving a little space at the top. Spread your grass seed evenly over the soil, gently rake it in, and water it well. It’s a good idea to let the grass establish for a few weeks before you start parking on it regularly. Once the grass has taken root, your beautiful and durable rock and grass driveway is ready to use.
How to Maintain Your Rock and Grass Driveway
A rock and grass driveway is a stunning feature, but like any part of your landscape, it requires some simple, consistent care to look its best. With a little attention, you can keep your driveway healthy, functional, and beautiful for years to come. Proper maintenance prevents the gravel from scattering, keeps the grass lush, and ensures water drains correctly, protecting your investment through every Minnesota season. The key is to stay on top of a few small tasks, which will save you from larger repairs down the road. By focusing on the grass, gravel, weeds, and drainage, you can easily preserve the unique charm of your driveway.
This isn’t about spending every weekend on upkeep; it’s about smart, seasonal habits that make a big difference. A well-maintained driveway not only looks great but also performs better, handling traffic and weather with ease. Think of it as a garden that you can park on. The living elements need a bit of nurturing, and the hardscape needs occasional tidying. We’ll walk through the four main areas of maintenance so you feel confident taking care of your beautiful and practical driveway. From mowing the grass strips to regrading the stone, these steps are straightforward and ensure your driveway remains a durable and attractive part of your property.
Caring for the Grass
The green stripes in your driveway do more than just look pretty; they also help manage surface runoff. To keep the grass healthy, mow it along with the rest of your lawn, but try to keep the blades a little higher to encourage strong roots. Water the grass during dry spells, especially in its first year as it gets established. Healthy grass starts with quality soil, so using a rich black dirt during installation gives it the best possible foundation. A little care will ensure the living part of your driveway thrives, adding to its natural appeal and environmental benefits.
Keeping the Gravel in Place
Over time, car tires and Minnesota weather can cause gravel to shift, creating ruts or low spots. To maintain a smooth, even surface, you should periodically rake the stones back into place. This simple task redistributes the gravel and keeps the driveway looking tidy. Every few years, you may need to add a fresh layer of material to restore its function and appearance. Topping it off with new Class 5 gravel is an easy fix. For more significant regrading, our professional skid steer services can quickly and efficiently level your driveway.
Weed Control and Seasonal Upkeep
Weeds can be persistent, but you can keep them under control with routine upkeep. Regularly raking your driveway not only levels the gravel but also disturbs any weed seedlings before they can take root. If you spot a few weeds popping through, it’s best to pull them by hand before they spread. In the fall, make sure to clear away fallen leaves. If left to decompose, leaves can create a layer of organic matter that becomes a perfect seedbed for weeds. A quick rake-through is often all it takes to keep your driveway clean and weed-free.
Checking Drainage and Making Repairs
Proper drainage is critical for the longevity of your driveway, as it prevents erosion and damage from pooling water. After a heavy rain, walk your driveway and look for any areas where water is collecting. These low spots should be filled to maintain a slight, even slope that directs water away from the surface. You can easily make these repairs by adding more gravel or a durable fill like asphalt millings to the sunken areas and raking them smooth. Regularly checking your drainage helps prevent washouts and protects the driveway’s structural base, especially during freeze-thaw cycles.
Common Installation Challenges to Avoid
A rock and grass driveway is a rewarding project, but a successful installation means paying close attention to the details. A few common missteps can turn your beautiful, green driveway into a lumpy, muddy problem. Getting the installation right from the very beginning is the key to creating a surface that looks great and performs well for years. The biggest hurdles usually involve improper site preparation, failing to account for our Minnesota weather, poor drainage, and underestimating the weight of vehicles. By understanding these potential issues ahead of time, you can plan your project to avoid them completely, saving you from costly and frustrating repairs down the line. Let’s walk through the most common challenges and how you can tackle them like a pro.
Avoiding Common Mistakes
The most frequent mistake we see is people trying to take a shortcut by pouring gravel directly onto their existing lawn. This simply doesn’t work. The gravel will shift underfoot, mix with the soil and grass, and create an unstable, messy surface that’s impossible to maintain. For a durable driveway, you have to start with a clean slate. This means you must excavate the area, removing all the grass, weeds, and topsoil. Creating this clear, solid ground is the only way to build a stable foundation for your driveway. For larger projects, using the right equipment for excavation can make all the difference, and our skid steer services can handle the heavy lifting for you.
Planning for Minnesota’s Climate
Here in Minnesota, we have to build things to last through our dramatic seasons. The freeze-thaw cycle is tough on any paved surface, and a rock and grass driveway is no exception. If your base isn’t deep and compacted enough, moisture in the ground will freeze, expand, and cause the driveway to heave and become uneven. To prevent this, you need a solid sub-base made from a material like Class 5 gravel. This layer provides a stable foundation that resists shifting during temperature swings. It’s also important to remove all grass and organic material from the site before you build, as these materials will decompose and create weak spots under your driveway.
Getting the Drainage and Grading Right
Water is the number one enemy of a stable driveway. If water pools on the surface, it can lead to erosion, soft spots, and dangerous ice patches in the winter. The solution is proper grading. Your driveway should have a slight slope, or “crown,” that directs water to run off the sides. This prevents it from sitting on the surface and seeping into the base. A well-built driveway uses multiple layers of stone that are compacted to create a solid, yet permeable, foundation. This structure provides support while also allowing water to drain through effectively. Using a durable material like recycled asphalt millings for your base can add strength and stability.
Managing Weight and Traffic
A rock and grass driveway needs to be strong enough to support the weight of vehicles without developing ruts. This strength comes from the plastic grid system you install. These grids are the structural backbone of the driveway, distributing the weight of your car across a wider area to protect the grass roots and prevent the gravel from compacting into the soil. It’s important to choose a grid system that is rated for the type of traffic you expect. The combination of a deeply compacted base, a sturdy grid, and the right amount of gravel infill creates a surface that can handle daily use. You can use our cubic yardage calculator to figure out exactly how much material you’ll need.
How Much Does a Rock and Grass Driveway Cost?
One of the most appealing aspects of a rock and grass driveway is its cost-effectiveness compared to solid paving. While the final price tag depends on your driveway’s size, the specific materials you choose, and whether you do the work yourself, it’s generally a more budget-friendly option. You get a beautiful, functional driveway without the high cost of traditional concrete or asphalt. Let’s break down the expenses so you can plan your project with confidence.
Breaking Down the Initial Costs
The initial cost of your rock and grass driveway involves a few key components: the plastic grid system, the base material, the fill material, and the grass seed. The grid itself is often the most significant single expense. After that, you’ll need a solid foundation, typically made from a material like Class 5 gravel, to provide stability. Finally, you’ll fill the grid cells with a mix of topsoil or sand and your chosen gravel, then add grass seed. While it requires several different materials, the total cost is often a fraction of what you’d pay for a solid paved surface.
Cost vs. Traditional Driveways
When you compare a rock and grass driveway to traditional options, the savings become clear. For homes with long driveways, which are common in many parts of Minnesota, gravel-based systems are often the most practical choice. Paving a long driveway with asphalt can be incredibly expensive, sometimes running into tens of thousands of dollars. A gravel or rock and grass system can achieve a similar result for a much smaller investment, often costing between $2,000 and $5,000 for the same length. This makes it an accessible and attractive option for many homeowners and contractors.
Factoring in Long-Term Maintenance
A well-built rock and grass driveway is surprisingly durable and can last for many years with proper care. Your long-term maintenance costs will be minimal. The main tasks involve standard lawn care, like mowing and watering the grass sections. You may also need to occasionally top up the gravel in the grid cells and ensure weeds don’t take hold. Because the grid system holds the gravel in place, you won’t have the constant need for regrading that you find with a loose gravel driveway. This simple upkeep helps your driveway look great and function properly for a long time.
Sourcing and Delivering Your Materials
Getting your materials to the project site is a key part of the budget. The cost of delivery can vary, but it’s a necessary expense for heavy materials like gravel and sand. To keep your project on schedule, it’s important to work with a reliable supplier who can provide timely delivery of high-quality aggregates. Before you order, you can use a cubic yardage calculator to figure out exactly how much material you need. This simple step prevents you from overspending or running short halfway through the installation.
Related Articles
- How to Spread Gravel on a Driveway the Right Way – Minnesota Aggregates
- What is the Best Gravel for a Driveway? 5 Types Compared – Minnesota Aggregates
- 6 Best Types of Gravel for Driveways Compared – Minnesota Aggregates
- Your Guide to the Best Equipment for Spreading Gravel – Minnesota Aggregates
Frequently Asked Questions
How long do I have to wait before I can park on my new driveway? Patience is your best friend right after installation. You should give the grass seed at least three to four weeks to germinate and establish strong roots before you start parking on it regularly. This waiting period allows the root system to intertwine with the soil and the grid, creating the durable, living surface you want. Rushing this step can damage the young grass and compact the soil, so it’s worth the wait to ensure a healthy, long-lasting result.
Is a rock and grass driveway a good choice for Minnesota winters? Yes, it can be an excellent choice, provided the installation is done correctly. The key is building a deep, properly compacted base with a material like Class 5 gravel. This foundation is what prevents the ground from heaving and shifting during our intense freeze-thaw cycles. The permeable nature of the driveway also helps manage melting snow, allowing water to drain directly into the ground instead of creating icy patches on the surface.
What kind of maintenance is really required to keep it looking good? The upkeep is surprisingly straightforward and is similar to caring for your lawn. You’ll need to mow the grass sections, water them during dry spells, and pull the occasional weed. For the gravel parts, a quick rake-through a few times a year will keep the stones level and prevent any low spots from forming. It’s far less work than constantly regrading a traditional loose gravel driveway and much simpler than patching cracks in asphalt.
Can I install this type of driveway on a sloped or hilly property? You can, but it requires very careful planning. On a slope, managing water runoff is critical to prevent erosion and washouts. The installation will need a robust base and potentially some extra features, like terracing or strategically placed drains, to control water flow. For anything more than a gentle slope, we highly recommend consulting with a professional to ensure the site is prepared correctly for a stable, long-lasting installation.
Will the plastic grid system actually hold the weight of a heavy truck? Absolutely. The plastic grids used for these driveways are engineered to be incredibly strong and are designed to handle the weight of heavy vehicles, including work trucks and RVs. The grid’s honeycomb structure works by distributing the vehicle’s weight across a wide area. This prevents the tires from sinking in and creating ruts. When paired with a solid, compacted stone base, the system creates a remarkably strong surface that is built to last.