
We’ve all seen it: the gravel driveway with deep ruts, the paver patio that’s become uneven, or the walkway where weeds are taking over. These common problems almost always trace back to one thing: a poorly installed base. A strong foundation is non-negotiable, and crush and run gravel is an excellent choice for the job, but only if it’s installed correctly. This guide is designed to help you avoid those future headaches by teaching you how to spread crush and run gravel like a pro. We’ll cover the critical steps that many people miss, from proper site excavation and drainage to the right way to compact each layer for maximum stability and a long-lasting finish.
Key Takeaways
- A solid foundation starts with proper site prep: Before spreading any gravel, take the time to clear the area, excavate to the correct depth, and create a slight slope to ensure water drains away from buildings.
- Build your base in layers for maximum strength: The secret to a durable surface is applying gravel in thin, two-to-three-inch layers. Dampen and compact each layer thoroughly before adding the next to create a tightly locked, stable base.
- Plan for drainage and simple upkeep: Water is the biggest threat to a gravel surface, so confirm your grading is effective. A little seasonal maintenance, like raking uneven spots and managing weeds, will keep your project looking great for years.
What Is Crush and Run Gravel?
If you’re planning a project that needs a solid, reliable foundation, you’ve likely come across the term “crush and run gravel.” Also known as crusher run, this material is a go-to choice for everything from driveways and walkways to building pads and paver bases. It’s valued for its unique composition that creates an incredibly stable and long-lasting surface.
Unlike uniform decorative stones, crush and run is a workhorse material designed for strength and performance. It combines two key ingredients that work together to form a tightly packed, interlocking base that can handle heavy loads and stand up to the elements. Understanding what it’s made of and why it works so well will help you see why it’s the perfect starting point for so many successful projects.
What It’s Made Of
So, what exactly is in this stuff? Crush and run gravel is a simple but effective mixture of crushed, angular stone and fine stone dust, often called “fines.” The larger stones are mechanically crushed, giving them sharp, irregular edges that fit together like puzzle pieces. The stone dust then fills in all the tiny gaps between the larger pieces. This combination is what gives the material its excellent binding properties. In Minnesota, you’ll often find materials like Class 5 gravel that serve a similar purpose, providing a compactable base for various construction and landscaping needs.
Why It’s Great for Your Project
The real magic of crush and run gravel lies in how it performs once it’s laid down and compacted. Because the angular stones and fine dust lock together so tightly, it creates a firm, stable surface that resists shifting and settling over time. This makes it an ideal base for surfaces that need to support heavy weight, like driveways, whether you’re topping it with more gravel, pavers, or recycled materials from an asphalt milling delivery. Even though it compacts to a high density, the material still allows for proper drainage, preventing water from pooling and causing issues like erosion or frost heave.
What Tools and Materials Will You Need?
Before you can get your hands dirty, you need to gather the right gear. Having everything ready from the start makes the whole process smoother and helps you avoid last-minute trips to the hardware store. Think of it as setting up your ingredients before you start cooking. A little prep work here goes a long way in making your gravel project a success. Let’s walk through exactly what you’ll need, from the gravel itself to the tools that will help you get a professional-looking finish.
Your Equipment Checklist
First things first, you’ll need the star of the show: the gravel. We can handle the delivery of high-quality Class 5 gravel right to your project site. Beyond that, you’ll want a few key tools. Grab a measuring tape to map out your area, a sturdy shovel for moving the material, and a hard-tined rake for leveling. To get that solid, packed-down surface, you’ll need a plate compactor or a hand tamper. A plate compactor is best for larger areas, while a hand tamper works for smaller jobs. You might also consider laying down landscape fabric first to keep weeds from popping through.
How to Calculate How Much Gravel You Need
Figuring out how much gravel to order can feel like a tricky math problem, but it doesn’t have to be. Ordering too little means delays, while ordering too much is a waste of money. A good rule of thumb is that one ton of gravel covers about 80 to 100 square feet at a 3-inch depth. For a more precise figure, you can measure the length, width, and desired depth of your area. To make it even simpler, you can plug your measurements directly into our handy cubic yardage calculator to get the exact amount you need for your project.
How to Prepare Your Site for Gravel
Before you even think about spreading that first layer of gravel, you need to get your site ready. This prep work is the most important part of the job because it creates a stable foundation for your entire project. Taking the time to prepare the ground correctly prevents future headaches like sinking, shifting, and drainage problems, ensuring your new gravel surface looks great and lasts for years.
Clear and Excavate the Area
First, you need a clean slate. Clear the entire project area of any grass, weeds, plants, and large rocks. Once it’s cleared, it’s time to dig. For a walkway or patio, you’ll want to excavate about four to eight inches deep. For a driveway that needs to support the weight of vehicles, you’ll need to go deeper, around eight to twelve inches. The goal is to remove the soft topsoil and get down to a firm subsoil base. Our skid steer services can make quick work of this step for larger projects.
Lay Down Geotextile Fabric
This step is a true game-changer. After excavating, lay down a layer of geotextile landscape fabric over the entire area. This fabric acts as a barrier between the soil and your gravel. It keeps the gravel from sinking into the dirt over time, which maintains the stability of your base. It also does a fantastic job of preventing weeds from growing up through your new surface. Just roll it out, making sure to overlap the edges by several inches, and secure it in place. This simple addition will save you a lot of maintenance work down the road.
Create the Right Slope for Drainage
Water is the number one enemy of any gravel installation. To prevent it from pooling and causing damage, you need to make sure it has somewhere to go. This means creating a slight slope across the excavated area. A good rule of thumb is to create a grade that drops about a quarter-inch for every foot, directing water away from any buildings or foundations. This ensures proper runoff and protects both your gravel surface and your home from water-related issues. You can use our cubic yardage calculator to help plan your material needs.
How to Spread Crush and Run Gravel, Step by Step
With your site prepped and ready, it’s time to lay the foundation. Spreading crush and run gravel isn’t just about dumping it and calling it a day. The method you use here will determine how stable and long-lasting your base will be. Following these steps carefully ensures you get a solid, reliable surface that stands up to weather and weight for years to come.
Apply the Gravel in Layers
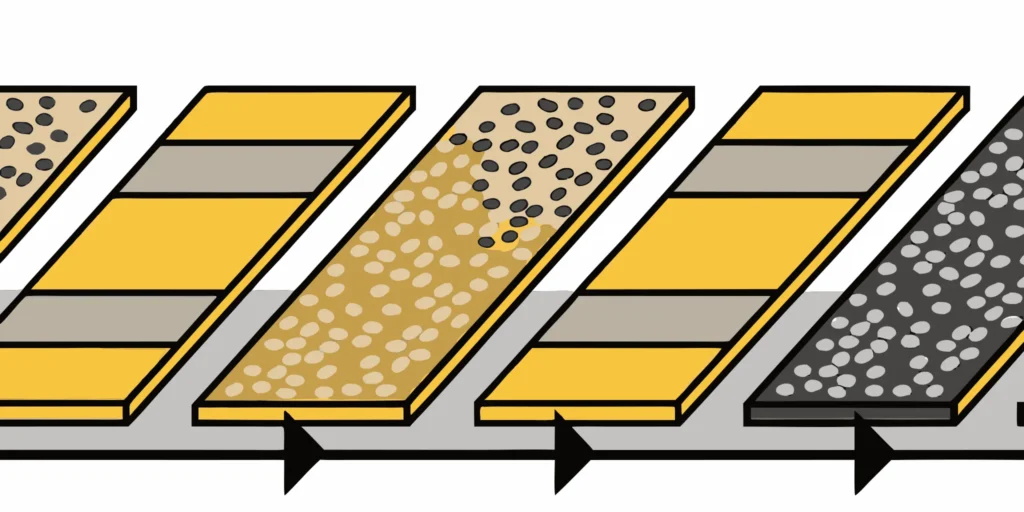
The secret to a strong gravel base is building it up gradually. Instead of dumping all your material at once, you’ll want to pour the gravel in thin, even layers. Aim for each layer to be about two to three inches thick. Use a sturdy rake or shovel to spread the Class 5 gravel evenly across the entire area. This layering technique is crucial because it allows for proper compaction from the ground up, which prevents the surface from sinking or developing soft spots later on. It takes a bit more time, but this step is your best defense against an uneven, unstable final product.
Add Water for the Best Results
Here’s a pro tip that makes a huge difference: add a little water. Before you start compacting each layer, lightly spray it with a garden hose. You’re not trying to create a puddle, just enough to make the gravel damp. Adding water during the compaction process helps all the fine particles and stone dust settle in between the larger, angular stones. This creates a tighter bond and helps you achieve a much more solid, stable base. The moisture acts as a lubricant, allowing the pieces to lock together more effectively when pressure is applied.
Compact Each Layer Thoroughly
Compaction is where the magic happens. This is the step that transforms a loose pile of rocks into a solid, interlocking base. After dampening each two-to-three-inch layer, you need to press it down firmly. For smaller projects like a walkway, a hand tamper will do the job. For larger areas like a driveway or patio base, renting a plate compactor is well worth it. Go over the entire surface several times until the layer feels completely solid and doesn’t shift under your feet. Proper compaction is what gives crush and run its excellent drainage and load-bearing properties, so don’t cut corners here. If you need help with the heavy lifting, our skid steer services can make quick work of spreading and grading.
Level and Finish the Final Surface
Once you’ve applied and compacted your final layer, it’s time to create a smooth, finished surface. Use a landscape rake to even out any minor bumps or ridges. For a truly level finish, you can drag a straight 2×4 board across the surface to check for high and low spots. If you find any dips, just add a small amount of gravel, dampen it, and tamp it down until it’s flush with the surrounding area. The goal is to create a uniform, tightly packed surface that is ready for pavers, asphalt, or to serve as a finished gravel driveway.
Getting Compaction and Drainage Just Right
You’ve laid your gravel, but the job isn’t done yet. Compaction and drainage are the two final steps that make the difference between a gravel surface that lasts for years and one that becomes a lumpy, potholed mess after the first season. Taking the time to properly compact the material and ensure water can drain away will give you a stable, long-lasting base for your driveway, patio, or shed. It’s all about creating a solid, interlocked surface that can handle traffic, weather, and anything else you throw at it. Let’s walk through how to get these crucial final details perfect.
Your Compaction Equipment Options
The secret to a rock-solid gravel base lies in compaction. Crush and run gravel, like Class 5 gravel, contains a mix of different-sized stones and fine dust. This dust is essential because it fills the gaps between the larger stones, helping everything lock together tightly when compressed. For small areas, you can get by with driving a heavy vehicle, like a pickup truck, back and forth over the surface multiple times. For a more professional finish or a larger project, renting a plate compactor is your best bet. This machine uses vibration to settle the gravel far more effectively than simple pressure, creating a dense and durable base that won’t sink or shift over time.
How to Test for Proper Density
How do you know when your gravel is compacted enough? You’re aiming for a surface that feels completely solid. After a pass with your compactor, walk across the area. It shouldn’t feel soft or spongy, and your feet shouldn’t sink in. A good rule of thumb is that you shouldn’t be able to easily kick the gravel loose. If you can scuff up a bunch of stones with the toe of your boot, it needs more compaction. Remember, this process should be done for each layer you put down, not just the final surface. Proper density is what prevents future cracking or settling, so don’t rush this step.
Make Sure Water Can Flow Freely
Proper drainage is just as important as compaction. If water pools on your gravel surface, it will eventually soften the base and lead to ruts and potholes. Before you even start spreading gravel, you should have graded the area with a slight slope, about a quarter-inch drop for every foot, leading away from any buildings. Once your gravel is spread and compacted, perform a simple water test. Lightly spray the area with a garden hose and watch how the water behaves. It should flow steadily in the direction of the slope without creating puddles. This simple check confirms your grading is correct and will protect your project from water damage.
Common Mistakes to Avoid When Spreading Gravel
Spreading gravel might seem simple, but a few common slip-ups can undermine your entire project. Getting it right the first time saves you from headaches, extra costs, and rework down the road. Let’s walk through the most frequent missteps so you can be sure your gravel base is solid, stable, and built to last. Paying attention to these details is what separates a professional-grade finish from a project that will need fixing in a year or two. By avoiding these pitfalls, you ensure your driveway, path, or patio foundation performs exactly as it should for years to come.
Skipping Your Site Prep
This is the foundation of your project, literally. Rushing this step is a recipe for disaster. Before you even think about spreading gravel, you need to properly prepare the area. This means clearing away all grass, weeds, and topsoil, and then digging down to the right depth, which is typically 4 to 8 inches for a walkway and 8 to 12 inches for a driveway. A poorly prepared site can lead to uneven settling and a weak base. If you need help with the heavy lifting of excavation, our skid steer services can get the job done quickly and efficiently, creating the perfect canvas for your gravel.
Applying Too Much Gravel at Once
It’s tempting to dump all your gravel in one go to save time, but this is a critical mistake. For a strong, stable base, you need to apply the gravel in thin, even layers. Aim for layers that are about two to three inches thick. Spreading too much at once makes it impossible to compact the material properly all the way through. This leaves you with a loose, unstable base that will shift and settle over time. By building up your base layer by layer, you ensure every inch is solid. You can use our cubic yardage calculator to make sure you order the right amount for your project from the start.
Not Compacting Enough
Spreading the gravel is only half the job; compacting it is what gives your base its strength. Every single layer you put down needs to be thoroughly compacted with a plate compactor or hand tamper. Skipping this or doing a quick, half-hearted job will lead to problems later on, like sinking, ruts, or an uneven surface. Proper compaction locks the stones together, creating a dense, durable foundation that can handle heavy loads and resist shifting. This step is especially important when you’re using materials like our Class 5 gravel, which is designed to create a firm, stable base when compacted correctly.
Forgetting About Drainage
Water is the number one enemy of any gravel installation. If you don’t plan for drainage, you’ll end up with puddles, erosion, and a base that weakens over time. Your prepared site should have a slight slope, about a quarter-inch drop for every foot, leading away from any buildings or foundations. This gentle grade ensures that rainwater runs off the surface instead of pooling and seeping into the base. You can even do a quick test by lightly spraying the area with a hose to see where the water goes. A well-drained base will last significantly longer and protect your property from potential water damage.
How to Maintain Your New Gravel Surface
You’ve put in the work to create a solid, functional gravel surface. Now, a little routine care will ensure it stays that way for years to come. Proper maintenance prevents major issues down the road, keeping your driveway or base looking great and performing perfectly. By staying on top of a few simple tasks, you can protect your investment and avoid costly repairs.
Regular Inspections and Upkeep
Get into the habit of walking over your gravel surface every few weeks, especially after heavy rain or snowmelt. Look for any signs of sinking, ruts, or areas where the gravel is wearing thin. High-traffic spots will naturally compact more over time and may need attention sooner. If you notice small dips or unevenness, a simple fix is to rake the gravel from higher spots into the low ones to level things out. This is also a good time to re-compact any loose areas with a hand tamper. For larger grading jobs or significant sinking, our professional skid steer services can quickly restore a smooth, even surface, ensuring your base remains stable and functional.
Managing Weeds and Edges
Even with a layer of geotextile fabric underneath, a few stubborn weeds might find their way through. The fabric’s main job is to keep the gravel from sinking into the soil, but it also provides a great barrier against most unwanted growth. Pulling weeds by hand as soon as you see them is the easiest way to keep them from taking over. You’ll also want to maintain crisp edges to keep your project looking sharp. Over time, gravel can spread from traffic and weather. Regularly rake any stray stones back into the main area to keep your driveway or path looking tidy and prevent the edges from thinning out.
Knowing When to Add More Material
Even with excellent compaction, your gravel will settle over time. You’ll know it’s time to add a fresh layer when you see low spots that collect water or notice the surface looks thin. Topping off your gravel every few years is a normal part of maintenance. Adding a fresh layer of Class 5 gravel not only refreshes the look but also helps maintain proper drainage by keeping the surface slightly higher than the surrounding ground. If you’re not sure how much you need, our handy cubic yardage calculator can help you figure it out.
Tips for a Long-Lasting Gravel Base
You’ve put in the hard work to spread and compact your gravel, and now you want to make sure it lasts. A strong gravel base is the foundation for a durable driveway, patio, or shed pad. With a little proactive care, you can protect your investment and keep your surface stable and functional for years. These simple strategies will help you maintain the integrity of your gravel base and prevent common problems before they start.
Let It Settle Before Adding Heavy Loads
I know it’s tempting to start using your new gravel driveway or build on your new foundation right away, but a little patience goes a long way. After you’ve finished compacting, give the gravel base some time to settle and cure. Pressing down each layer properly is essential, but allowing it to fully set ensures it can handle heavy loads without shifting. Rushing this step can lead to sinking or cracking down the road, especially if you’re pouring concrete on top. Think of it as letting the foundation truly find its footing before you ask it to do any heavy lifting.
Create a Seasonal Maintenance Plan
Maintaining your gravel base doesn’t have to be a huge chore. The best approach is to create a simple seasonal routine. A couple of times a year, maybe in the spring and fall, take a walk over the surface and look for any changes. Check for low spots where water might be pooling, ruts from vehicle traffic, or any signs of erosion. High-traffic areas might need a little extra attention. If you notice any significant compaction or sinking, you may need to add a fresh layer of Class 5 gravel and re-compact the area to keep it level and stable.
Keep Your Drainage System Clear
Water is the number one enemy of a stable gravel base. If water can’t drain away properly, it will pool under the surface, softening the base and compromising its strength. Make sure your drainage plan is working effectively. Regularly clear any nearby ditches or culverts of leaves and debris to ensure water has a clear path to flow away. You can even do a simple water test by lightly spraying the area with a hose to see if it drains correctly. If you need help re-establishing a proper grade, our skid steer services can get your project back on track.
Related Articles
- What is the Best Gravel for a Driveway? 5 Types Compared – Minnesota Aggregates
- How to Spread Gravel on a Driveway the Right Way – Minnesota Aggregates
- Gravel Calculator Tons: 4 Steps to an Accurate Order – Minnesota Aggregates
- Your Guide to the Best Equipment for Spreading Gravel – Minnesota Aggregates
Frequently Asked Questions
What’s the difference between crush and run gravel and other types of gravel? Think of crush and run, or Class 5 gravel here in Minnesota, as a functional base material, not a decorative top layer. It’s made of angular, crushed stones and fine dust that lock together tightly when compacted. This creates a solid foundation. Other gravels, like pea gravel, are typically rounded and uniform. While they look nice on top of a path, they don’t interlock and will shift under pressure, making them unsuitable for a stable base.
Is landscape fabric really necessary under the gravel? I highly recommend it, and yes, it makes a huge difference. The fabric serves two key purposes. First, it separates your gravel from the soil below, which prevents the stones from sinking into the dirt over time and keeps your base stable. Second, it acts as a powerful weed barrier, saving you a lot of maintenance work later on. It’s a simple step that protects the integrity of your entire project.
How deep does my gravel base need to be? The right depth depends entirely on what the surface will be used for. For a project with light foot traffic, like a garden path or a small patio base, a depth of four to eight inches is usually sufficient. For a driveway that needs to support the weight of cars and trucks, you should plan for a much more substantial base of eight to twelve inches deep.
Can I just drive my truck over the gravel to compact it? While driving over the gravel is better than doing nothing, it doesn’t compare to using proper equipment. A vehicle’s weight provides some compression, but a plate compactor uses vibration to settle the fine particles and lock the angular stones together much more effectively. For a small patch or a quick fix, your truck might be okay, but for a driveway or foundation that needs to last, renting a compactor is the best way to get a truly solid, durable result.
How often will I need to add more gravel to my driveway or path? A properly installed and compacted gravel surface is very durable, but it does require some upkeep. You can expect to top it off with a fresh layer of gravel every few years. The exact timing depends on factors like how much traffic it gets and the weather conditions in your area. A good sign it’s time for a refresh is when you start to see low spots where water puddles or areas that look thin.