
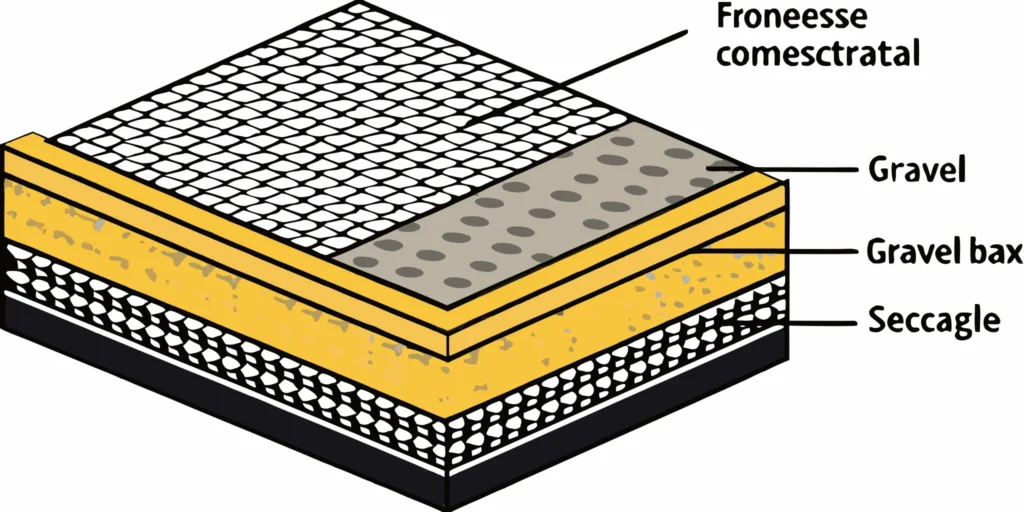
Building a gravel road seems straightforward until you’re a year in, staring at the same ruts and puddles you were trying to fix in the first place. A lasting road isn’t just about dumping a truckload of rock; it’s a methodical process that starts from the ground up. The real secret lies in the foundation. If you don’t get the base right, you’ll be fighting a losing battle against weather and wear. This guide is here to change that. We’ll walk you through the essential steps, focusing on how to install a gravel road base that provides solid support and excellent drainage, ensuring your road stays smooth and stable for years.
Key Takeaways
- Proper Prep is Everything: Your road’s longevity starts with the groundwork. A successful project requires clearing the site down to the subsoil, grading a crown for proper water runoff, and installing geotextile fabric to prevent layers from mixing.
- Build Your Road in Layers: For maximum stability, use different types of gravel for each layer. Start with large stones for the base, add medium gravel to lock them in, and finish with a dense material like Class 5 for a smooth, durable driving surface.
- Finish Strong with Compaction and Maintenance: Don’t skip the final steps. Tightly compact each layer of gravel to prevent future ruts, and plan for simple upkeep like occasional raking and adding new material to keep your road smooth for years.
What You’ll Need for Your Gravel Road
Before you can break ground, it’s important to gather the right materials and equipment. A little planning here goes a long way in making sure your gravel road is built to last. Think of it like baking a cake: you can’t just throw everything in a bowl and hope for the best. You need the right ingredients in the right order. For a durable gravel road, this means selecting the correct gravel for each layer, using a geotextile fabric, and having the proper tools on hand to get the job done right. Let’s walk through exactly what you’ll need.
Select the Right Gravel for Each Layer
Building a strong gravel road is all about layering. You can’t just use one type of gravel for the whole thing. For a solid foundation, you need to use different sizes of stone for each layer. Start with large, angular stones for the bottom sub-base, as this creates stability and helps with drainage. The middle layer should consist of smaller, medium-sized stones that lock together.
For the top layer, you’ll want a dense, fine material like Class 5 gravel. This material is a mix of crushed stone and gravel fines that compacts tightly, creating a smooth and durable surface that holds up well to traffic. Getting these layers right is the key to a road that won’t turn into a muddy mess.
Why You Need Geotextile Fabric
Here’s a pro tip that will save you a lot of future headaches: use geotextile fabric. Before you lay down any gravel, roll this special fabric over the prepared soil. It acts as a barrier between your gravel base and the dirt underneath. This is a critical step because the fabric prevents the gravel from sinking into the soil over time, which is a common cause of potholes and ruts. It also significantly improves drainage by allowing water to pass through without washing away the soil foundation. Think of it as a small investment that protects the longevity and stability of your entire road.
Tools and Equipment for the Job
Having the right tools makes all the difference between a frustrating project and a successful one. For a DIY project, you’ll need shovels, rakes, and a wheelbarrow. To ensure your road is solid, you’ll also need compaction equipment. A plate compactor or a jumping jack rammer is essential for pressing each gravel layer down tightly. For larger projects, you might need heavier machinery. A skid steer with attachments like a box blade or land leveler can make grading and spreading gravel much more efficient. If you don’t own this equipment, our skid steer services can handle the heavy lifting for you.
How to Prepare the Ground for a Gravel Road
A successful gravel road is all about the prep work. Before you even think about spreading your first layer of gravel, you need to create a solid, stable, and well-drained foundation. Skipping these crucial steps is the fastest way to end up with a rutted, muddy mess that becomes a constant headache. Think of it like building a house; you wouldn’t start putting up walls without a proper foundation, and the same principle applies here. A strong base is what allows your road to handle heavy vehicles, seasonal thaws, and Minnesota’s toughest weather for years to come.
Proper ground preparation involves four key stages: clearing and excavating the site, assessing the soil foundation, grading for proper drainage, and installing a geotextile fabric. Each step builds on the last to create the perfect canvas for your new road. While it might seem like a lot of upfront effort, taking the time to do this right will save you countless hours and dollars on future repairs and regrading. It’s the difference between a road that lasts a decade and one that needs work after the first big rainstorm. Let’s walk through exactly how to get it done.
Clear and Excavate the Site
First things first, you need a clean slate. This means removing all vegetation, grass, tree roots, and topsoil from the planned roadway. That rich, dark topsoil is great for a garden, but it’s too soft and unstable to support a road. You’ll need to dig down until you reach the firm subsoil, typically 6 to 12 inches deep. The road’s intended use, whether for light residential traffic or heavy farm equipment, will determine how wide and deep you need to excavate. For this part of the job, you’ll likely need heavy equipment, and our skid steer services can help make quick work of it.
Assess and Prepare the Soil Foundation
Once the site is cleared, take a good look at the subsoil you’ve uncovered. This layer, called the subgrade, is the true foundation of your road. Is it sandy and firm, or is it soft clay that holds water? You need to survey the land and understand your soil conditions. If you’re dealing with soft, unstable soil, you may need to excavate deeper and add a stabilizing material. Compacting the subgrade with a heavy roller is a crucial step to create a dense, solid base that won’t shift or settle over time. A firm, well-compacted subgrade prevents future dips and potholes.
Grade for Proper Drainage
Water is the number one enemy of a gravel road. If it’s allowed to pool, it will soften the foundation and turn your road into mud. The solution is proper grading. You need to shape the roadbed so water sheds off to the sides. The best practice is to create a “crown,” where the center of the road is slightly higher than the edges, sloping down at about a 2% to 5% grade. This ensures that rainwater has a clear path to run off and away, preventing it from soaking into your road’s base layers. You should also have ditches or swales along the sides to carry the water away from the road entirely.
Install the Geotextile Fabric
This is a step many people skip, but it’s a game-changer for the longevity of your road. Geotextile fabric is a durable, permeable material that you lay down over the compacted subgrade before adding any gravel. Its job is to create a barrier between the soil and your gravel base. This separation is critical because it stops the gravel from mixing with the soil, which helps prevent potholes. It also adds stability and improves drainage. Roll the fabric out, making sure to overlap the edges by at least 12 to 18 inches, and secure it so it lies flat before you start adding your first layer of gravel.
How to Layer and Compact Your Gravel Road
With your site prepped and the geotextile fabric in place, you’re ready to build your road. The key to a long-lasting gravel road is creating distinct, well-compacted layers. Each layer serves a specific purpose, working together to create a stable and durable surface that can handle traffic and weather. Rushing this stage or cutting corners will only lead to problems down the line, so take your time to get it right. This methodical approach ensures your road will stand strong for years to come.
Install the Sub-Base Layer
Every strong structure starts with a solid foundation, and your gravel road is no exception. The first layer you’ll install is the sub-base. This layer is made of larger, coarse stones that create a stable bed for the rest of the road. If you’re working with particularly soft or unstable soil, you might want to add a sub-grade of compacted crushed rock first. This provides an even stronger foundation for the road base, preventing sinking and shifting over time. This initial layer is all about creating a firm, unyielding base to build upon.
Build the Middle and Top Layers
Once your sub-base is down, it’s time to add the middle and top layers. The trick here is to use different sizes of gravel for each layer to ensure maximum stability. For the middle layer, use medium-sized stones like #57 gravel. This layer fills the gaps in the larger sub-base stones, locking them into place. For the top layer, you’ll want a finer material like our Class 5 gravel. This creates a smooth, dense surface that’s comfortable to drive on and holds up well against traffic. This step-by-step layering process is what gives the road its strength.
How Deep Should Each Gravel Layer Be?
The depth of your gravel is critical for durability and proper drainage. For a standard gravel road or driveway, you should aim for a total depth of 12 to 18 inches. This depth allows rainwater to drain through the layers effectively, preventing water from pooling on the surface and eroding your hard work. Each layer should be about 4 to 6 inches deep. Not sure how much material that is? You can use a cubic yardage calculator to figure out exactly how much gravel you’ll need for your project’s dimensions, ensuring you order the right amount from the start.
Compact and Crown for a Durable Finish
This is the final, crucial step to finishing your road. After spreading each layer of gravel, you must compact it thoroughly with heavy machinery. Compaction removes air pockets and locks the stones together, creating a solid, stable road that won’t easily rut or wash out. Once all layers are compacted, you’ll shape the road into a slight arch, making the center a little higher than the edges. This is called “crowning,” and it encourages water to run off to the sides instead of sitting on the surface. Our professional skid steer services can help you achieve the perfect grade and compaction for a flawless finish.
Maintaining Your Road and Avoiding Common Mistakes
Building a gravel road is a significant investment of time and resources, so you want to make sure it lasts. A few common missteps can turn a smooth, durable road into a rutted, muddy mess. The good news is that these problems are entirely avoidable with proper planning and consistent care.
Think of your road in two phases: the initial build and its long-term upkeep. Getting the foundation right from the start is non-negotiable. This means paying close attention to how water will drain away from your road, choosing the correct materials for each layer, and compacting everything tightly. Once your road is built, a little regular maintenance will go a long way in preserving its shape and function for years to come. Let’s walk through the most critical points to ensure your project is a success from day one.
Don’t Skimp on Site Prep and Drainage
The single biggest mistake you can make is rushing through the site preparation. Before you even think about laying gravel, take a good look at the land. Notice the natural slope, the soil type, and where water tends to collect after it rains. Proper drainage is the secret to a long-lasting gravel road, especially with Minnesota’s freeze-thaw cycles.
If your road can’t shed water effectively, you’ll end up with soft spots, potholes, and ruts. The goal is to create a solid foundation that stays dry and stable. This involves grading the area to create a slight crown, which encourages water to run off to the sides. It might seem like extra work upfront, but a well-drained base prevents countless headaches down the line.
Choose the Right Materials and Compact Thoroughly
Your road is only as strong as the materials you use. A durable gravel road is built in layers, not with a single type of rock. You’ll need larger, angular stones for the sub-base to create a stable foundation. The middle layer uses smaller stones to lock everything in place, and the top layer requires a finer material that packs down into a smooth, dense driving surface.
For that top layer, a material like Class 5 gravel is an excellent choice because it contains a mix of crushed rock and fines that compact beautifully. Once you spread each layer, you must compact it thoroughly. Renting a plate compactor or roller is essential for creating a solid, interlocked base that won’t shift and sink under the weight of vehicles.
Ongoing Maintenance for Your Gravel Road
A gravel road isn’t a “set it and forget it” project. It needs a little attention to stay in top shape. Over time, traffic and weather will displace the gravel, leading to bare spots or ruts. Plan to rake and redistribute the gravel every few months to maintain an even surface and preserve the road’s crown. This simple task helps with water runoff and prevents potholes from forming.
Every year or two, you may need to add a fresh layer of gravel to replenish what’s been lost. If you notice significant low spots or washouts, address them quickly before they get worse. For larger grading and spreading jobs, our skid steer services can make quick work of repairs, keeping your road smooth and functional.
Related Articles
- How to Spread Gravel on a Driveway the Right Way
- 6 Best Types of Gravel for Driveways Compared
- What is the Best Gravel for a Driveway? 5 Types Compared
Frequently Asked Questions
Is using geotextile fabric really necessary for a gravel road? Think of it this way: skipping the fabric is like building a house on sand. Sooner or later, your gravel will sink into the soil underneath, creating ruts and soft spots. The fabric acts as a permanent barrier that keeps your layers separate and stable. While it might seem like an extra cost upfront, it saves you from having to constantly buy more gravel to fill in the low spots that will inevitably appear without it.
What is the single biggest mistake that causes a new gravel road to fail? Hands down, the most common reason a gravel road fails is poor drainage. If you don’t properly grade the road with a crown and create ditches for runoff, water will just sit on the surface. It then soaks down, softens the foundation, and turns your road into a muddy mess, especially during a Minnesota thaw. No amount of high-quality gravel can save a road that’s built on a soggy, unstable base.
How do I figure out exactly how much gravel I need to order? Guessing your material needs is a recipe for frustration. You either end up with a giant pile of leftover gravel or have to pause your project to place another order. The best way to get it right is to measure the length, width, and desired depth of your road and use a cubic yardage calculator. This simple tool does the math for you, ensuring you order the correct amount from the start.
My road already has potholes. Can I just dump new gravel in them? Just filling a pothole with fresh gravel is a temporary fix at best. The loose material will quickly get kicked out by traffic. For a more lasting repair, you should first clear out any loose rocks and water from the hole. Then, build up the area in layers, using larger stones at the bottom and finishing with a compacted layer of Class 5 gravel on top so it sits level with the rest of the road.
Can I build a gravel road myself, or should I hire a professional? A small project like a short garden path can certainly be a DIY job with rented compaction equipment. However, for a full-sized driveway or road, the work involved in excavation, grading, and spreading tons of material is significant. Using professional skid steer services not only saves your back but also ensures the critical prep work and grading are done correctly, giving you a durable road that lasts.