
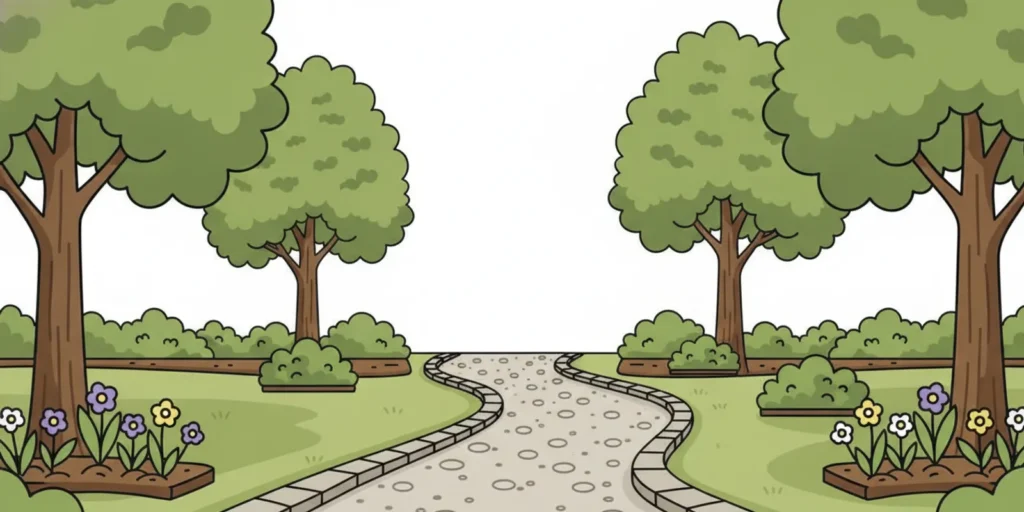
Gravel can give a Minnesota yard useful paths, clear bed edges, and low-maintenance surfaces without turning every outdoor project into a major construction job. The best gravel landscaping ideas start with how you will use the space, where water should go, and what material will stay comfortable and stable through seasonal changes. A little planning makes it easier to choose a surface that fits the yard instead of ordering material first and solving problems later.
Request a material delivery quote
What gravel landscaping ideas work well in a Minnesota yard?
Think of gravel as a surface with a job, rather than a decorative layer to spread everywhere. It can mark a walking route, separate planting areas, create a small place to sit, or cover a defined strip where grass is difficult to maintain. Each use has different needs for firmness, drainage, and edging.
- Garden paths: Connect a gate, patio, shed, or seating spot with a route people will actually walk. Gentle curves can soften a formal yard, while a straight path often works well between two practical destinations.
- Bed borders: A narrow gravel strip can make the edge between lawn and planting bed easier to see and maintain. Keep the width consistent and use a clear edge to prevent material from migrating into the grass.
- Small sitting areas: A compact gravel surface can define a chair-and-table area or a place to gather around a fire feature. Check local fire and building requirements before placing a fire feature, and follow its manufacturer’s clearance instructions.
- Utility-side strips: Gravel can create a distinct surface beside a shed or along a narrow side yard. First confirm that the area can drain appropriately and that the material will not cover vents, siding clearances, or access points.
- Planting accents: Gravel can contrast with plants in a limited, intentionally edged area. Match the look and surface to the plants’ needs; many garden plants need suitable soil and water rather than a thick layer of stone.
For a garden path, map the route before choosing a material. A path used every day needs a more predictable walking surface than a decorative branch leading to a single garden feature. For planting areas, use gravel as a defined design element, not a substitute for healthy soil. If you are planning a lawn transition or new planting bed, compare the project with the guidance on black dirt delivery.
Which gravel should you use for a path, border, or sitting area?
Material choice affects how a surface feels underfoot, how easily it shifts, and how much preparation it needs. The exact best fit depends on the intended use and what is available for your project. These broad comparisons are a starting point; ask the supplier to confirm the material’s properties and intended use before ordering.
| Project | Material direction to consider | Planning point |
|---|---|---|
| Walking path | A compactable crushed aggregate may provide a firmer surface than loose rounded stone. | Consider foot comfort, edging, and the path’s slope; plan a stable base and finished surface. |
| Bed border or accent area | A decorative stone or gravel selected for its color and texture. | Confirm size and appearance, and contain it with a durable edge. |
| Small sitting area | A stable aggregate suited to regular foot traffic and furniture. | Prepare a level footprint and check how water will leave the area. |
| Base under a project | Class 5 gravel may be worth considering where a compactable base is needed. | Confirm the design calls for this material; it is not automatically the right finish for every landscape feature. |
Class 5 gravel is a crushed limestone material used for base construction. It may suit some base-preparation needs, but the look and performance you want should guide the final surface choice. See the Class 5 gravel delivery information and the guide to what Class 5 gravel is before deciding whether it fits your project. For a route where a softer finish is preferred, compare aggregate options with the supplier rather than assuming that every gravel has the same feel or compaction behavior.
Do not select a material based on color alone. Ask about particle size, whether it compacts, and whether the intended use is suitable for walking or supporting furniture. A sample or a clear description from the supplier can also help you avoid a mismatch between the planned look and the delivered material.
How should you plan gravel paths and borders?
Start with the layout and the finished height. Mark the edges with a garden hose, stakes, or paint approved for the surface. Walk the route and check where it meets steps, gates, patios, and lawn. The transitions matter: a path that ends abruptly or sits too high against a threshold can be inconvenient even if the middle section looks right.
- Set the purpose. Decide whether the area is a main walking route, occasional access, or a visual border. That choice helps establish how wide and firm the surface should be.
- Measure the footprint. Measure each straight section separately. For curves, divide the route into short sections or use an average width and length to estimate the area.
- Choose the planned depth. The required depth depends on existing ground, use, and whether the project includes a separate base and finish layer. Confirm an appropriate build-up for the site before calculating total volume.
- Plan the edge. Edging helps define the shape and limits movement into lawns or beds. Choose an edge that matches the style and can be installed at the intended finished height.
- Prepare the ground. Remove unsuitable surface material and address soft spots before placing aggregate. Keep the finished surface from blocking drainage routes or covering building details.
- Order with access in mind. Make sure the delivery vehicle can reach a safe, useful drop location and that the pile will not block a driveway, sidewalk, or drainage feature.
For a rough quantity estimate, multiply the area in square feet by the planned depth in feet, then divide by 27 to convert cubic feet to cubic yards. For example, a 3-foot-wide path that is 30 feet long covers 90 square feet. At a hypothetical 4-inch depth, the calculation is 90 × (4 ÷ 12) ÷ 27, or about 1.1 cubic yards. This is a volume estimate, not a guarantee of the amount to order: uneven ground, compaction, and the chosen layer design can change the requirement. Use the cubic yardage calculator to help check your estimate, and confirm the assumptions before placing an order.
How can you make gravel areas look intentional?
A gravel feature looks more considered when its shape, edge, and nearby planting relate to the rest of the yard. Repeat one material or color in two or three small areas rather than scattering unrelated patches across the property. For example, a short path can use the same aggregate as a narrow border beside a planting bed, while the patio or lawn remains the visual center.
Use transitions to make the design clear. A path can widen slightly near a bench or garden entrance to signal a destination. A consistent border can separate gravel from lawn and make mowing easier. Where gravel meets another hard surface, plan a clean edge and a safe height change so it does not create a trip point or spill onto the adjoining area.
Balance stone with plants and open space. A narrow gravel strip beside a planting bed may work better than covering the whole bed, especially where plants need suitable soil and moisture. Keep access in mind when placing larger stones, containers, or garden features; the finished design should leave room to maintain both the gravel and the plants. Sketching the footprint and noting adjacent colors and materials before ordering can help you decide whether the chosen aggregate will complement the yard.
How can gravel landscaping handle water and Minnesota seasons?
Gravel does not automatically solve a drainage problem. Water still needs a safe route away from structures and toward an appropriate part of the property. Before building a path or sitting area, watch the yard during rain or snowmelt. Note where water collects, where it crosses the planned surface, and whether a downspout or slope directs runoff toward the project.
Keep the surface profile compatible with the surrounding yard. Avoid creating a low pocket that holds water or a raised edge that redirects water toward a foundation, neighbor, or walkway. If runoff is substantial, the ground is persistently wet, or the plan involves changing grades, get site-specific advice before work begins. A landscape surface is not a replacement for a drainage design.
Minnesota’s freeze-thaw cycles and spring moisture make ground preparation especially important. A surface installed on soft, saturated, or poorly prepared soil may settle or shift. Avoid scheduling excavation when the ground is too wet to work cleanly, and plan for the local seasonal conditions at the time of installation. If grading is part of the project, learn more about what land grading involves or consider whether skid steer grading and site preparation are appropriate for the work.
For planting areas, choose plants and soil conditions for the specific location instead of assuming a gravel cover will meet every plant’s needs. Minnesota-specific gardening guidance is available from the University of Minnesota Extension. Check its current recommendations for plant selection and site conditions, especially when combining gravel with garden beds.
How do you estimate gravel and prepare for delivery?
Good delivery planning starts with a measured footprint and a clear description of the job. Decide which areas will receive aggregate, which will use soil or another surface, and whether the project needs separate layers. Then note the approximate quantity and the preferred drop location.
Before requesting a quote, gather these details:
- Length, width, and planned depth for each area.
- The intended use, such as a walking path, decorative border, or compactable base.
- Any known soft spots, slopes, drainage concerns, or existing surfaces.
- Access restrictions, overhead obstacles, narrow approaches, and the safest location for a material pile.
- Your desired schedule and whether the project is ready for material.
Delivery pricing depends on the quantity, distance, and site conditions, so details help the supplier provide a useful quote. Minnesota Aggregates serves Twin Cities projects and offers statewide delivery upon request; locations outside the standard metro area are quoted based on the job. General material delivery is typically 3–4 business days. Confirm timing and availability for your specific order rather than relying on a general window. See the sand delivery page for an example of a product-specific delivery resource, or review the gravel size chart when comparing aggregate sizes.
Keep the drop area accessible and tell the supplier about tight turns, overhead wires, soft ground, gates, or other conditions that may affect the approach. Do not assume that a truck can place material exactly at the final installation point. If the pile will be set away from the work area, plan how you will move and spread it. You can also ask whether delivery can be paired with professional spreading or site preparation for your project.
What mistakes can make a gravel landscape harder to maintain?
A few common planning errors can turn a simple landscape feature into recurring work:
- Skipping the layout: An unmarked path may be too narrow, too wide, or poorly connected to the rest of the yard. Mark it and walk it before ordering.
- Using one material everywhere: A surface suited to a firm base may not give the look or feel wanted for a decorative bed. Match the material to the job.
- Ignoring edges: Gravel can move into lawns and planting areas. Add an edge where movement would make mowing or maintenance difficult.
- Covering unsuitable ground: Placing stone over soft or uneven soil does not correct the underlying problem. Prepare the site and address drainage first.
- Ordering from a guess: A small error in area or depth changes the quantity. Measure, calculate, and confirm the planned layer thickness.
- Forgetting ongoing care: Leaves and organic debris can collect on a gravel surface. Plan how you will clear it without removing too much of the material.
Think about future access, too. A narrow gravel route may be fine for foot traffic but not for a wheelbarrow or maintenance equipment. If you expect regular access, allow room for the intended use and make sure the surface is appropriate.
What should you confirm before starting?
Before ordering, review the project as a whole: what the surface is for, what material fits, how the ground will be prepared, where water will go, how much aggregate is needed, and where the delivery can be placed. For a larger project or a site with complicated slopes, utilities, or drainage, consult an appropriate local professional before changing the grade.
For more planning help, compare the different gravel types and their uses and review the guide to estimating gravel quantity. These resources can help frame questions, but the project’s use and site conditions should determine the final selection.
Frequently asked questions
Can I use gravel around plants?
Yes, in a defined area where the surface is compatible with the plants and the site. Keep in mind that gravel is not a substitute for suitable soil, and consider how water, debris, and future planting will be managed.
Is Class 5 gravel a good finish for every landscape path?
No single material fits every path. Class 5 is a crushed limestone used for base construction, so confirm whether its characteristics and appearance suit the finished surface you have in mind. Ask about alternatives if you want a different texture or look.
How much gravel should I order for a path?
Measure the area and multiply its square footage by the planned depth in feet, then divide by 27 for an approximate cubic-yard volume. The layer design, soil condition, and compaction can affect the order quantity, so verify the estimate with the supplier.
Can gravel fix standing water in my yard?
Not by itself. Gravel may be part of a planned surface, but water still needs an appropriate path to drain. If you have persistent pooling or runoff near a structure, get site-specific drainage guidance before adding material.
Sources and planning references
For Minnesota plant and garden planning, consult the University of Minnesota Extension. Confirm material suitability, delivery timing, and project-specific site conditions with the relevant supplier or professional.
With the layout, material, drainage, quantity, and drop location planned in advance, gravel can become a practical part of a Minnesota yard rather than a surface you have to rethink after installation.