
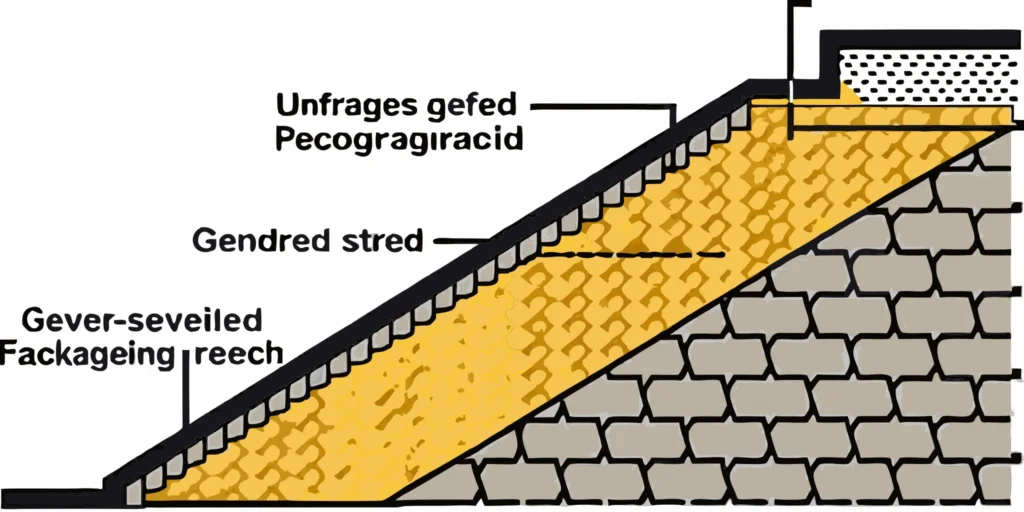
In Minnesota, our weather puts any outdoor project to the test. Heavy spring thaws and intense summer downpours can be particularly destructive to sloped surfaces. For homeowners and contractors, this means a standard approach to driveways simply won’t cut it. A gravel driveway on a steep hill requires a thoughtful strategy that accounts for significant water runoff and the constant pull of gravity. This article is your guide to building a driveway that can handle our state’s demanding climate. We’ll cover the best local materials, like Class 5 gravel for a solid base, and proven techniques for drainage and stabilization to ensure your driveway remains safe and intact season after season.
Key Takeaways
- Choose interlocking gravel for grip and stability: Your driveway’s success depends on the right materials. Use angular, crushed stone that locks together to provide traction and prevent sliding, and build it on a compacted Class 5 gravel base for a solid, long-lasting foundation.
- Control water flow to prevent erosion: To stop your driveway from washing away, you need a smart drainage plan. Crown the surface so water sheds to the sides, and use culverts or ditches to safely channel runoff away from the driveway.
- Build a strong structure from the ground up: A durable driveway requires proper layering and containment. Start with geotextile fabric to separate the soil, consider using stabilization grids to hold gravel in place, and plan for regular grading to maintain its shape and function.
Why Are Steep Driveways So Challenging?
A sloped driveway can add a lot of character to a property, but it also comes with a unique set of construction and maintenance hurdles. Unlike a flat surface, a steep grade is in a constant battle with gravity and the elements. Water runoff, shifting materials, and overall stability become major concerns that require careful planning and the right approach. If you don’t address these challenges from the start, you could face a cycle of costly repairs and constant upkeep. Understanding these core issues is the first step toward building a steep gravel driveway that is both beautiful and built to last.
Tackling Erosion and Washouts
The biggest challenge with a sloped gravel driveway is erosion. Gravity is always at work, and when you add rain or melting snow, the situation gets worse. As one source puts it, “Gravel on a slope easily moves, spreads, and washes away because of gravity and water runoff.” This constant movement causes erosion and requires a lot of upkeep. A single heavy downpour can create deep ruts, wash away your investment, and leave you with an uneven, messy surface. This loss of material means you’ll spend more time and money replenishing gravel and regrading the surface just to keep it functional and safe.
Keeping Gravel in Place
Because loose gravel is prone to shifting downhill, keeping it contained is essential for a stable driveway. The most effective way to secure it is by using a stabilization system. According to experts, “The best solution for a gravel driveway on a slope is to use a gravel grid system.” These grids create a honeycomb-like structure of cells that hold individual stones in place, preventing them from migrating. When choosing a system, look for one that is flexible. Stiff, hard plastic grids can become brittle and crack over time because they can’t conform to the natural contours of the land.
Solving Drainage Issues
Proper water management is non-negotiable for a steep driveway. If you don’t give water a clear path to follow, it will carve its own path right through your gravel. You need to proactively direct water away from the driveway surface to prevent washouts. An effective strategy is to install culverts or dig drainage ditches alongside the driveway. These features capture and channel runoff safely away, protecting the integrity of your driveway. Creating these drainage solutions often requires the right equipment, and professional skid steer services can handle the excavation and grading needed to ensure water flows where you want it to.
What’s the Best Gravel for a Steep Driveway?
Choosing the right gravel for a steep driveway isn’t just about looks; it’s about safety, stability, and longevity. The wrong material will wash away with the first heavy rain, create a slippery surface, and turn into a constant maintenance headache. You need gravel that will lock together, stay put, and provide excellent traction for vehicles, even in wet or icy conditions. The secret lies in using angular, crushed stone rather than smooth, rounded pebbles that easily roll downhill. Let’s look at the top contenders that will keep your driveway secure and functional for years to come.
Angular Crushed Gravel
If you want your gravel to stay put on a slope, angular crushed gravel is your best friend. Unlike smooth river rock, this gravel is mechanically crushed, creating jagged, irregular edges. These sharp angles are the key. They allow the individual pieces of stone to interlock, forming a stable, cohesive surface that resists movement. This interlocking action provides fantastic grip for your tires, which is crucial for preventing vehicles from slipping, especially when the driveway is wet. It’s the texture and shape of this gravel that make it a top performer for any sloped project.
Reliable Class 5 Gravel
A beautiful driveway is nothing without a solid foundation, and that’s where Class 5 gravel comes in. When you’re building on a steep hill, starting with a strong base layer is non-negotiable. A quality Class 5 delivery provides a dense mixture of sand and gravel that compacts tightly, creating incredible stability. This material is excellent for drainage, allowing water to pass through without eroding the base. By distributing the weight of vehicles evenly, a Class 5 base prevents the ruts and soft spots that can ruin a sloped driveway over time. Think of it as the essential first step for a long-lasting, low-maintenance driveway.
High-Traction 3/4″ Limestone
For a top layer that’s both functional and attractive, 3/4″ crushed limestone is an excellent choice. This angular stone offers the same interlocking benefits as other crushed gravels, ensuring great traction and stability on steep inclines. It’s also a very durable material that holds up well against harsh Minnesota weather cycles. Beyond its strength, it provides a clean, polished look that can really enhance your property’s curb appeal. The uniform size and color of the limestone create a more refined finish than a basic gravel mix, making it the perfect option if you want a material that works hard and looks great.
How to Manage Water Runoff on Your Sloped Driveway
A steep driveway and a heavy Minnesota downpour can be a recipe for disaster. Without a solid plan, water will carve right through your gravel, creating ruts and washing your investment downhill. The key is to control the water, not let it control you. By implementing a few smart drainage solutions, you can protect your driveway from erosion and keep it stable and functional for years to come. These techniques range from simple grading adjustments to more involved installations, but they all share the same goal: directing water safely away from your driveway’s surface.
Managing runoff isn’t just about preventing washouts; it’s about preserving the structural integrity of your driveway’s base. When water is allowed to saturate the foundation, it can lead to soft spots, potholes, and long-term instability. A well-designed drainage system works with the landscape to create a durable, long-lasting driveway that can handle whatever weather comes its way. From strategically placed ditches to clever grading techniques, you have several options to keep your driveway in top shape. Thinking about water flow before and during construction will save you countless hours and dollars in repairs down the road. Let’s look at some of the most effective methods for managing runoff and protecting your property.
Install Culverts and Drainage Ditches
If you have a significant amount of water flowing across or down your property, culverts and drainage ditches are your first line of defense. A culvert is a large pipe installed underneath the driveway that allows water to pass through without washing out the surface. Ditches, dug alongside the driveway, catch runoff and channel it to a safe drainage area. Adding culverts and ditches can effectively direct water away and prevent damaging washouts. For this kind of work, you may need professional help with excavation, and our skid steer services can handle the heavy lifting to ensure your drainage system is installed correctly from the start.
Crown the Driveway to Direct Water
One of the most effective and straightforward ways to manage water is by crowning your driveway. This simply means grading the driveway so the center is slightly higher than the edges. This subtle peak encourages water to shed off to the sides rather than flowing straight down the middle, where it can gain speed and erode the gravel. A proper crown prevents a central channel from forming and washing away your material. Using a quality base material like Class 5 gravel is essential for creating a firm, compact surface that will hold its crowned shape and stand up to the elements.
Add Water Bars to Prevent Erosion
Think of water bars as speed bumps for runoff. These are small ridges or humps of compacted gravel and soil built diagonally across your driveway at strategic intervals. Their purpose is to interrupt the flow of water, slowing it down and diverting it off the side of the driveway before it can build up enough volume and velocity to cause erosion. You can add these small ridges across the steepest parts of the driveway to effectively slow down water flow. This is a great technique for very steep sections where water runoff is most aggressive, helping to keep your gravel where it belongs.
Use French Drains for Better Drainage
For persistent drainage problems, a French drain is an excellent solution. A French drain is a trench dug alongside your driveway, lined with filter fabric, and filled with gravel and a perforated pipe. This system collects water that runs off the driveway surface and seeps through the ground, channeling it away to a designated outlet. It’s a highly effective way to prevent water from pooling or saturating the base of your driveway, which can lead to instability. The trench is typically filled with a coarse aggregate, and a layer of sand can be used to protect the pipe and improve filtration.
How to Build a Steep Driveway That Lasts
A steep gravel driveway that stands the test of time isn’t about luck; it’s about smart construction from the ground up. The biggest enemies of a sloped driveway are gravity and water. Together, they work to pull your gravel downhill, create deep ruts, and wash away your investment with every heavy rain. To build a driveway that lasts, you need a multi-layered approach that addresses these challenges head-on. It all starts with creating an unshakeable foundation that can handle weight and direct water effectively. From there, you need to think about containment. How will you keep thousands of pounds of loose stone from migrating? This is where modern materials like geotextile fabrics and stabilization grids become essential, acting as the skeleton that holds everything together.
Finally, you need to consider how the driveway interacts with the surrounding landscape. For driveways cut into a hillside, providing structural support with retaining walls isn’t just for looks; it’s a crucial step in preventing landslides and erosion that could undermine your entire project. By focusing on these key areas—a solid base, smart layering, gravel containment, and structural support—you can build a durable and attractive driveway that remains stable for years. It’s a methodical process, but getting it right from the start saves you countless hours and dollars in future repairs.
Prepare and Grade Your Base Correctly
Everything starts with a strong foundation. Before you lay any gravel, you must prepare the sub-base by clearing all vegetation and topsoil, then compacting the earth until it’s firm. The key to preventing water damage is proper grading. Your driveway should have a slight crown, meaning it’s highest in the middle and slopes down toward the edges by about 2-5%. This simple shape encourages water to run off the sides instead of flowing down the center and carving out a path. A solid base layer of compacted Class 5 gravel is perfect for this stage, as it creates a stable, interlocking surface that distributes weight evenly and resists erosion.
Use Geotextile Fabric for a Stable Foundation
One of the best ways to keep your driveway layers from mixing is to use geotextile fabric. This permeable material is laid down directly on top of your compacted sub-base, right before you add your gravel layers. It acts as a separator, preventing your expensive gravel from sinking into the soil below over time. For a sloped surface, this is especially important because it adds a significant layer of stability. The fabric helps lock the base layer in place and improves drainage by allowing water to pass through without taking soil with it. It’s a simple, inexpensive step that makes a huge difference in the long-term health of your driveway.
Lock in Gravel with Grids or Permeable Pavers
To stop gravel from migrating downhill, consider using a stabilization system. Cellular confinement grids or permeable pavers are plastic grids that you lay down and fill with your chosen gravel. These grids create hundreds of small pockets that hold the gravel securely in place, even on a steep incline and with regular vehicle traffic. This method not only prevents ruts and washouts but also creates a more solid, drivable surface. While it’s an extra upfront investment, using a grid system dramatically reduces the amount of gravel you’ll lose to erosion, saving you time and money on future refills and constant raking.
Add Retaining Walls for Extra Support
If your driveway cuts into a hill, retaining walls along the sides can provide critical structural support. These walls hold back the surrounding earth, preventing soil and debris from sliding onto your driveway. They also help define the edges and can be integrated with drainage solutions like French drains or culverts. For particularly long or steep driveways, this is a non-negotiable step for safety and longevity. Building these elements often requires excavation and earthmoving, which is where professional skid steer services can make the job much faster and more precise, ensuring your driveway and the surrounding landscape are properly protected from erosion.
Your Long-Term Steep Driveway Maintenance Plan
A steep gravel driveway isn’t a set-it-and-forget-it project. Because of the slope, it’s constantly battling gravity and the elements. A little bit of regular upkeep goes a long way in preventing major washouts and costly repairs down the road. Think of it as protecting your investment. By staying proactive, you can keep your driveway safe, functional, and looking great for years. Here’s a simple maintenance plan to follow.
Grade the Surface Regularly
This is probably the most important task on your list. Over time, your driveway will develop low spots and ruts from traffic and water runoff. Regular grading smooths everything out, restores the crown, and ensures water flows off the surface correctly instead of pooling. Plan to re-grade your driveway every year or two to keep it in top condition. If you don’t have the equipment, professional skid steer services can handle the job quickly and efficiently, ensuring your driveway maintains its optimal shape and performance.
Refill Gravel and Smooth Out Ruts
After a season of heavy rain or snowmelt, you’ll likely notice some gravel has shifted or washed away. It’s important to fill in these bare spots and ruts to maintain a consistent depth and prevent potholes from forming. You can order a fresh delivery of Class 5 gravel and spread it yourself with a shovel and rake for smaller touch-ups. For larger jobs, a tractor with a front-end loader makes the work much easier. Staying on top of this task ensures your driveway remains stable and provides good traction.
Inspect and Repair Seasonally
Make it a habit to walk your driveway every few weeks, especially after a big storm. Look for early signs of trouble like small gullies forming, gravel piling up at the bottom of the hill, or clogged culverts and ditches. Catching these issues early is key. You can often fix them with a simple rake or shovel by moving gravel back into place to maintain the proper slope. A quick seasonal check-up can save you from a massive headache later on.
Keep Weeds Under Control
Weeds might seem like a small nuisance, but they can cause real problems for a gravel driveway. Their roots can push gravel apart, destabilizing the surface and trapping water. If you didn’t install a weed barrier during construction, you’ll want to stay on top of any unwanted growth. You can pull them by hand or use a weed killer designed for driveways. Keeping your driveway clear of vegetation helps maintain its structural integrity and clean appearance.
What Tools and Materials Will You Need?
Getting your project started on the right foot means gathering all your supplies beforehand. A steep driveway requires specific materials to ensure it’s stable, drains properly, and stands up to Minnesota weather. Having the right tools also makes the job much smoother, whether you’re tackling it yourself or just preparing the site for a professional. Let’s walk through exactly what you’ll need to build a gravel driveway that lasts.
Your Essential Materials Checklist
The foundation of your driveway is the most critical part. For a solid base that promotes good drainage, we recommend using Class 5 gravel. It compacts well to create a stable layer. For the top surface, you need something that provides excellent grip. Crushed, angular gravel is ideal because the jagged edges lock together, preventing the stones from sliding down the slope. Recycled asphalt milling is another great option that hardens over time for a durable finish. Don’t forget geotextile fabric to place between the soil and your base layer; it prevents weeds and keeps your gravel from sinking into the ground.
The Right Tools and Equipment for the Job
The tools you need will depend on the scale of your project. For smaller jobs, you can get by with a sturdy shovel, a steel rake, a wheelbarrow, and a hand tamper for compaction. If you’re planning a larger installation, renting a plate compactor is a must for a solid base. For moving large amounts of material, a tractor with a front-end loader or a UTV with a grader attachment can save you a lot of time and effort. If the job involves significant excavation or grading, consider bringing in a professional. Our skid steer services can handle the heavy lifting and ensure your site is perfectly prepared.
How to Calculate Your Material Needs
Guessing how much gravel to order can lead to extra costs or last-minute runs for more material. To get an accurate estimate, start by measuring your driveway’s length and width in feet. Then, decide on the depth of your gravel layers (typically 4-6 inches for the base and 2-4 inches for the top layer). With these three measurements, you can find the total volume you need. To make it even easier, you can plug your numbers into a cubic yardage calculator to get a precise figure. It’s always a good idea to add about 10% to your final number to account for compaction and any small adjustments.
How to Install Your Steep Gravel Driveway
Putting in a gravel driveway on a steep slope is a serious project, but breaking it down into clear steps makes it manageable. Proper installation is the key to a driveway that looks great and holds up against Minnesota weather for years to come. It’s all about creating a solid, stable surface that can handle rain, snow, and daily traffic without washing away.
Step 1: Site Prep and Excavation
Before any gravel gets delivered, you need to prepare the site. This means clearing away all vegetation, topsoil, and any large rocks to create a clean slate. The next step is grading the slope to ensure a consistent, even surface. This is where professional skid steer services can save you a ton of time and effort. A well-prepared base is non-negotiable. As the experts at Bray Top Soil and Gravel note, you should “always start with a strong base layer. This helps spread weight evenly and lets water drain well.” A solid foundation prevents sinking and shifting, which is especially important on a steep grade where gravity is working against you.
Step 2: Layering and Compacting
Once your site is graded, it’s time to build your layers. Start with a geotextile fabric to separate the soil from your gravel and prevent weed growth. Next, lay down a sub-base of larger crushed stone, like our reliable Class 5 gravel, and compact it thoroughly. For steep driveways, many find success with a gravel grid system. According to the team at Beauxfort, these grids sit under the gravel and lock the stones into small cells, which stops them from moving around. Similarly, TRUEGRID Pavers explains that their permeable pavers trap gravel inside, preventing movement even with heavy vehicle use. After installing a grid, you can add your top layer of smaller, angular gravel and compact it one last time.
DIY vs. Hiring a Pro: Making the Call
Deciding whether to tackle this project yourself or hire a professional comes down to your budget, timeline, and experience. If you’re comfortable operating heavy machinery and have the time, a DIY approach can be rewarding. Some homeowners even find it cost-effective to buy their own equipment, like a tractor with a front-end loader, which allows them to spread new stone themselves for future maintenance. However, steep slopes add a layer of complexity that can be tricky. A professional crew has the experience to handle drainage, grading, and compaction correctly, ensuring your driveway is built to last. For a project this critical, hiring a pro can provide peace of mind and a better long-term result.
Related Articles
- 6 Best Types of Gravel for Driveways Compared – Minnesota Aggregates
- How to Spread Gravel on a Driveway the Right Way – Minnesota Aggregates
- What is the Best Gravel for a Driveway? 5 Types Compared – Minnesota Aggregates
Frequently Asked Questions
What is the most common mistake people make with steep gravel driveways? The biggest mistake is focusing on the top layer of gravel while neglecting the foundation. A steep driveway will fail every time without a properly prepared and compacted sub-base. People often skip the crucial steps of grading the driveway with a crown (a slight peak in the middle) and laying down a solid base of compacted Class 5 gravel. This foundation is what provides stability and manages water runoff, so getting it right from the start saves you from endless repairs later.
How often will I need to add more gravel to my sloped driveway? This really depends on the steepness of your driveway, how much traffic it gets, and the severity of Minnesota’s weather. A well-built driveway with proper drainage and a stabilization grid might only need a light touch-up every few years. However, if your slope is particularly aggressive, you should plan on inspecting it each spring after the snow melts and refilling any low spots or ruts as needed to keep the surface even and safe.
Is a gravel grid or stabilization system really worth the extra cost? For a gentle slope, you might be fine without one. But for a genuinely steep driveway, a grid system is one of the smartest investments you can make. It essentially creates a honeycomb structure that locks your gravel in place, preventing it from washing away during heavy rain or shifting under the weight of vehicles. While it adds to the initial project cost, it dramatically cuts down on long-term maintenance and the expense of replacing lost gravel year after year.
Can I use smooth, rounded river rock for a more decorative look? I would strongly advise against using smooth river rock for the main driving surface of a sloped driveway. Think of it like trying to drive on a layer of marbles; the stones won’t interlock, making the surface unstable and slippery, which is a major safety hazard. If you love the look, consider using river rock as a decorative border along the edges where it won’t affect traction, but stick with angular, crushed stone for the path your tires will actually travel on.
My current steep driveway is a mess. What’s the first step to fixing it? The first thing you need to do is figure out why it’s failing, and the answer is almost always related to water. Watch where the water goes during the next rainstorm. If it’s carving a path down the middle, your driveway needs to be regraded with a proper crown to shed water to the sides. If water is flowing onto the driveway from the surrounding landscape, you likely need to install a drainage ditch or culvert to intercept it. Addressing the water problem is the only way to achieve a lasting fix.