
Nothing is more frustrating than finishing a big project only to see it fail. For gravel driveways and paths, failure often looks like ruts, puddles, and weeds popping through within the first year. These problems aren’t just bad luck; they’re the direct result of common, avoidable mistakes made during installation. From choosing the wrong type of stone to skipping proper compaction, small errors can lead to big headaches. This guide is your roadmap to getting it right the first time. We’ll show you the easy way to spread gravel by focusing on the crucial steps that guarantee a stable, long-lasting surface, helping you sidestep the pitfalls that trip up so many DIY projects.
Key Takeaways
- Prepare your foundation for lasting results: Before spreading any gravel, clear the area completely, grade the ground with a slight crown for proper drainage, and select a compactible, angular stone like Class 5 to create a solid base.
- Choose the right equipment for the job: Use hand tools for small projects like garden paths, but switch to power equipment like a tractor or skid steer for larger areas. Using the correct tools saves time and ensures a more professional, even finish.
- Spread and compact like a pro: For a durable, smooth surface, spread your gravel in thin, even layers instead of all at once. Compact each layer thoroughly to lock the stones together and prevent future shifting, ruts, and potholes.
What Tools Do You Need to Spread Gravel?
Choosing the right tools for spreading gravel really comes down to the size of your project. You don’t need to rent a tractor for a small garden path, but you also don’t want to spread gravel for a half-mile driveway with a single shovel. The right equipment not only saves your back but also ensures the job gets done efficiently and looks professional.
Think of it in three simple categories: small jobs that you can tackle with basic hand tools, mid-sized areas where power equipment makes a huge difference, and large-scale projects that call for heavy machinery. Let’s break down what you’ll need for each.
Hand Tools for Small Jobs
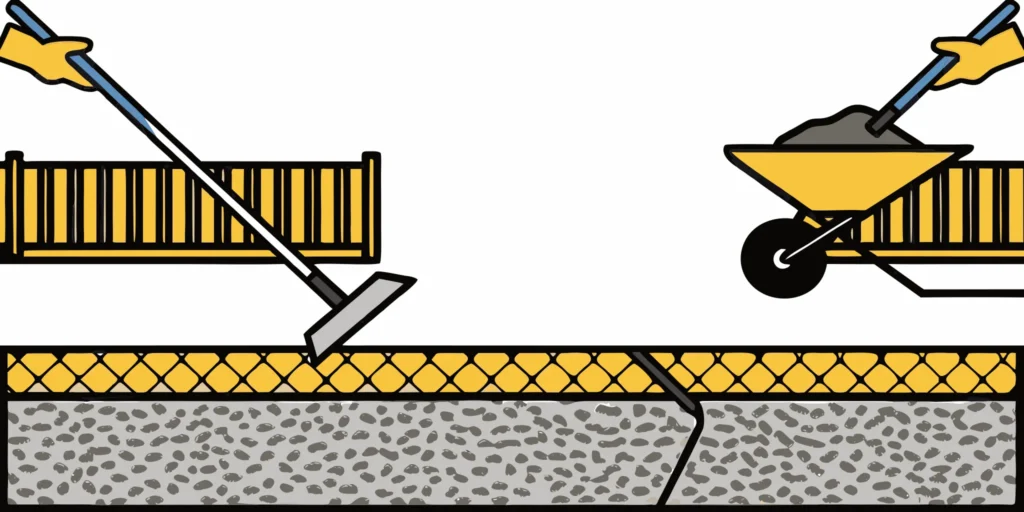
If you’re working on a small, contained area like a walkway, a fire pit surround, or patching up a small section of your driveway, you can get the job done with a few simple hand tools. A sturdy wheelbarrow is your best friend for moving gravel from the delivery pile to where you need it. From there, a good scoop shovel will help you place the material, and a wide, hard-tined garden or gravel rake is perfect for spreading it evenly. For a really solid and stable surface, especially for something like a walkway, a hand tamper is a great tool for compacting the gravel down.
Power Equipment for Mid-Sized Areas
When you move up to a project like a full home driveway or a large patio base, power equipment becomes a game-changer. These tools often attach to a garden tractor or an ATV and can save you hours of manual labor. A box blade is fantastic for spreading gravel in even layers and getting a nice, level surface. A power rake can also work well for smoothing things out and creating a clean finish. Using equipment for these jobs helps you maintain a consistent depth, which is key for a durable surface. Before you order, be sure to use a cubic yardage calculator to get exactly the right amount of material.
Heavy Machinery for Large-Scale Projects
For big projects like building a long private road, a large parking area, or preparing a construction site, you’ll need heavy machinery. We’re talking about equipment like a skid steer with a bucket attachment, a tractor with a front-end loader, or a specialized gravel spreader. This machinery is designed to move and spread large quantities of materials like Class 5 gravel quickly and effectively. If you don’t own this type of equipment, renting it is a solid option. For local projects, you can also hire professional skid steer services to handle the heavy lifting, ensuring your project stays on schedule and is completed correctly.
How to Prep Your Area for Gravel
A little prep work goes a long way in making sure your new gravel surface looks great and lasts for years. Before you even think about spreading the gravel, taking these few steps will create a stable, long-lasting foundation and save you headaches later on. It’s all about setting your project up for success from the ground up.
Clear and Clean the Site
First things first, you need a clean slate. Start by clearing the entire area of any grass, weeds, large rocks, or other debris. You’ll want to dig down about two to four inches to remove the topsoil and create a solid base for your gravel. This step is crucial because it prevents the gravel from sinking into soft ground and becoming uneven over time. For smaller paths, a shovel and a wheelbarrow will do the trick. If you’re tackling a larger area like a driveway, our skid steer services can handle the heavy lifting and excavation for you, ensuring a perfectly prepared site.
Level and Grade the Ground
Once your area is cleared, it’s time to get it level. But level doesn’t mean perfectly flat. For driveways and walkways, you’ll want to create a slight crown, which is a gentle slope from the center down to the edges. This simple grading technique is a game-changer for drainage, as it directs rainwater to run off the sides instead of pooling in the middle and creating ruts. Use a sturdy landscape rake to move the soil around and a level to check your work. Taking the time to grade properly now will protect your investment and keep your gravel surface stable through every Minnesota season.
Install a Weed Barrier and Edging
This final prep step is your secret weapon for a low-maintenance gravel area. Before you lay down any gravel, roll out a high-quality landscape fabric over the entire prepared surface. This weed barrier does two important jobs: it stops pesky weeds from growing up through your gravel and prevents the stones from sinking into the soil below. Next, install a sturdy edging material like metal, stone, or heavy-duty plastic along the borders of your project. Edging creates a crisp, clean look and, more importantly, keeps your gravel neatly contained so it doesn’t spill into your lawn or garden beds.
How to Choose and Calculate Your Gravel
Getting your gravel project right starts long before you pick up a shovel. The two most important decisions you’ll make are choosing the right type of gravel and accurately calculating how much you need. It might seem like a small detail, but the type of stone you select directly impacts the stability and longevity of your surface. Picking the wrong material can lead to a shifty, unstable driveway or path that requires constant maintenance and top-offs. Think of it like building a house on a weak foundation; it just won’t hold up over time. On the other hand, miscalculating the volume is a classic project pitfall. It can leave you with either too little material to finish the job, forcing a second delivery fee, or a costly surplus pile sitting in your yard with nowhere to go. Taking a few minutes to plan these details will save you time, money, and a lot of frustration down the road, ensuring your new project is built to last from the ground up.
Picking the Right Gravel (Like Class 5)
When you’re choosing gravel, think about stability. You want a material that will lock together to create a firm, solid surface. That’s why it’s best to avoid rounded stones, like pea gravel, which tend to roll and shift underfoot. Instead, look for angular, crushed stone that includes a mix of different-sized particles and dust, often called “fines.” These sharp edges and fine materials help the gravel compact tightly, creating a surface that stays put. A perfect example of this is Class 5 gravel, a popular choice for driveways and bases because it packs down so well.
Considering Gravel Size
The depth of your gravel layer is just as important as the type you choose. The right thickness depends entirely on what you’ll be using the area for. For a standard residential driveway that will see regular car traffic, a depth of four to six inches is a great starting point. This provides enough of a base to handle the weight without shifting. For a simple garden path, you might get away with a little less. However, if you’re building a surface that needs to support heavy equipment or constant traffic, you’ll want to plan for a thicker, more substantial base to ensure long-term durability.
Calculating How Much You Need
Once you know the type and depth, it’s time to figure out the quantity. First, measure the length and width of your area in feet and multiply them to get the total square footage. Then, you’ll need to factor in your desired depth. A general rule of thumb is that one cubic yard of gravel will cover about 100 square feet at a three-inch depth. If math isn’t your favorite thing, don’t worry. You can skip the guesswork and use an online cubic yardage calculator to get a precise number. Just plug in your dimensions, and it will do the work for you.
Spreading Gravel on Small Projects
Tackling a smaller gravel project, like a new walkway, a garden path, or a small patio base, is a completely manageable weekend task. You don’t always need heavy machinery to get a great result. With a bit of muscle and the right technique, you can spread gravel efficiently and achieve a clean, professional look. The key is to work smart, not just hard. Whether you’re using basic hand tools or bringing in a wheelbarrow to help, the process is straightforward. We’ll walk through the best methods for getting your gravel from the pile to its final, perfectly-graded home.
Spreading by Hand with a Rake and Shovel
For very small areas, you can get the job done with just a few essential hand tools. You’ll want a sturdy scoop shovel and a hard-tined garden rake. A wider landscape rake is also great for the final leveling. When you start shoveling, work from the outer edges of your gravel pile. It’s much easier to slide the shovel under the stones this way than trying to dig into the center of the mound. As you spread the material, aim to overfill the area just slightly. The gravel will settle and compact over time, so starting with a little extra ensures you won’t have low spots later. This method is perfect for projects where precision is more important than speed.
Using a Wheelbarrow to Distribute
If your project requires more than just a few shovelfuls of gravel, a wheelbarrow will be your best friend. It saves your back and dramatically speeds up the process of moving material from the main pile to where it needs to go. The most efficient way to work is to dump small, evenly spaced piles of gravel throughout your project area. This prevents you from having one giant mound to rake across the entire space. From there, you can use your shovel and rake to spread each smaller pile, connecting them to create a uniform layer. Before you begin, use our Cubic Yardage Calculator to confirm just how much material you’re moving.
Getting an Even Finish Manually
Once your gravel is spread, the final step is to compact it for a stable, long-lasting surface. For a simple DIY approach, you can use your own vehicle. After spreading the gravel as evenly as possible with a rake, slowly drive your car back and forth over the entire area. This weight does a surprisingly good job of packing the stones down. After the first pass, you may want to rake it smooth one more time and then drive over it again. For the most durable and professional finish, consider renting a plate compactor. This machine will give you the firm, even compaction needed for high-traffic walkways or patio bases.
Spreading Gravel on Medium-Sized Projects
When your project is too big for a wheelbarrow but doesn’t quite require a full construction crew, it’s time to bring in some power equipment. For medium-sized areas like long driveways, parking pads, or large garden paths, using a tractor or a skid steer is the most efficient way to get the job done. This approach not only saves your back from hours of shoveling but also gives you a much more even and professional-looking result that will last for years.
Using machinery allows you to move large amounts of Class 5 gravel quickly and spread it with greater precision than you could ever achieve by hand. It turns a weekend-long chore into a task you can complete in an afternoon. If you don’t own a tractor, you can often rent one from a local equipment supplier. Another great option is to hire professional skid steer services to handle the heavy lifting and spreading for you. This section will walk you through the best techniques for using a tractor to create a smooth, durable gravel surface that looks great and functions perfectly.
Using a Box Blade on a Tractor
A box blade attachment is a fantastic tool for spreading gravel evenly over a medium-sized area. It’s essentially a three-sided metal box with blades on the front and back that attaches to the back of a tractor. As you drive, it drags and smooths the gravel, creating a consistent layer. Using a box blade is best for spreading a thick, even layer of rock over a large area like a driveway. It helps you avoid the high and low spots that can happen when you only use a front-end loader, giving your project a clean, level finish from the start.
Spreading Techniques for Tractors
Proper technique is key when using a tractor’s front-end loader to move gravel from the pile to your project area. To get a full bucket, angle it down slightly as you drive into the gravel pile. As you move forward, slowly raise and tilt the bucket back to fill it completely without spilling. When you’re ready to pour, raise the bucket just high enough to see where you’re going. It’s a good idea to do a small test pour by tilting the bucket slightly to see where the gravel will land. This helps you get a feel for the flow before you start spreading it across the entire area.
Maintaining a Consistent Depth
Achieving a uniform depth is what separates a DIY job from a professional one. When using a box blade, the trick is to set it and forget it. For a consistent depth, adjust the attachment so the front blade is slightly off the ground and the back blade is just touching. This setup allows the box blade to evenly distribute the gravel as you drive. Trying to manually adjust the depth with the hydraulics during each pass often leads to an uneven surface, with some spots too high and others too low. Before you start, make sure you have enough material by using a cubic yardage calculator to plan your project.
The Easiest Way to Spread Gravel on Large Projects
When you’re tackling a big project like a long driveway or a large parking area, spreading gravel by hand is simply out of the question. Your back would give out long before the job was done. The good news is, you don’t have to. For large-scale jobs, the key is to work smarter, not harder. By using the right equipment and coordinating with your supplier, you can get a smooth, even layer of gravel with a fraction of the physical effort. It’s all about leveraging the machinery and services available to you to get the job done efficiently and professionally. Let’s walk through the best methods for handling a serious amount of gravel.
Using the Dump Truck Tailgate Method
This is one of the most effective and time-saving tricks in the book. The tailgate method, or “tailgate spreading,” is exactly what it sounds like. When your gravel is delivered, you can ask the truck driver to slowly drive forward while the dump bed is raised, allowing the gravel to flow out of the tailgate in a controlled stream. This lays down a relatively even layer of material as the truck moves along the path. It dramatically reduces the amount of raking and shoveling you’ll need to do later. It’s a common request, so don’t be shy about asking your supplier if they can do this for you when you schedule your delivery.
Renting Professional Equipment
For a truly professional finish on a large area, renting specialized equipment is a fantastic option. A skid steer with a bucket or a specialized spreader attachment can make quick work of distributing and leveling large piles of gravel. This gives you complete control over the depth and evenness of the spread. If you’re not comfortable operating heavy machinery yourself, you can hire a professional to do it for you. Our skid steer services are perfect for this, as we can handle the spreading and grading to ensure your project base is solid and perfectly prepared for whatever comes next.
Coordinating Multiple Deliveries
Large projects often require more than one truckload of gravel. A little planning here can save you a lot of headaches. When you place your order, talk to your supplier about the scope of your project and coordinate the delivery schedule. For maximum efficiency, you can combine this tip with the first one. Request that each driver uses the tailgate method to spread their load. This creates a continuous, even layer across the entire project area, minimizing gaps and piles. Clear communication with your supplier is key to making sure the entire process, from delivery to spreading, goes off without a hitch.
How to Get a Professional Finish
Spreading gravel is one thing, but getting that clean, professional look that lasts is another. It’s all about the finishing touches. Once your gravel is down, a few extra steps will make a huge difference in how your project looks and performs over time. Paying attention to drainage, compaction, and the overall shape of your surface prevents common problems like puddles, ruts, and shifting stones. These techniques are what separate a quick DIY job from a durable, long-lasting surface that looks like it was done by a pro. Taking the time to get these details right means less maintenance and a better-looking driveway, path, or patio for years to come. It’s the part of the process where you can really see the quality of your work shine through. A well-finished gravel area not only looks better but also provides a safer, more stable surface for walking or driving. Think of it as the final polish on your project, ensuring your hard work pays off with a result you can be proud of. This isn’t about making the job more complicated; it’s about working smarter to create a surface that stands up to Minnesota weather and daily use.
Following Proper Spreading Patterns
How you spread your gravel matters just as much as what you spread. The key is to create a slight, consistent gradient that encourages water to run off instead of pooling. When you’re laying down material like Class 5 gravel, work in thin, even layers rather than dumping it all in one spot. Use a rake to pull the material, not push it, to avoid creating uneven clumps. By building up the surface gradually, you can maintain control over the depth and slope, ensuring a smooth, uniform finish that drains properly and stands up to traffic and weather.
Compacting Your Gravel Correctly
Compaction is the secret to a stable and long-lasting gravel surface. This step locks the aggregate particles together, creating a solid base that resists shifting and rutting. For small areas, a hand tamper will do the trick. For driveways or larger patios, you’ll want to use a plate compactor or a roller. It’s best to compact your gravel in two- to three-inch layers. Spreading all your gravel at once and then trying to compact it will only solidify the top layer, leaving the base loose. Regular compaction is essential for long-term stability and a consistently smooth surface.
Creating a Crown for Proper Drainage
One of the best ways to manage water and prevent a soggy, rutted mess is to build a crown into your gravel driveway or path. A crown is a slight arch in the center of the surface, making it just a little higher than the edges. This gentle slope allows rain and snowmelt to run off to the sides instead of sitting in the middle. You don’t need a dramatic hump; a grade of about a quarter-inch to a half-inch per foot is perfect. This simple grading technique is a game-changer for preventing driveway issues and keeping your gravel surface in great shape.
Common Gravel Spreading Mistakes to Avoid
Spreading gravel seems straightforward, but a few common missteps can turn a promising project into a lumpy, uneven mess. Getting a durable, professional-looking finish is all about avoiding the easy-to-make errors that can compromise your hard work. By taking the time to sidestep these pitfalls, you can ensure your new gravel surface looks great and lasts for years, saving you from future headaches and costly repairs. Let’s walk through the most frequent mistakes so you can get your project done right the first time.
Choosing the Wrong Type of Gravel
Not all gravel is created equal, and choosing the right type is the first step toward a successful project. The biggest mistake is picking a material that doesn’t match your goal. For instance, if you need good drainage, you’ll want a clean, washed rock with plenty of space between the stones for water to pass through. On the other hand, if you’re building a driveway or a base for a shed, you need a material that compacts into a solid, stable surface. Using a gravel with too many fine particles (a “minus” gravel) in a drainage-heavy area can create a muddy, water-logged problem. For a solid foundation, a product like Class 5 gravel is specifically designed to lock together tightly when compacted.
Spreading or Compacting Improperly
Simply dumping gravel and raking it around is a recipe for future problems. One of the most common issues from improper spreading is the formation of potholes and ruts. A well-laid gravel driveway should have a slight crown, meaning it’s a little higher in the middle than on the sides. This gentle slope encourages water to run off instead of pooling and creating soft spots. Equally important is compaction. Spreading gravel in thin layers and compacting each one creates a dense, interlocked surface that can handle traffic and weather. Skipping this step leaves the gravel loose and prone to shifting, which means you’ll be dealing with an uneven surface in no time. For a perfectly graded and compacted finish, professional skid steer services can make all the difference.
Skipping Site Prep and Drainage
The final gravel surface is only as good as the ground it’s sitting on. Rushing through or skipping site preparation is one of the most critical mistakes you can make. Before any gravel is delivered, the area must be completely cleared of vegetation, graded to be level, and compacted to create a firm sub-base. Proper drainage planning is a huge part of this. You need to ensure the ground is sloped correctly to guide water away from foundations and prevent it from sitting under your new gravel. If you lay gravel on a poorly prepared base, you’ll end up with a lumpy, unstable surface that will sink, shift, and wash away with the first heavy rain. Taking the time to prepare the site correctly is the best way to protect your investment.
How to Maintain Your New Gravel Surface
You’ve put in the work to create a beautiful and functional gravel surface. Now, let’s make sure it stays that way. Proper maintenance protects your investment and keeps your driveway, path, or patio looking sharp for years. The good news is that it doesn’t require a ton of effort, just a little consistency. By staying on top of a few key tasks, you can prevent small issues like puddles or stray stones from turning into bigger headaches. Think of it as simple upkeep that ensures your project’s long-term success.
Regular Grading and Topping Off
Over time, traffic and weather can cause your gravel to shift, creating low spots or ruts. The easiest fix is regular grading. For smaller areas, a sturdy landscape rake is all you need to pull gravel from high spots into lower ones. For larger driveways, you might use a drag harrow or a box blade. The goal is to keep the surface smooth and even.
Every couple of years, you’ll also want to top off the surface with a fresh layer of gravel. This replenishes any material that has been washed away or broken down. Adding an inch or two of new Class 5 gravel will restore the surface, improve its appearance, and maintain its strength and stability.
Maintaining Edges and Drainage
One of the best ways to keep your gravel area looking tidy is to make sure the gravel stays where it belongs. Installing a sturdy edging material, like metal strips, pavers, or landscape timbers, creates a clean border and prevents gravel from spilling into your lawn or garden beds. This simple step makes a huge difference in the overall look and reduces cleanup.
Proper drainage is also essential for longevity. A well-designed gravel surface should have a slight crown, meaning it’s a little higher in the center than at the edges. This gentle slope encourages rainwater to run off to the sides instead of pooling in the middle, which is the primary cause of potholes and erosion.
Seasonal Care Tips
A little seasonal attention goes a long way. In the spring and after heavy rains, take a walk around your gravel area. Watch where the water flows and look for any spots where it’s starting to pool or create channels. Catching these drainage issues early allows you to fix them with a rake before they become major problems. In the fall, be sure to clear away fallen leaves and other organic debris. If left to decompose, they can turn into soil, which can encourage weed growth right on top of your beautiful gravel.
Related Articles
- Your Guide to the Best Equipment for Spreading Gravel
- How to Spread Gravel on a Driveway the Right Way
- A Guide to Professional Gravel Spreading Services
Frequently Asked Questions
What type of gravel is best for a driveway? For a stable and long-lasting driveway, you want an angular, crushed stone that packs down tightly. We almost always recommend Class 5 gravel because it contains a mix of different-sized stones and fine particles. These components lock together when compacted, creating a solid surface that resists shifting. You should generally avoid rounded stones, like pea gravel, for driveways because they tend to roll and move under the weight of a vehicle.
How deep does my gravel need to be? The right depth depends on what you’re using the area for. For a typical residential driveway that sees daily car traffic, a depth of four to six inches is a solid target. This provides enough of a base to distribute weight and prevent ruts. For a simple garden path, you can use a little less, but for any surface that needs to support heavy trucks or equipment, you should plan for a thicker, more substantial base.
Is a weed barrier really necessary before I spread gravel? Yes, we highly recommend it. Taking the time to lay down a quality landscape fabric is one of the best things you can do for the long-term health of your project. It serves two critical functions: it prevents weeds from growing up through your new gravel, and it keeps the stones from sinking into the soil beneath. This one step will save you a lot of maintenance and keep your surface looking clean for years.
How often will I need to add more gravel to my driveway? Over time, even the best gravel driveways will settle and lose some material to traffic and weather. You can expect to top off your surface with a fresh, thin layer of gravel every two to three years. This simple maintenance task replenishes any lost stone, fills in low spots, and keeps the driveway looking and performing its best.
What is “crowning” and why is it so important for a gravel surface? Crowning is the technique of making the center of your driveway or path slightly higher than the edges, creating a gentle arch. This is incredibly important for proper drainage. The slope allows rainwater and snowmelt to run off to the sides instead of pooling in the middle. Without a crown, you’re likely to end up with puddles that can lead to soft spots, ruts, and potholes.