
We’ve all seen it: a once-beautiful paver patio that has become a lumpy, uneven mess with weeds sprouting from every joint. This frustrating outcome is almost never the fault of the pavers themselves. It’s a sign of a failed base. A strong foundation is what separates a professional-looking project from one that needs repairs in just a few years. The key is building a proper multi-layered system, and a critical component of that system is the one-inch setting bed directly beneath the pavers. This guide will show you why using a quality concrete sand for paver base is non-negotiable for achieving the stability and drainage your project needs to succeed.
Key Takeaways
- Use the right sand for the right purpose: Concrete sand is specifically for the one-inch bedding layer under your pavers, creating a stable and drainable cushion. Polymeric sand is completely different and used only for filling the joints between pavers to lock them in place.
- Build your foundation in layers: A durable paver project relies on a complete system, not just sand. Always start with a compacted gravel sub-base, then add your one-inch layer of concrete sand to ensure a stable, long-lasting installation that can handle Minnesota weather.
- Never skip compaction or use substitutes: Using the wrong material, like play sand or dry concrete mix, will ruin your project. For a professional result, you must use a plate compactor on both the gravel sub-base and the final pavers to prevent sinking and shifting.
What Is Concrete Sand?
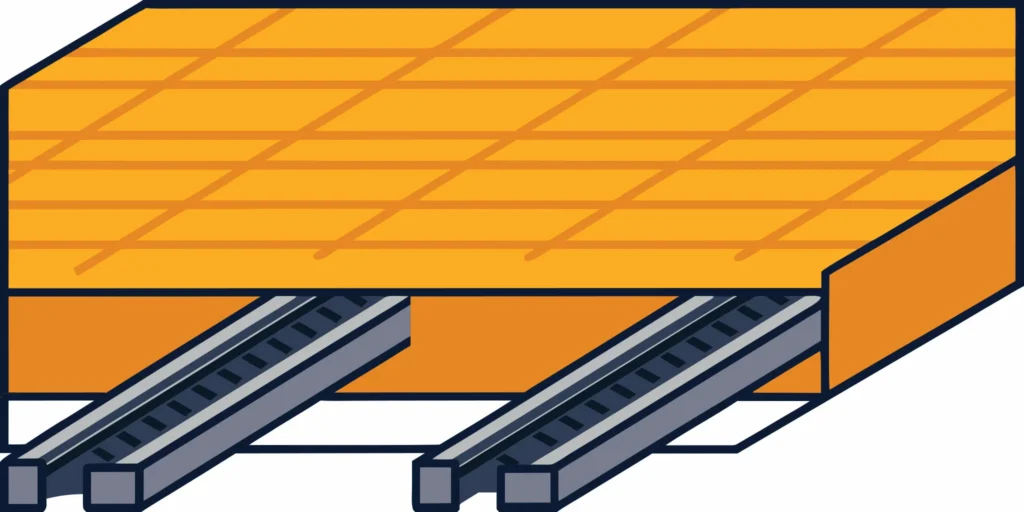
Let’s clear up a common question: what exactly is concrete sand? Think of it as the industry-standard bedding material for laying pavers. It’s the crucial layer that goes directly underneath the pavers, providing a stable, compactable, and level cushion. Typically, you’ll spread a one-inch to one-and-a-half-inch layer of concrete sand over your compacted gravel base to create the perfect surface for setting your pavers. This layer is what allows you to make those tiny adjustments to get each paver perfectly level.
Despite the name, there is no actual concrete in it. The name comes from its primary use as a key ingredient in concrete and asphalt mixes. It’s a coarse, granular sand that has been washed and screened to remove fine particles. The grains are angular and sharp, which is exactly what you want for a paver base. This texture allows the sand particles to interlock when compacted, forming a strong, stable base that resists shifting. At the same time, its coarseness allows water to drain through, preventing water from pooling and causing issues like frost heave later. Getting the right sand delivery is a critical first step for a paver project that will stand the test of time, ensuring your patio or walkway looks great for years.
How It Differs from Other Sands
Not all sand is created equal, especially when it comes to paver projects. The unique qualities of concrete sand make it the right choice for the job. Its coarse, angular grains are the key. This shape allows the particles to lock together firmly when compacted, creating a solid base that still lets water pass through. This drainage is essential for preventing frost heave and erosion under your patio or walkway.
This is why you should steer clear of other types, like masonry sand or play sand, for your paver base. These sands have very fine, rounded grains. They feel softer, but they don’t compact properly. Instead of locking together, the round particles just shift around, and their fine texture means they can easily wash away over time. Using the wrong sand will lead to an unstable base and uneven pavers down the road.
Concrete Sand vs. Polymeric Sand
It’s easy to mix up concrete sand and polymeric sand, but they have two very different and important jobs in a paver installation. You can think of it this way: concrete sand is for the foundation, and polymeric sand is for the finish. You use concrete sand to create the bedding layer under your pavers, giving them a stable surface to rest on.
Once your pavers are set and compacted, you use polymeric sand to fill the joints between them. Polymeric sand is a special product mixed with a binder that activates with water. When you sweep it into the joints and lightly mist it, the binders harden like a flexible grout. This process locks your pavers tightly in place, helps prevent weeds from growing in the cracks, and keeps ants from building nests.
Why Use Concrete Sand for a Paver Base?
When you’re planning a paver project, it’s easy to focus on the pavers themselves. But the secret to a beautiful, long-lasting patio or walkway lies just beneath the surface. The thin layer of sand directly under your pavers, known as the bedding layer, is crucial. Using the right material here makes all the difference, and that’s why concrete sand is the go-to choice for professionals. It’s not just about creating a level surface; it’s about building a foundation that provides stability, allows for proper drainage, and can stand up to whatever the weather throws at it. Let’s look at exactly why concrete sand is the smart choice for your paver base.
Achieve Superior Stability
The key to a paver installation that doesn’t shift or settle is a stable bedding layer. Concrete sand provides exactly that. Unlike round, fine particles found in play sand, concrete sand is composed of coarse, angular grains. When compacted, these sharp edges lock together to form a solid, interlocking base. This creates a firm cushion that holds each paver securely in place, preventing them from wobbling or sinking over time. This stability is what gives your finished project that professional, even surface that will last for years, without the need for constant adjustments.
Ensure Proper Drainage
Water is the biggest enemy of a paver installation. If it pools beneath the surface, it can erode the base and cause pavers to heave or settle. This is where concrete sand truly shines. Its coarse and angular texture allows water to drain through it freely, even after it has been compacted. This prevents water from getting trapped under your pavers, protecting the integrity of the entire system. Proper drainage is essential for preventing long-term damage, and using a quality sand delivery service ensures you get the right material for the job.
Withstand Minnesota’s Climate
Here in Minnesota, we know our weather can be tough on outdoor projects. The constant freeze-thaw cycles can wreak havoc on improperly installed pavers, turning a beautiful patio into an uneven mess. Concrete sand is your best defense. Its excellent drainage prevents water from freezing and expanding beneath the pavers, which is the primary cause of winter heaving. Combined with its superior stability, this makes it the ideal material for a durable, Minnesota-proof paver base. For a truly robust foundation, this sand layer should sit on a well-compacted Class 5 gravel sub-base, creating a system built to last through every season.
How to Build a Paver Base with Concrete Sand
Building a paver patio or walkway is a rewarding project, and getting the base right is the most critical part of the job. A solid base ensures your pavers won’t shift, sink, or become uneven over time. Using concrete sand is a key component of that strong foundation. Follow these five steps to build a durable paver base that will last for years, even through Minnesota’s toughest seasons. We’ll walk through everything from preparing the ground to locking in the final paver.
Step 1: Prepare the Gravel Sub-Base
Your paver project is only as strong as its foundation. Start by excavating the area to a depth of about 4 to 6 inches, plus the height of your pavers. This space will hold your sub-base, which provides the primary structural support. For a reliable foundation, we recommend using a high-quality aggregate like Class 5 gravel. Once you’ve spread the gravel evenly, you need to compact it thoroughly with a plate compactor. This step is essential for creating a dense, stable layer that won’t settle or shift later on. A solid, compacted sub-base is your first line of defense against future paver problems.
Step 2: Lay Geotextile Fabric
Next, it’s time to lay down a layer of geotextile fabric over your compacted gravel sub-base. Think of this fabric as a separator that keeps your layers distinct. It prevents the concrete sand you’re about to add from mixing into the gravel below, which is crucial for maintaining stability and proper drainage. This step is especially important for projects in Minnesota, where freeze-thaw cycles can cause the ground to shift. By keeping your base materials separate, the geotextile fabric helps ensure the entire system remains intact and functional for the long haul. Overlap the seams by at least 12 inches to ensure complete coverage.
Step 3: Spread and Screed the Concrete Sand
Now you can add the concrete sand. You’ll need a consistent, 1-inch layer to create a perfect setting bed for your pavers. After you get your sand delivered, pour it over the geotextile fabric. To get it perfectly level, a technique called “screeding” is your best friend. Place two straight pipes or rails on either side of the area and pull a straight 2×4 board across them to smooth the sand to a uniform depth. Once your sand is perfectly flat, avoid walking on it or disturbing it. This pristine surface is what will allow your pavers to sit evenly and securely.
Step 4: Set Your Pavers
With your sand bed prepared, you can begin carefully placing your pavers. Start at a corner or along a straight edge, like the side of your house, and work your way out. Gently set each paver onto the sand, being careful not to slide it, which can disrupt the level surface. Keep a small gap between each paver for the joint sand later. You can use a rubber mallet to lightly tap the pavers into place and make minor height adjustments as you go. The goal is to create a flat, uniform surface across the entire project area before moving on to the final step.
Step 5: Compact Pavers and Finish the Joints
The final step locks everything together for a professional finish. First, run a plate compactor over the entire paver surface to firmly set them into the sand bed. This action forces sand up into the joints from below and ensures each paver is secure. After compacting, sweep polymeric sand into the joints between the pavers. This specialized sand contains a binder that hardens when activated with water. It locks the pavers together, prevents weeds from growing in the cracks, and resists erosion from rain. Follow the manufacturer’s instructions for wetting the sand to ensure it cures properly.
Common Mistakes to Avoid with Concrete Sand
Building a beautiful paver patio or walkway is incredibly rewarding, but a few common missteps can turn your dream project into a real headache. Getting the base right is everything, and that means using the right materials in the right way. Let’s walk through the mistakes I see most often so you can avoid them from the start. A solid foundation ensures your hard work stands up to Minnesota weather and lasts for years to come. By sidestepping these pitfalls, you’re setting yourself up for a project you can be proud of.
Using the Wrong Type of Sand
Not all sand is created equal, and using the wrong kind is one of the quickest ways to derail a paver project. It might be tempting to grab a bag of play sand or all-purpose sand, but these fine, rounded grains won’t lock together to create a stable base. They shift and wash away too easily. Even worse is using a “sand topping mix” or anything that contains cement; it will harden into a concrete-like slab, preventing drainage and leading to cracks. You need a coarse, angular sand that allows for drainage while also creating a firm, interlocking bed for the pavers. That’s why a quality sand delivery of concrete sand is the only way to go for your setting bed.
Skipping the Gravel Base
Think of your paver project as a layered cake; every layer has a purpose. The concrete sand is just one part of a larger system. Underneath it, you need a solid gravel sub-base. Skipping this step is a critical error. A 4- to 6-inch layer of compacted gravel, like Class 5 gravel, provides the real strength for your project. It distributes the weight of foot traffic and patio furniture and, most importantly, provides a stable foundation that resists the freeze-thaw cycles we experience in Minnesota. Without this gravel base, your pavers will inevitably sink, shift, and become uneven over time, no matter how well you lay them.
Forgetting to Compact the Base
You can have the best materials in the world, but if they aren’t properly compacted, your paver patio won’t last. Compaction is the process of using a plate compactor to settle and lock the aggregate particles together, removing air pockets. This needs to be done for both the gravel sub-base and after the pavers are set in the sand. Forgetting this step leaves your base loose and vulnerable to settling. Over time, you’ll see dips, wobbly pavers, and an uneven surface. Taking the time to compact each layer thoroughly creates a dense, stable foundation that will keep your pavers perfectly in place for years.
Ignoring Proper Slope and Drainage
Water is the number one enemy of any hardscape project. If you don’t give it a path to escape, it will cause major problems. Every paver surface needs a slight, almost imperceptible slope—typically about a quarter-inch drop for every foot—that directs water away from your home’s foundation. This is where concrete sand really shines; its coarse texture allows water to drain through the joints and into the gravel base below. If you build a perfectly flat patio or, worse, one that slopes toward your house, you’re asking for pooling water, icy patches in the winter, and potential erosion of the base materials.
Confusing Concrete Sand with Concrete Mix
This is a common and costly mistake for first-time DIYers. Concrete sand is a specific type of aggregate. Concrete mix, on the other hand, is a blend of sand, gravel, and Portland cement that hardens when you add water. Never, ever use dry concrete mix as a bedding layer for your pavers. The idea that it will harden and create a super-strong base is a myth. Instead, ambient moisture will cause it to harden unevenly, creating a rigid, non-draining slab that will crack under pressure and from frost heave. A paver system is designed to be flexible and interlocking, and using concrete mix completely undermines that principle.
How Much Concrete Sand Do You Need?
Figuring out exactly how much sand you need can feel like a guessing game, but it’s actually straightforward math. Getting this number right is important. Ordering too little means a frustrating delay and another delivery fee, while ordering too much leaves you with a pile of sand and a lighter wallet. The key is to calculate your needs based on the recommended layer thickness and the specific dimensions of your project area. Let’s walk through how to determine the perfect amount for your paver base so you can order with confidence.
Recommended Layer Thickness
For a paver project, the concrete sand layer serves as a crucial bedding course. This is the final layer you’ll level before setting the pavers in place. The industry standard for this setting bed is a uniform depth of one inch. This thickness provides a firm, yet flexible, cushion that helps you set each paver perfectly level. It’s just enough material to make minor adjustments and create a smooth surface without being so deep that it compromises the stability of the pavers. Sticking to this one-inch rule ensures your pavers have a solid foundation to rest on, which is essential for a long-lasting, professional-looking finish.
How to Calculate Your Quantity
Ready for some simple math? First, measure the length and width of your project area in feet and multiply them to find the total square footage. Since the recommended sand depth is one inch, you’ll convert that to feet by dividing by 12 (1 inch = 0.0833 feet). Now, multiply your square footage by 0.0833 to get the total cubic feet of sand needed. Because sand is sold by the cubic yard, your final step is to divide the cubic feet by 27. To make it even easier, you can use our handy cubic yardage calculator to skip the math. Once you have your number, you’re ready to schedule your sand delivery.
Where to Get Concrete Sand in Minnesota
When you’re ready to source your concrete sand, your best bet is to look local. Minnesota has a great network of aggregate companies and landscaping supply yards that stock the specific materials you need for your project. You can find quality concrete sand from established businesses like Hassan Sand & Gravel or Baker Sand & Gravel, which serve their respective local areas. The key is finding a supplier who not only has high-quality material but can also get it to your job site without a headache.
For most paver projects, you’ll need more sand than you can haul in the back of a pickup truck. That’s where a reliable delivery service becomes essential. At Minnesota Aggregates, we specialize in providing timely sand delivery across the state, ensuring you get the right amount of material exactly when you need it. Before you place an order, it’s helpful to understand the benefits of buying in bulk and what to look for in a partner.
Why Buying in Bulk Is Smart for Large Projects
For any project bigger than a small walkway, buying concrete sand by the bag is rarely practical. Opting for a bulk delivery is almost always the smarter move, both for your budget and your schedule. The most obvious benefit is cost savings; the price per cubic yard drops significantly when you buy in larger quantities. It’s a simple equation: one large delivery is far more efficient than multiple small trips.
Beyond the savings, buying in bulk ensures you have a consistent supply of material from the same source, which helps maintain uniformity in your paver base. The National Ready Mixed Concrete Association notes that purchasing materials in bulk also streamlines logistics by reducing transportation needs. This means fewer trucks coming to your site and less time spent waiting for materials, helping you keep your project on track from start to finish.
What to Look for in a Local Supplier
Choosing the right supplier is just as important as choosing the right sand. Your project’s success depends on a partner you can count on, so here are a few things to consider. First, confirm the quality of the material. Ask if their concrete sand meets industry standards to ensure it’s properly washed and graded. Second, check their reputation. Look for online reviews and see what other contractors and homeowners are saying about their experience.
Most importantly, evaluate their delivery service. A supplier with a great product is useless if they can’t get it to you on time. At Minnesota Aggregates, we pride ourselves on dependable, on-time delivery of quality materials. Good customer service ties it all together; a responsive team that can answer your questions and help you calculate your needs makes the entire process run smoothly.
Related Articles
- What Type of Sand for Paver Base? A Pro Guide – Minnesota Aggregates
- How to Buy Mason Sand by the Yard: A Simple Guide – Minnesota Aggregates
- How to Use Paver Sand to Stop Weeds: A Pro Guide – Minnesota Aggregates
Frequently Asked Questions
Can I just use play sand or all-purpose sand instead? I strongly advise against it. While it might seem like a simple substitution, play sand and all-purpose sand have fine, rounded grains that don’t compact properly. Instead of locking together, they just shift around, which will cause your pavers to become unstable and uneven over time. Concrete sand has coarse, angular grains that interlock to form a solid, stable base that still allows for excellent drainage, which is exactly what you need for a lasting project.
What’s the difference between the sand under the pavers and the sand that goes in the joints? This is a great question because they have two very different jobs. The sand that goes under the pavers is concrete sand, which creates a one-inch thick setting bed to cushion and level them. The sand that goes between the pavers is polymeric sand. It’s a special product with binders that harden when you add water, effectively locking your pavers in place and preventing weeds from growing in the cracks.
Do I really need to put gravel down before the sand? Yes, absolutely. The gravel sub-base is the structural foundation of your entire project, while the sand layer is the leveling bed. A 4 to 6-inch layer of compacted Class 5 gravel provides the strength needed to support the pavers and resist the ground movement from Minnesota’s freeze-thaw cycles. Skipping the gravel base is one of the biggest mistakes you can make, as it will almost certainly lead to sinking and shifting pavers down the road.
How do I know how much sand to order? The standard rule is to plan for a one-inch thick layer of concrete sand across your entire project area. To figure out the total amount, you can calculate the square footage of your patio or walkway and then determine the volume needed for that one-inch depth. To make it simple, we have a cubic yardage calculator on our website that does all the math for you. It’s the easiest way to ensure you order the right amount.
Is it okay if my sand pile gets rained on before I can use it? It’s not a dealbreaker, but it does make the job a bit harder. Wet sand is much heavier and more difficult to screed, or level, into a smooth, uniform layer. If your sand pile gets wet, it’s best to let it dry out as much as possible before you try to spread it. Covering your sand pile with a tarp is always a good idea if you know rain is in the forecast.