
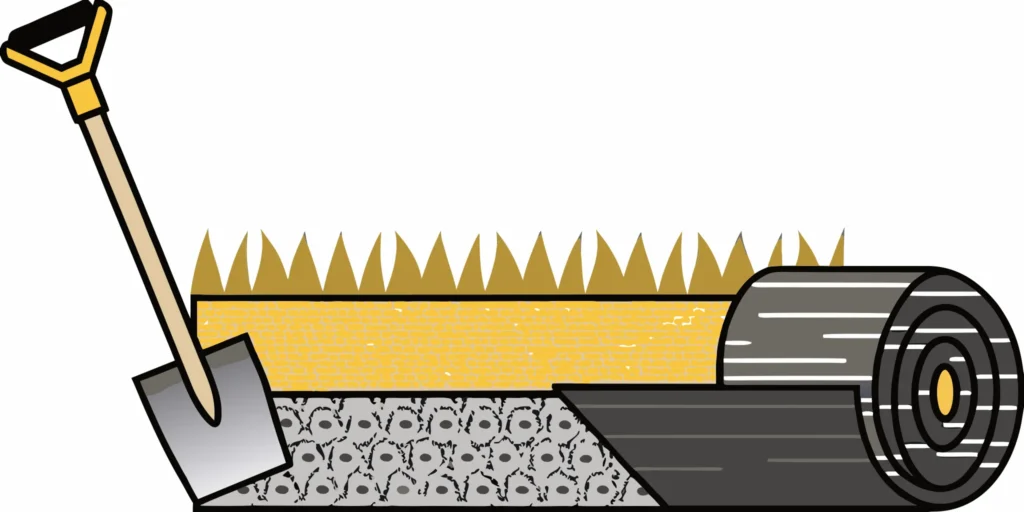
Let’s get right to the point. You want to know if laying a gravel path over grass is a good idea. The answer is no, and it’s not even a close call. While it seems like a clever way to avoid a lot of digging, this approach will ultimately fail, leaving you with a pathway that’s difficult to walk on and a constant source of frustration. The gravel will sink into the soft turf, weeds will have a perfect environment to sprout, and the stones will never stay contained. Instead of saving you time, it will just create a bigger project for you to fix later. This guide will show you the correct way to build a gravel path, ensuring your hard work results in a stable, beautiful, and low-maintenance feature for your yard.
Key Takeaways
- Start with a solid foundation: The most critical step is removing the grass and topsoil before you begin. Laying gravel directly over your lawn creates an unstable, weedy path, so always dig down to create a firm, level base.
- Use the right layers for success: A great gravel path is built with a specific system. You need a compacted soil base, landscape fabric to block weeds, a sturdy base material like Class 5 gravel for stability, and finally, your decorative top layer of stone.
- Finish with edging and plan for upkeep: A border is non-negotiable; it keeps your gravel contained and gives the path a polished look. A little seasonal raking and weeding is all it takes to protect your investment and keep it looking sharp.
Can You Lay a Gravel Path Directly Over Grass?
It’s a tempting shortcut, I get it. You have a vision for a beautiful gravel path, and the idea of just pouring the stones over your lawn seems so simple. But can you lay a gravel path directly over grass? The short answer is no. While it might look okay for a week or two, taking this shortcut will create a lumpy, weedy, and unstable mess that will cost you more time and effort to fix in the long run.
A durable, attractive gravel path depends entirely on a solid foundation. That means you have to do the prep work, and the first and most important step is removing the existing grass and topsoil. Think of it this way: you’re not just adding a path, you’re building a small piece of hardscaping. Just like you wouldn’t build a deck on soft, uneven ground, you can’t expect a gravel path to last without a proper base. By preparing the ground correctly from the start, you ensure your path remains stable, looks professional, and serves its purpose for years to come.
Why You Need to Remove the Grass First
The main reason you need to remove the grass is stability. Grass and the layer of topsoil beneath it are organic and spongy. When you pour heavy gravel over this soft surface, it will inevitably shift, sink, and spread. You’ll end up with ruts, low spots, and an uneven walkway that’s difficult to walk on. As landscaping experts often note, “You cannot simply pour gravel on top of grass for a driveway, walkway, or patio. It will shift, spread, and cause problems.” Removing the grass and topsoil allows you to create a firm, compacted foundation with a proper base material like Class 5 gravel, which is designed to lock together and provide a solid footing for your path.
Common Problems with Laying Gravel on Grass
If you’re still not convinced, let’s talk about the specific headaches you’ll face by skipping the excavation step. First, your gravel path will become a maintenance nightmare. The grass underneath will die, but its decomposition will create a rich environment for new weeds to sprout up through the stones. You’ll be fighting a constant battle to keep it looking clean. Second, the gravel won’t stay put. Without a defined edge and a sunken base, the stones will get kicked into your lawn, tracked into the house, and can even get caught in your lawnmower, potentially damaging the blades. Finally, the path will sink unevenly into the soft soil below, creating a lumpy and unsafe surface.
What Materials and Tools Do You Need?
Before you break ground, gathering all your supplies is the best way to ensure your project goes smoothly. There’s nothing worse than having to stop mid-project for a run to the store or to wait for a delivery. A little prep work now saves you a lot of headaches later. Think of it as setting yourself up for success. By having the right materials and tools on hand from the start, you can focus on building a beautiful, long-lasting gravel path without any interruptions. Let’s walk through exactly what you’ll need to get the job done right.
Gather Your Materials
For a sturdy path that stands the test of time, you’ll need more than just a top layer of decorative gravel. A solid foundation is key. Plan on using a base layer of crushed stone, about four inches deep, to create stability and help with drainage. We recommend a material like Class 5 gravel for this. On top of that, you’ll place your chosen decorative gravel. You will also need landscape fabric (or weed membrane) to prevent weeds from popping up through the stones and some sort of edging material, like metal strips, bricks, or stone pavers, to keep your path contained and looking sharp.
Get the Right Tools
You don’t need a shed full of professional equipment, but a few key tools will make this project much easier. Make sure you have a sharp spade or shovel for digging out the grass and soil. A wheelbarrow is essential for moving gravel and dirt around your yard. You’ll also want a sturdy garden rake to spread the gravel evenly and a hand tamper to compact the layers, which is a crucial step for a firm path. Finally, grab a tape measure, some string, and stakes to mark out your path accurately before you start digging.
How to Choose the Best Gravel
The gravel you choose affects both the look and function of your path. For the base, a crushed stone aggregate like Class 5 is perfect because it compacts tightly to create a very stable foundation. For the top layer, you have more creative freedom. Smaller, angular gravel (around ⅜-inch) is often more comfortable to walk on than larger, rounded stones. Before you order, you’ll need to calculate how much material you need for both the base and top layers. Just measure the length, width, and depth of your path to figure out the right amount and ensure you get everything in one delivery.
How to Prepare Your Lawn for a Gravel Path
A beautiful, long-lasting gravel path starts with a solid foundation. While it might seem easier to just pour gravel over your grass, taking the time to properly prepare the ground is the most important part of the project. This prep work prevents weeds, stops the gravel from sinking into the soil, and ensures your path remains stable and level for years to come. Think of it as setting the stage for a pathway that not only looks great but also holds up to foot traffic and Minnesota’s changing seasons.
Step 1: Mark Your Path
First things first, you need to decide exactly where your path will go. Grab some stakes and string, or even a can of spray paint, to outline the shape. Think about how you’ll use the path. Will it need to be wide enough for a wheelbarrow or lawnmower? A good rule of thumb is a width of at least three feet for comfortable walking. You can opt for a classic straight line for a formal look or a gentle curve to create a more natural, flowing feel in your yard. Walk the marked path a few times to make sure you’re happy with the placement and flow before you start digging.
Step 2: Remove the Grass and Topsoil
Now it’s time to get your hands dirty. To create a stable base, you have to remove the existing grass and a layer of topsoil from your marked-out path. Simply pouring gravel over the grass is a recipe for a lumpy, unstable mess, as the turf will decompose and cause the stones to shift. Use a flat spade or rent a sod cutter to slice away the turf within your outline. This is a crucial step for preventing future headaches with ruts and uneven spots. You can add the removed sod to your compost pile or use the rich topsoil to fill in other areas of your garden.
Step 3: Dig and Level the Foundation
With the grass gone, it’s time to dig. You’ll want to excavate the entire path to a depth of about four inches. This creates the trench that will hold your base material and top layer of gravel. As you dig, try to keep the bottom of the trench as level as possible. A strong foundation is key, which is why we recommend adding a base layer of compacted material. A product like Class 5 gravel is perfect for this, as it provides excellent stability. Before adding any material, use a hand tamper to compact the soil at the bottom of the trench for an even stronger base.
Step 4: Ensure Proper Drainage
Good drainage is essential for a path that lasts, especially if your yard has low spots that collect water. Without a place for water to go, your path can become a muddy stream after a heavy rain. If your soil is heavy clay or you’re building in a soggy area, consider creating a “dry well.” This is basically a deeper hole dug at a low point along your path, lined with landscape fabric, and filled with larger drain rock. This simple feature gives excess water a place to collect and slowly seep into the ground, keeping your gravel path dry and usable.
Step 5: Lay Down Landscape Fabric
Before you bring in the gravel, line the bottom of your excavated trench with high-quality landscape fabric. This step is a game-changer for a couple of reasons. First, it acts as a powerful weed barrier, preventing unwanted plants from growing up through your path. Second, it separates your gravel from the soil below, which keeps the stones from sinking into the dirt over time. Roll the fabric out, making sure to overlap the edges by a few inches if you use multiple pieces. Secure it with landscape staples to keep it from shifting as you add your base layer.
How to Install and Compact Your Gravel Path
With the foundation prepped, you’re on the home stretch. Now it’s time for the most satisfying part: adding the gravel and putting the finishing touches on your new path. These final steps are all about building a durable, stable surface that looks great and holds up to foot traffic for years to come. Taking your time here will ensure all your hard work pays off with a beautiful, long-lasting walkway. Let’s get this path finished.
Step 6: Add the Base Layer
Before you pour your decorative gravel, you need to create a solid foundation. This base layer is what gives your path its strength and prevents the stones from shifting around over time. A strong base is key to a path that lasts. For this, you’ll want to add a layer of crushed stone about four inches deep. A material like Class 5 gravel is an excellent choice because it compacts well and creates a firm, stable surface. Spread it evenly across the landscape fabric, making sure it fills the entire excavated area. This foundational layer is the unsung hero of a great gravel path.
Step 7: Spread the Top Layer of Gravel
Now for the fun part. Once your base is in place, you can add the top layer of gravel. This is the stone you’ll see, so choose a color and size that complements your yard. For the best results, it helps to use a mix of gravel sizes. Start by spreading the largest stones, then fill in with smaller ones. This helps the pieces lock together for a more stable walking surface. As you spread the gravel, aim to keep the final level about half an inch below the top of your edging. This simple trick keeps the stones from spilling over into your lawn or garden beds.
Step 8: Compact the Gravel
To get that smooth, professional finish, you need to compact the gravel. This step presses all the stones together, creating a firm and stable surface that’s comfortable to walk on. While you can use a hand tamper for a small path, renting a plate compactor from a local hardware store will make the job much easier and give you better results. Simply guide the machine over the entire path, allowing its weight and vibration to lock the gravel tightly into place. A well-compacted path is less likely to develop ruts or soft spots, ensuring it stays beautiful and functional.
Step 9: Install Path Edging
The final step is to install edging along the borders of your path. Edging serves two important purposes: it creates a crisp, defined look and it keeps your gravel contained. Without it, the stones will slowly spread into the surrounding grass or garden beds. You have plenty of options for materials, from classic bricks and natural stones to metal or plastic strips. Choose something that matches the style of your home and landscape. Installing a sturdy edge is the finishing touch that makes your gravel path look polished and complete while reducing future maintenance.
How to Maintain Your New Gravel Path
You’ve put in the work to create a beautiful gravel path, and with a little regular care, you can keep it looking great for years. Maintenance is straightforward and doesn’t require a lot of time, but staying on top of a few key tasks will prevent small issues from turning into bigger projects down the road. Think of it as protecting your investment and ensuring your path remains a functional and attractive feature of your property.
Keep Weeds from Taking Over
Even with a layer of landscape fabric, you’ll find that weeds can still pop up. Most of the time, these aren’t growing from the soil underneath. Instead, seeds blow in and germinate in the dust and organic debris that naturally settles between the stones. The best defense is a little offense. Make it a habit to walk your path and pull any weeds you see by hand. For smaller, emerging weeds, a stiff rake can disturb the gravel enough to uproot them before they get established. Consistent weed control is the key to keeping your path looking clean and tidy.
Simple Upkeep for Your Path
Over time, foot traffic and weather can cause your gravel to shift, creating low spots or thin patches. To keep your path level and looking full, you’ll want to do some occasional raking. A sturdy landscape rake is perfect for smoothing the surface and moving gravel back into place. Every few years, you may notice the path looking a bit sparse. This is a great time to top it off with a fresh layer of gravel. Ordering a small delivery of Class 5 gravel can refresh the look and feel of your path, ensuring it stays compact and comfortable to walk on.
How to Fix Drainage Problems
If you notice puddles forming on your path after it rains, you might have a drainage issue. This usually happens in low-lying areas or where the soil underneath is heavily compacted. For persistent standing water, you can create a “dry well.” This involves digging a hole at the lowest point of the path, lining it with landscape fabric, and filling it with larger rocks or coarse gravel. The dry well gives excess water a place to go, allowing it to slowly soak into the ground instead of pooling on the surface. It’s an effective solution for keeping your path dry and usable, even after a heavy Minnesota downpour.
Seasonal Care Tips
Your path’s needs can change with the seasons. In the spring, rake away any leftover winter debris and check for spots that may have settled during the thaw. In the fall, it’s important to remove fallen leaves promptly so they don’t break down and create a layer of compost that invites weeds. For Minnesota winters, be careful when removing snow. A shovel can scrape up your gravel, so try using a leaf blower for light snow. For heavier accumulations, shovel carefully, keeping the blade just above the gravel’s surface to avoid disturbing the stones.
Related Articles
- How to Spread Gravel on a Driveway the Right Way – Minnesota Aggregates
- 6 Best Types of Gravel for Driveways Compared – Minnesota Aggregates
- What is the Best Gravel for a Driveway? 5 Types Compared – Minnesota Aggregates
Frequently Asked Questions
Why do I need two different types of gravel for my path? Think of it like building a house; you need a strong foundation before you put up the pretty walls. The base layer, which is usually a crushed stone like Class 5, is the functional foundation. Its job is to lock together tightly when compacted, creating a solid, stable base that won’t shift or sink. The top layer is what you see and walk on, so you choose it for its color, size, and feel. Using both ensures your path is both durable and beautiful.
Is landscape fabric absolutely necessary? Yes, I would never build a path without it. While its main job is to block weeds from growing up from the soil, it also serves another critical purpose: separation. The fabric keeps your gravel layers from mixing with the dirt below. Without it, the stones will slowly sink into the soil over time, especially after rain, creating a muddy mess and forcing you to constantly add more gravel to keep the path usable.
How long does a project like this usually take? For a straightforward path of a reasonable length, you can typically get this done over a weekend. The most labor-intensive part is the initial digging and removal of the grass and soil, so how long that takes depends on your soil type and the tools you have. Once the trench is prepped, laying the fabric and spreading the gravel moves along much more quickly.
What happens if I don’t compact the gravel? Skipping the compaction step will leave you with a path that feels soft and unstable underfoot. The stones won’t be locked into place, so they will shift around easily, creating ruts and low spots every time you walk on it. Compacting the base and top layers is what creates that firm, solid surface that feels permanent and is easy to walk on or roll a wheelbarrow over.
Can I build a gravel path on a sloped part of my yard? You can, but it requires some extra planning to prevent all your gravel from washing away in a heavy rain. For a very gentle slope, you might be fine. For anything more noticeable, you should consider building a series of level terraces or steps using landscape timbers or stone blocks. These act as barriers to hold the gravel in place on each level, ensuring your path stays put.