
A strong gravel driveway needs more than just dumping stone on the ground and raking it flat. It takes careful plans and the right stone layers to create a surface that lasts. Homeowners can get expert results by using a few clear steps.
Ready to start your driveway project? Get a free quote from Minnesota Aggregates →
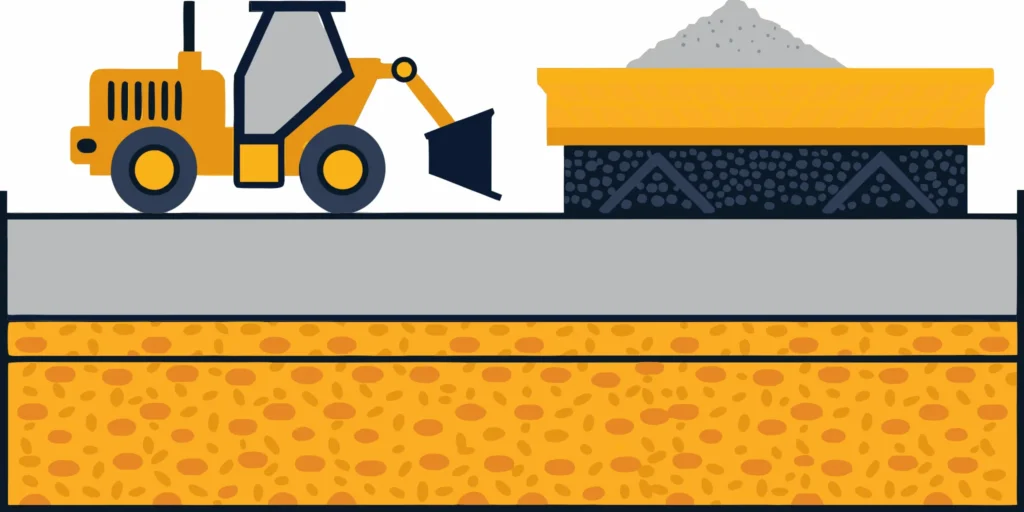
How to build a gravel driveway starts with clearing topsoil and digging the site eight to twelve inches deep. You must pack the dirt and lay down landscape fabric to keep the soil and stone apart. The base needs four to six inches of coarse stone, followed by a middle layer of crushed rock. In Minnesota, Class 5 gravel is the best choice for the base because it binds together to form a solid mat. Each layer should be spread in thin steps and packed down with a heavy roller. Last, add two inches of sharp surface stone and grade the center into a peak to help water run off. This layered method stops ruts and ensures the driveway handles heavy trucks and harsh winter weather.
Setting up a new driveway needs a clear plan for water flow and site access before you move any dirt. You can avoid costly mistakes by taking the time to Plan Your Gravel Driveway Layout and Design to fit your land. The path begins with
How To Build A Gravel Driveway: Plan Your Gravel Driveway Layout and Design
Good plans are the first step to a driveway that stays solid for years. You must think about where the path goes and how water will run off the top. Taking time to map out your work now saves money on extra dirt work or stone later. If you are not sure how much stone to buy, use our gravel calculator to get a fast count based on your path size.
Check Local Rules and Permits
Before you dig, check with your local city or town office about rules. Some spots in the Twin Cities metro need a permit for new paths or changes to a curb. Once you get the green light, clear the area of tall grass, brush, or small trees. This makes it easy to see the ground and set up your stakes the right way.
Mark Your Path and Slope
The best way to see your new driveway is to mark it with stakes and string. Place stakes at each corner and every few feet along the path. Run a string line between them to show the edges. This guide helps you stay on track when you start to dig. It also shows you if any big rocks or steep spots will be in your way before you bring in big gear.
- Check for permits. Talk to your town or city office to see if you need a permit before you break ground.
- Mark the edges. Drive wood stakes into the ground and tie string between them to outline the path.
- Measure the depth. Plan to dig down 8 to 12 inches based on your soil and the weight of your cars.
- Set the slope. Ensure the ground has at least a 2% slope from the center to the edges for drainage.
- Find your size. Measure the total square feet of the area to know how much stone you need to order.
Find Your Stone Needs
Knowing your numbers helps you stay on budget. A load of 3 to 5 yards of stone covers about 250 to 400 square feet at a depth of 4 inches. Since there are no minimum order needs at Minnesota Aggregates, we can bring just what you want for a small fix or a full build. Proper plans ensure you have enough stone to reach the right depth without having too much left over.
Excavate and Prepare the Subgrade
A solid gravel driveway starts with a deep, clean cut into the earth. You must dig out the area where your new driveway will sit. For most homes, this means you need to dig between 8 and 12 inches deep. The exact depth depends on your local soil and how much weight the driveway must hold. Cutting deep enough allows you to build a thick base that won’t shift or sink over time.
Remove organic material
The most vital part of digging is removing all topsoil and plants. You must clear away grass, roots, and soft dirt. If you leave this matter behind, it will rot under your gravel. As it breaks down, it creates soft spots and air pockets. This leads to gravel sinking and ruts forming in your path. You need to reach the firm, dry subsoil to create a lasting foundation.
Use the right tools
Digging a large driveway by hand is a massive chore. Most people use a small tractor with a blade or rent a skid steer to do the work. These machines can move large amounts of dirt quickly and help you keep a level base. If you aren’t sure how to run heavy machines, you can hire help. Minnesota Aggregates provides professional skid steer services for site prep and grading across the Twin Cities. This ensures your subgrade is flat and ready for stone.
Level and compact the base
Once you finish digging, you must prep the raw dirt. Check your drainage slope to make sure water will flow away from buildings. You want a slight peak in the middle so rain runs off the sides. After the dirt is shaped, run a plate compactor over the entire area. This packs the loose soil down so it stays firm. A tight, flat subgrade prevents your layers from mixing and keeps the surface smooth for years.
Install Geotextile Fabric for Long-Term Stability
One of the most overlooked steps in learning how to build a gravel driveway is installing geotextile fabric. This simple layer of heavy-duty fabric sits between your compacted subgrade and the first layer of stone. It acts as a permanent barrier that keeps your gravel from mixing with the soil below.
Why geotextile fabric matters
Without a separation layer, your base gravel slowly sinks into the subgrade over time. Rain and vehicle traffic push the stones deeper into the soft ground, creating ruts and low spots. Geotextile fabric prevents this by creating a physical barrier. It also blocks weeds from growing up through your driveway and improves drainage by keeping the stone layer free of soil contamination.
Choose the right fabric
For a gravel driveway, you want a heavy-duty woven polypropylene or nonwoven geotextile fabric. Woven fabric is stronger and better for load-bearing driveways that see heavy truck traffic. Nonwoven fabric works well for drainage-focused applications. Both types will significantly extend the life of your driveway by keeping the layers separate.
Installation steps
- Roll out the fabric over the entire compacted subgrade area. Cut it to fit the full width and length of your driveway path.
- Overlap the edges by 3 to 4 inches where pieces meet. This prevents gaps where soil can push through between fabric sections.
- Secure with landscaping stakes every few feet along the edges and seams. This keeps the fabric from shifting when you dump and spread the first layer of stone.
- Avoid puncturing the fabric during gravel placement. Dump the first load gently and spread it with a rake or box blade rather than driving directly on the exposed fabric.
Taking the time to install geotextile fabric correctly is one of the smartest investments you can make in your driveway. It prevents the most common cause of gravel driveway failure: layer mixing. Your base stones stay where they belong, your drainage stays clear, and your surface stays smooth for decades.
Build the Sub-Base with Class 5 Gravel
The sub-base is the main step in learning how to spread gravel on a driveway. It acts as the core base for your project. Without a solid base, the heavy weight of cars will push your top stones into the soil. This causes ruts and low spots that hold water. In Minnesota, the top choice for this layer is Class 5 gravel. This stone meets the MnDOT Spec 3138 rule for road and driveway work.
The top choice for Minnesota bases
Class 5 is a clear mix of crushed limestone. It has rocks that are 3/4-inch wide down to fine dust. This mix is what makes it so strong. The large rocks give the bulk and strength needed to hold up a car or truck. The small bits fill in every gap. This creates a surface that stays in place even when the ground moves. It is the best way to fight the freeze and thaw cycles that happen every year.
Some people think that using large rocks alone will make a better base. But large rocks leave open spaces where dirt can move through. Over time, this makes the driveway soft and weak. Class 5 acts like a shield. It keeps the dirt down and the driveway up. If you need a steady supply, Class 5 gravel delivery from Minnesota Aggregates makes sure you get the right stone for your job.
How the stones lock together
The key to Class 5 is how the pieces fit together. This is called a matrix. The stones in this mix are angular, which means they have sharp edges. These sharp edges catch on each other. When you add the fine dust, it acts like glue. It fills the holes and binds the large rocks together. This stops the stone from rolling or shifting when you drive over it.
This mix is why Class 5 is better than round river rock. Round rocks act like marbles and will always move. Sharp limestone locks in place and gets stronger as you pack it down. This creates a bridge over the soft ground. It spreads the weight of your car across a wide area. This stops the driveway from forming deep ruts during the rainy spring months.
Steps for spreading and packing
To build a lasting drive, you should spread the base in steps called lifts. Each lift should be 3 or 4 inches thick. Do not try to pack 6 inches of stone at one time. The machine will not be able to reach the bottom of the layer. Spread one lift and then use a plate pack machine to press it down. This makes sure the whole base is firm from top to bottom. Most drives need a total base depth of 4 to 6 inches.
As you work, keep the stone slightly damp. A light mist of water helps the small dust pieces slide into the holes. This makes the base much tighter. You should also check the slope. Make sure the middle of the driveway is slightly higher than the sides. This helps water run off and protects the base from washouts. Proper packing will make your driveway last for many years.
| Base Material | Best Use | Main Gain | Strength |
|---|---|---|---|
| Class 5 Gravel | Standard Driveways | Locks tight with fines | Very High |
| #3 Crushed Stone | Wet or Soft Areas | Great drainage | Medium |
| Recycled Concrete | Heavy Load Areas | Hard and low cost | High |
Minnesota Aggregates delivers Class 5 and other stones across the Twin Cities area. We can help you pick the best stone for your site. Whether you are building from scratch or fixing an old path, a strong sub-base is the most key part of the job. A good base saves you time and money on fixes in the future.
Need aggregates for your driveway? Minnesota Aggregates delivers Class 5 gravel and more across the Twin Cities →
Add the Middle Binding Layer
The middle layer of your driveway acts as a bridge between the large base stones and the fine surface gravel. This step is vital because it fills the small gaps in your sub-base. Without this layer, your surface gravel would eventually sink into the larger stones below. Using 2 to 3 inch crushed stone creates a tight, interlocking mesh that supports the weight of heavy trucks and trailers.
Choose the right stone size
For this layer, most builders use #57 or #411 crushed stone. These materials are small enough to settle into the voids of the Class 5 gravel delivery you placed earlier. Crushed limestone is the best choice here because its sharp, angular edges lock together under pressure. Round stones like pea gravel will roll and shift, but angular crushed stone stays in place to prevent ruts.
Spread and moisten the gravel
You should aim for a layer that is about 4 inches thick. Spreading the stone evenly ensures your driveway stays level as you build up the height. Before you start the compaction process, it is helpful to moisten the gravel slightly with a hose. Adding a small amount of water helps the stone particles slide into place. This leads to better interlocking, which is a key part of how to spread gravel on a driveway for long-term use.
Compact for a solid finish
Once the stone is damp, use a plate compactor or a heavy roller to press the layer down. Proper compaction is what prevents your driveway from settling or forming low spots over time. According to guidelines from the Environmental Protection Agency, a stable base and middle layer are necessary to manage water flow and stop erosion. If you do not have the right equipment, you can hire skid steer services to handle the heavy spreading and leveling for you.
Finish with the Top Layer and Edging
The top layer is the final touch for your driveway. For the best result, use about 2 inches of angular surface gravel. Choose 14mm to 20mm stone chippings to create a firm path. This small, sharp stone locks together better than round rocks. In the best gravel for a driveway, angular shapes help the surface stay flat and smooth.
Master the drainage peak
Good drainage is the key to a long-life driveway. When you spread the top layer, aim for a slight peak in the center. This “crown” should slope down to the sides at a rate of at least 2%. This shape helps rainwater run off the surface instead of forming puddles. Proper grading keeps the base dry and prevents deep ruts from forming after a heavy storm.
Set up permanent edging
Loose gravel tends to spread out over time. To keep it in place, you should install permanent edging along the sides. You can use treated wood, bricks, or metal strips for this job. This how to spread gravel on a driveway step keeps your stone off the lawn. Strong edging also makes it easier to mow your grass without hitting stray rocks.
Choose freeze-thaw resistant stone
Minnesota weather is hard on driveways. The ground moves as it freezes and thaws throughout the year. Angular crushed stone is the top choice here because it resists heaving and shifting better than smooth pebbles. According to the EPA, using right-sized aggregate is a best practice for stable roads. This type of stone keeps your driveway level and safe even in the coldest winters.
Consider recycled asphalt millings
If you want a very hard surface, look into a crushed asphalt driveway. These millings are a great alternative to standard stone. When the sun heats the asphalt, the small bits bond together to form a solid layer. This creates a surface that feels like a paved road but costs less. You can get recycled asphalt delivered by Minnesota Aggregates to finish your project.
How to Maintain Your Gravel Driveway
A gravel driveway is a tough and long-term choice for your home. When you build it with the right layers and a solid base, it can last between 15 and 30 years. To reach this lifespan, you must give the surface some care at least once or twice a year. Regular work keeps the stones in place and stops water from washing away your hard work.
Grade the Surface Every Year
Minnesota winters can be hard on a drive. Snow plows often push gravel to the sides or into the yard. Once the spring thaw ends, you should grade the surface to pull that stone back to the center. Use a box blade or a skid steer to level the path and fix ruts. You can find more tips on how to spread gravel on a driveway to keep the surface flat and even.
Proper grading also helps with water flow. Water is the main enemy of any drive. You should keep a slight crown in the center of the path so rain runs off to the sides. Without this peak, water will sit in the middle and create soft spots or deep holes. Check the EPA guidelines on runoff for more facts on why good drainage matters for the land.
Fill Low Spots and Control Weeds
Potholes start small but grow fast if you ignore them. When you see a low spot, do not just rake loose rocks into it. You should dig out the loose dirt and fill the hole with fresh Class 5 gravel. Pack the new stone down tight so it bonds with the old base. If you need help with a large area, Minnesota Aggregates offers skid steer services to grade and fill your drive fast.
Weeds can also cause issues if they take root in the gravel. Their roots break up the packed layers and let water get under the stone. You can use a safe spray or pull them by hand to keep the drive clean. Keeping the edges sharp will also stop grass from creeping into your path. This small bit of work saves you from a big repair bill later on.
Frequently Asked Questions
Can I just put gravel down over grass or dirt?
No. Simply dumping gravel on grass or soil is a common mistake that leads to sinking and ruts. Grass and roots will rot and create soft spots where stones will later vanish into the mud. For a solid driveway, you must remove the topsoil and pack the dirt below. Using a heavy fabric before adding your base layer helps keep the stones and soil separate so your driveway stays firm for years.
What is the best gravel for a driveway base in Minnesota?
In Minnesota, Class 5 gravel is the industry standard for a driveway base. This material is made of crushed limestone that ranges from 3/4-inch stones down to fine dust. The fine dust fills the gaps between the larger rocks, which helps them lock together into a hard surface. This blend handles the harsh freeze-thaw cycles of the Twin Cities better than rounded stones. You can get Class 5 gravel delivery directly to your site from Minnesota Aggregates.
Should I wet the gravel before compacting it?
Yes. Adding a light mist of water to each layer of gravel before you run a compactor is a vital step. Moisture helps the small pieces slide into place between the larger stones. This step creates a much tighter bond and a denser surface that resists shifting. Be careful not to use too much water, as you do not want to turn the ground into mud. Proper packing ensures your driveway remains stable under heavy vehicle traffic.
How long can I expect a gravel driveway to last?
A well-built gravel driveway can last 15 to 30 years if you take care of it well. How long it lasts depends on how well you prepare the site and the quality of the rocks you use. Regular care, like filling low spots and grading the surface once a year, will prevent potholes and drainage issues. Using skid steer services for professional grading can help your driveway last longer by keeping the right slope and shape.
How much does it cost to build a gravel driveway?
The cost to build a gravel driveway varies based on size, depth, and the type of stones you choose. For a typical 100-foot driveway, material costs often range from $300 to $1,500. Factors like digging needs and your distance from the supplier will also change the final price. Since every project is different, it is best to contact us for a quote. This will give you an exact price for your own site and needs in the Twin Cities.
Ready To Start Your Gravel Driveway Project?
Building a gravel driveway from scratch is a rewarding project that adds lasting value to your property. From the initial excavation and geotextile fabric to the Class 5 sub-base and top-layer finish, every step matters. Minnesota Aggregates supplies and delivers all the materials you need for every layer of your driveway, including MnDOT-spec Class 5 gravel, crushed stone, and recycled asphalt millings.
We serve the entire Twin Cities metro area with fast, on-time delivery and no minimum order requirements. Need help with excavation, grading, or spreading? Our professional skid steer services can handle the heavy work so your project stays on schedule.
Contact Minnesota Aggregates today for a free quote on your driveway materials and delivery.