
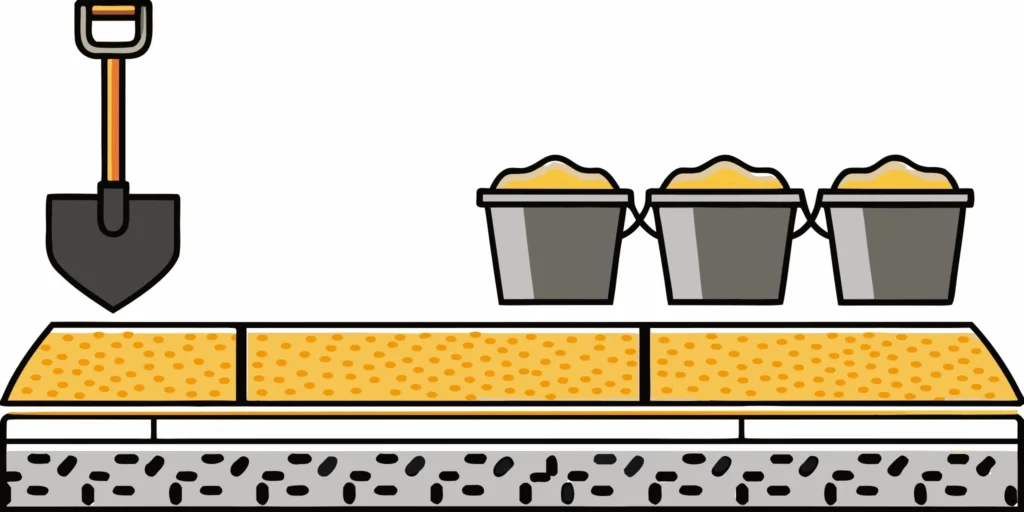
The secret to a beautiful, long-lasting paver patio isn’t just the pavers you choose; it’s the unseen layers beneath them. The sand bedding layer provides a crucial, stable cushion that allows you to set each paver perfectly. This layer needs to be exactly the right depth to prevent future problems like wobbling or sinking. Before you can even think about laying pavers, you have to figure out exactly how much sand do I need for a paver patio? Getting this number right is the first step toward a professional-quality result. Let’s walk through the straightforward process for measuring your space and calculating your exact material needs.
Key Takeaways
- Use the Correct Sand for the Base and Joints: A lasting paver patio relies on a two-sand approach. Use coarse, angular sand for the one-inch bedding layer to ensure stability and drainage, then use polymeric sand to fill the joints, locking pavers together and preventing weeds.
- Prioritize the Gravel Base, Not the Sand: The sand layer is only for fine-tuning and should be just one inch deep. The real strength of your patio comes from a properly compacted gravel base, so never use extra sand to fix an uneven foundation.
- Measure Twice, Order Once: Avoid project delays by carefully calculating your sand needs based on your patio’s square footage and a one-inch depth. It’s always best to add a 10% buffer to your final order to cover any inconsistencies or settling.
What Sand Should You Use for a Paver Patio?
Building a paver patio that looks great for years to come starts from the ground up. While it might seem like a minor detail, the type of sand you use is one of the most important decisions you’ll make. Using the wrong sand can lead to shifting pavers, weed growth, and drainage problems down the road. For a successful paver project, you actually need two different types of sand: one for the base layer that sits directly under the pavers, and another to fill the joints between them.
Each type serves a distinct purpose. The base sand creates a stable, level bed for the pavers to rest on, while the jointing sand locks them together to form a durable, unified surface. Getting both of these right is the secret to a professional-looking patio that can withstand Minnesota’s changing seasons. Let’s walk through exactly what you need for each step.
Choosing the Right Sand for Your Base Layer
The first layer of sand, often called the bedding layer, sits directly on top of your compacted gravel base. Its job is to provide a firm yet flexible cushion to set your pavers into. For this, you need a coarse, angular sand, sometimes referred to as concrete sand or C-33 sand. The sharp, irregular shape of the sand particles allows them to interlock and compact tightly, creating a stable surface that resists shifting. This type of sand also allows for excellent drainage, which is essential for preventing water from pooling and causing damage from freezing and thawing. Avoid using fine sand, like play sand, as its rounded particles don’t lock together and can easily wash away.
Locking Pavers in Place with Jointing Sand
Once your pavers are set, you need to fill the gaps between them. This is where jointing sand comes in. The best option for this job is polymeric sand. This is a special blend of fine sand and additives that harden when activated with water. As it cures, it forms a strong yet flexible bond that locks the pavers together, preventing them from moving. A major benefit of using polymeric sand is its ability to resist weed growth and ant infestations, which significantly cuts down on long-term maintenance. It creates a durable, finished look that keeps your patio stable and clean.
Our Sand Options for Your Project
Finding the right sand for your paver base is simple. We provide high-quality coarse sand that is perfect for creating a stable and long-lasting bedding layer for your patio or walkway. Our sand has the angular particles needed to ensure proper compaction and drainage, giving you a solid foundation to build on. When you’re ready to start your project, we can help you get the exact amount you need. You can explore our sand delivery options to get your materials brought directly to your job site, whether you’re a contractor or tackling a weekend project at home.
How to Calculate How Much Sand You Need
Figuring out exactly how much sand you need for your paver patio might seem complicated, but it’s really just a bit of simple math. Getting this number right is key to staying on budget and avoiding last-minute runs for more material. All you need is a tape measure and a calculator to get started. By following these three steps, you can confidently determine the right amount of sand for your project and have it ready for a smooth installation.
Step 1: Measure Your Patio Area
First things first, you need to know the size of your project space. Grab a tape measure and find the length and width of the area where you’ll be laying your pavers. For a simple square or rectangular patio, you just multiply the length by the width to get your total square footage. For example, if your patio is 10 feet long and 12 feet wide, your total area is 120 square feet (10 x 12 = 120). If your patio has an irregular shape, break it down into smaller, manageable rectangles, calculate the square footage for each one, and then add them all together.
Step 2: Determine Your Sand Depth
Next, you need to decide on the depth of your sand. For a paver patio, you’re primarily concerned with the bedding layer, which is the layer of sand the pavers sit on. The industry standard for this bedding layer is a consistent depth of 1 inch. This depth provides a firm, level base that allows for slight adjustments when setting the pavers. While you will also use sand to fill the joints between the pavers later, the 1-inch bedding layer is the main measurement you’ll need to calculate your bulk sand delivery. Sticking to this 1-inch depth is crucial for ensuring your patio remains stable and even for years to come.
Step 3: Convert to Cubic Yards (and Add a Buffer)
Now it’s time to put it all together. Since sand is sold by the cubic yard, you’ll need to convert your measurements. First, find the volume in cubic feet by multiplying your patio’s square footage by the sand depth in feet (1 inch is about 0.0833 feet). Using our 120-square-foot patio example: 120 sq ft x 0.0833 ft = 9.996 cubic feet. To convert this to cubic yards, divide by 27 (since there are 27 cubic feet in a cubic yard). So, 9.996 / 27 = 0.37 cubic yards. If math isn’t your thing, our handy Cubic Yardage Calculator can do the work for you. Finally, it’s always a good idea to order about 10% extra to account for any settling or small measurement errors.
Best Practices for Installing Paver Sand
Getting your sand installation right is the secret to a paver patio that looks great and lasts for years. It’s not just about pouring sand and laying pavers on top. The process requires careful preparation and attention to detail to prevent sinking, shifting, and uneven surfaces down the road. By following a few key best practices, you can create a stable, professional-looking patio that you’ll enjoy for a long time. Let’s walk through the essential steps for a flawless installation.
Prepare a Solid Base
The sand layer isn’t your patio’s foundation; it’s the final leveling course. The real strength comes from the compacted aggregate base underneath. Think of the sand as a thin cushion that smooths out minor dips and imperfections in your gravel base. If your main base isn’t level, adding more Class 5 gravel and re-compacting it is the right move. You should never use a thick layer of sand to fix an uneven base, as this will cause your pavers to shift and settle over time. A solid, well-prepared base is the most important step for a durable patio.
Get the Depth and Compaction Right
When it comes to the depth of your paver sand, less is more. The industry standard is a consistent one-inch layer. Your goal is to use just enough sand to create a smooth, level bed for the pavers to sit in. Using more than an inch of sand can create an unstable layer that allows pavers to move and sink, especially with foot traffic and changing weather. Once you’ve spread your paver sand, lightly tamp it down to create a firm, even surface before you start laying your pavers. This ensures everything stays put.
Level for a Perfect, Lasting Finish
To get that perfectly smooth, professional finish, you need to level, or “screed,” the sand. You can do this by laying down two parallel pipes or rails and pulling a straight 2×4 board across them to scrape off excess sand. This technique removes high spots and fills in low spots, creating a perfectly flat plane. Check your work with a level to ensure the surface is even and has the proper slope for drainage. Taking your time on this step is crucial. Careful planning and precise execution here will make all the difference in the final quality of your project. Our cubic yardage calculator can help you plan your material needs accurately.
Common Sand Installation Mistakes to Avoid
You’ve done the hard work of planning and calculating, and now it’s time to install. Getting the sand installation right is the key to a paver patio that looks great and lasts for years. A few common missteps can lead to a wobbly, uneven surface that needs repairs down the road. But don’t worry, they’re easy to avoid once you know what to look for. Let’s walk through the most frequent mistakes so you can tackle your project with confidence and get a professional-quality result that you’ll be proud of for a long, long time.
Using Too Much Sand in the Bedding Layer
When it comes to the sand bedding layer, more is definitely not better. It might seem like a thicker layer of sand would create a softer, more forgiving base, but it actually does the opposite. Too much sand creates instability, causing pavers to shift, sink, or become uneven over time. Aim for a consistent, screeded layer that is just one inch deep. Anything over two inches is asking for trouble. A thin, uniform layer provides the perfect surface for setting your pavers securely. Getting the right amount of paver sand delivered ensures you have what you need without encouraging overuse.
Skipping Proper Base Preparation
The success of your paver patio rests entirely on its foundation. A common shortcut is to lay sand directly over loose dirt, but this will almost certainly lead to settling and shifting. Your patio needs a solid, compacted base to support it. This usually involves excavating the area and laying several inches of a compactable aggregate, like Class 5 gravel. This material locks together tightly when compacted, creating a stable foundation that won’t move or sink under the weight of the pavers and foot traffic. Taking the time to build a proper base is the single most important step for ensuring your patio lasts a lifetime.
Forgetting About Drainage and Slope
Water is a patio’s worst enemy. If it doesn’t have a place to go, it will pool on the surface, seep into the joints, and erode the base material over time. This is why planning for drainage is so important. Your finished patio should have a gentle slope that directs water away from your home’s foundation and off the paver surface. A good rule of thumb is to create a drop of about one inch for every 8.5 feet of patio. This slight angle is barely noticeable to the eye, but it’s enough to keep water moving and prevent long-term damage, ensuring your beautiful patio stays that way.
Plan Your Sand Purchase and Delivery
With your measurements and calculations ready, it’s time to get your materials to the job site. Planning your purchase and delivery ensures you have what you need, right when you need it, so your project can move forward without a hitch. A little bit of coordination at this stage saves a lot of headaches later on. From confirming your final numbers to figuring out where to store the sand pile, here’s how to manage the logistics of your project.
Finalize Your Sand Calculation
Before you place an order, it’s always a good idea to double-check your math. A good rule of thumb for a standard 1-inch bedding layer is that you’ll need about one cubic yard of sand for every 300 square feet of patio. Once you have your total, add an extra 10% to 15% to your order. This buffer accounts for any spills, settling during compaction, or minor measurement errors. It’s much better to have a little extra than to run out mid-project. Our handy cubic yardage calculator can do the math for you and help you confirm your final number.
Schedule Your Delivery with Minnesota Aggregates
Once you know how much sand you need, you can schedule your delivery. Keep in mind that paver sand is heavy, weighing around 2,410 pounds, or 1.21 tons, per cubic yard. Knowing this helps you plan for its arrival and understand the logistics involved. At Minnesota Aggregates, we handle the heavy lifting for you. Our reliable sand delivery service brings high-quality materials directly to your home or job site across Minnesota, ensuring your project stays on schedule. Just let us know how much you need and where you want it, and we’ll take care of the rest.
How to Store Your Sand On-Site
When your sand arrives, you’ll need a designated spot to keep it. It’s best to have it dropped on a tarp or a strong, durable fabric to keep it contained and clean. This also makes cleanup much easier once the project is done. Storing it properly prevents waste and protects it from the elements, like heavy rain that could wash it away. Don’t worry if you have a little sand left over after setting the pavers. That extra material is perfect for filling the joints between the pavers, which is the final step in locking them securely in place.
Related Articles
- What Type of Sand for Paver Base? A Pro Guide – Minnesota Aggregates
- How to Use Paver Sand to Stop Weeds: A Pro Guide – Minnesota Aggregates
Frequently Asked Questions
Can I use the same type of sand for both the base and the joints? It’s best to use two different types of sand for your paver project. The base layer needs a coarse, angular sand that compacts well to create a stable bed for the pavers. For the joints, you’ll want a specialized product like polymeric sand, which hardens to lock the pavers together and prevent weeds. Using the right material for each job ensures your patio will be stable and low-maintenance for years.
Why can’t I just use regular play sand for the paver base? Play sand is made of fine, rounded particles that don’t interlock or compact properly. When used as a paver base, it can easily shift or wash away, leading to wobbly, uneven pavers. You need a coarse, angular sand, often called concrete sand, because its sharp edges lock together to form a firm, stable base that also allows for proper water drainage.
Do I really need a gravel base underneath the sand layer? Yes, a compacted gravel base is the most critical part of your patio’s foundation. The sand layer is only meant to be a thin, one-inch cushion for leveling the pavers. The gravel base provides the actual strength and support for the entire patio, preventing it from sinking or shifting over time. Skipping this step will almost always lead to problems down the road.
What happens if I make the sand base thicker than one inch? While it might seem like more sand would create a stronger base, it actually creates instability. A sand layer thicker than one or two inches will not compact properly, which allows the pavers to move, shift, and settle unevenly under foot traffic. Sticking to a consistent one-inch depth is the professional standard for a durable, long-lasting patio.
How far in advance should I schedule my sand delivery? It’s a good idea to schedule your delivery a few days before you plan to start the installation. This gives you a buffer in case of any project delays and ensures the material is on-site and ready when you are. Having the sand delivered to a designated spot on a tarp will keep your work area clean and prevent the material from mixing with your lawn or soil.